Connect with us

Exercise

Workout Handles: How to Lose Arm Fat

Published

on

workout handles
Spread the love

Here is your complete guide to workout handles

Introduction to Workout Handles

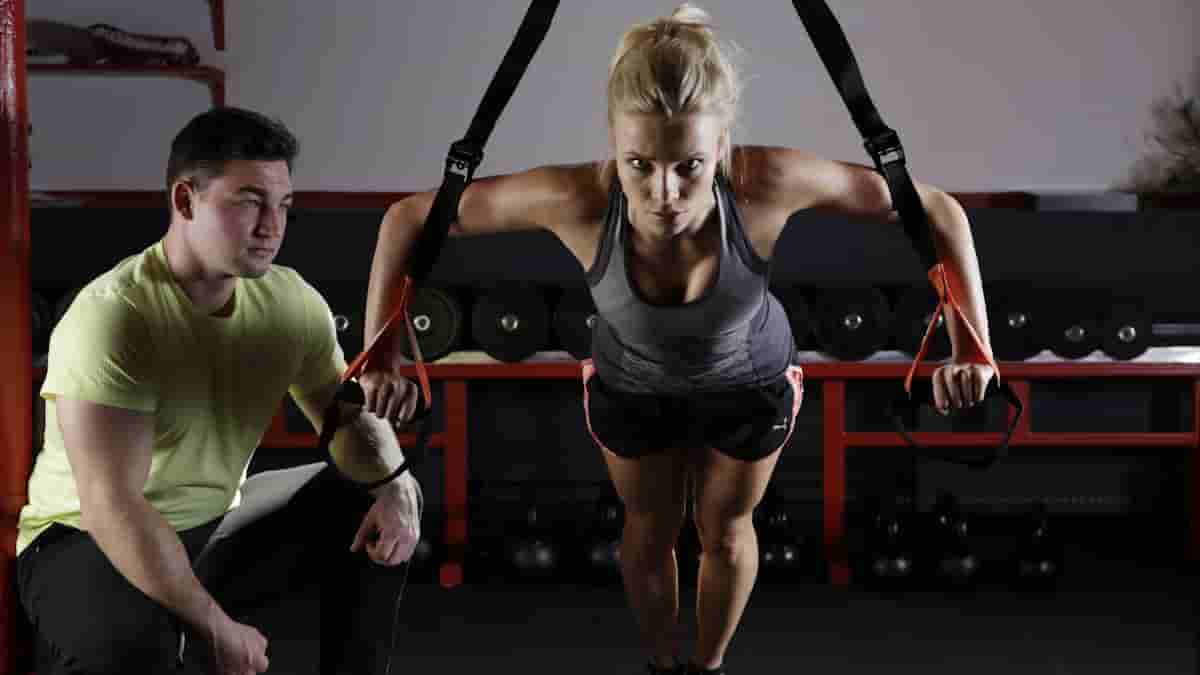
Workout handles are an essential piece of equipment for any fitness enthusiast looking to take their workouts to the next level. Whether you’re a seasoned gym-goer or just starting your fitness journey, choosing the right workout handles can make a significant difference in your results. In this comprehensive guide, we’ll explore the different types of workout handles available, their benefits, and how to select the perfect ones for your fitness goals. We’ll also provide tips on how to incorporate workout handles into your routine for maximum effectiveness. By the end of this article, you’ll have all the information you need to make an informed decision and take your workouts to new heights.

Types of Workout Handles

Workout handles come in various shapes and sizes, each designed to target specific muscle groups and provide a unique workout experience. Here are the most common types of workout handles:

  1. Straight Handles
    • Ideal for exercises that require a neutral grip, such as bicep curls and tricep extensions.
    • Provide a stable and comfortable grip.
  1. Angled Handles
    • Designed to reduce stress on the wrists and elbows during exercises.
    • Encourage a more natural hand position, promoting better form and reducing the risk of injury.
  2. Rotating Handles
    • Allow for a smooth, natural movement during exercises.
    • Ideal for exercises that require a rotating motion, such as chest flyes and shoulder presses.
  1. Tricep Rope Handles
    • Specifically designed for tricep exercises, such as tricep pushdowns and extensions.
    • Provide a secure grip and allow for a full range of motion.
  2. Ankle Strap Handles
    • Used for exercises that target the lower body, such as leg raises and calf raises.
    • Attach to your ankles to provide resistance and stability during these movements.

Workout Handles Types

TypeDescriptionBest For
Straight HandlesProvide a neutral gripBicep curls, tricep extensions
Angled HandlesReduce stress on wrists and elbowsExercises requiring a natural hand position
Rotating HandlesAllow for smooth, natural movementChest flyes, shoulder presses
Tricep Rope HandlesSpecifically designed for tricep exercisesTricep pushdowns, tricep extensions
Ankle Strap HandlesUsed for lower body exercisesLeg raises, calf raises

Benefits of Using Workout Handles

Incorporating workout handles into your routine can provide numerous benefits, including:

  1. Improved Grip Strength
    • Using handles can help strengthen your grip, which is essential for many exercises and daily activities.
  2. Targeted Muscle Engagement
    • Workout handles allow you to target specific muscle groups more effectively, leading to better results and a more balanced physique.
  1. Increased Range of Motion
    • Some handles, such as rotating handles, can increase your range of motion during exercises, allowing for a fuller contraction and better muscle activation.
  2. Reduced Risk of Injury
    • Proper form is crucial for avoiding injury during workouts. Workout handles can help you maintain proper form and reduce stress on your joints.
  1. Enhanced Workout Versatility
    • Workout handles can be used with various types of equipment, such as resistance bands, cables, and free weights, making them a versatile addition to your workout arsenal.

Workout Handles Benefits

BenefitDescription
Improved Grip StrengthStrengthens grip for exercises and daily activities
Targeted Muscle EngagementAllows for more effective targeting of specific muscle groups
Increased Range of MotionSome handles increase range of motion for fuller contractions
Reduced Risk of InjuryHelps maintain proper form and reduces stress on joints
Enhanced Workout VersatilityCan be used with various types of equipment

Factors to Consider When Choosing Workout Handles

When selecting workout handles, it’s important to consider several factors to ensure you choose the best ones for your needs. These factors include:

  1. Material
    • Workout handles are typically made from materials such as metal, plastic, or rubber.
    • Consider the durability, weight, and grip of each material to determine which best suits your preferences.
  1. Grip Size
    • The grip size of handles can vary, and it’s important to choose one that fits your hand comfortably.
    • A grip that is too small or too large can lead to discomfort and reduced grip strength.
  2. Adjustability
    • Some handles are adjustable, allowing you to customize the grip width or length to suit your needs.
    • Adjustable handles can be particularly useful if multiple people will be using the same equipment.

  1. Durability
    • Workout handles should be durable enough to withstand regular use without breaking or wearing down.
    • Look for handles made from high-quality materials and designed to last.
  2. Compatibility with Your Equipment
    • Ensure that the handles you choose are compatible with the equipment you’ll be using, such as resistance bands, cables, or weight machines.
    • Some handles may have specific attachments or connectors that may not be compatible with all equipment.

Factors to Consider When Choosing Workout Handles

FactorDescription
MaterialMetal, plastic, or rubber; consider durability, weight, and grip
Grip SizeChoose a size that fits your hand comfortably
AdjustabilitySome handles are adjustable for customized grip width or length
DurabilityHandles should be durable enough to withstand regular use
CompatibilityEnsure handles are compatible with your equipment

How to Incorporate Workout Handles into Your Routine

Workout handles can be incorporated into a variety of exercises targeting different muscle groups. Here are some examples:

  1. Exercises for Upper Body
    • Bicep Curls
    • Tricep Extensions
    • Shoulder Raises
  1. Exercises for Lower Body
    • Squats
    • Lunges
    • Calf Raises
  2. Core Exercises
    • Planks
    • Russian Twists
    • Leg Raises

When incorporating workout handles into your routine, start with lighter weights and focus on proper form. Gradually increase the weight or resistance as you become more comfortable with the exercises. Remember to listen to your body and take breaks when needed to avoid overtraining or injury.

Maintenance and Care

To ensure your handles last as long as possible, it’s important to properly maintain and care for them. Here are some tips:

  1. Cleaning
    • Clean your handles after each use to remove sweat, dirt, and grime.
    • Use a mild soap and water solution or a disinfectant wipe to clean the handles.
  1. Storage
    • Store your handles in a cool, dry place when not in use.
    • Avoid storing them in direct sunlight or in humid environments, as this can cause damage to the materials.
  2. Replacement
  1. Replace your handles if they show signs of wear or damage, such as cracks, splits, or excessive wear on the grip.
  2. Damaged handles can be unsafe to use and may not provide the same level of support and stability as new ones.

Workout Handles vs. Other Equipment

Workout Handles vs. Dumbbells

FeatureWorkout HandlesDumbbells
Grip OptionsStraight, angled, rotatingFixed grip
AdjustabilitySome models are adjustableRequire different weights
VersatilityCan be used with cables, resistance bandsLimited to dumbbell-specific exercises
Grip StrengthHelps improve grip strengthDoesn’t specifically target grip strength

Handles vs. Resistance Bands

FeatureWorkout HandlesResistance Bands
Resistance TypeProvides resistance through weightProvides resistance through elastic tension
Grip OptionsStraight, angled, rotatingLimited grip options
VersatilityCan be used with cables, weight stacksCan be used with workout handles
PortabilityLess portable than resistance bandsMore portable than weight-based equipment

Handles vs. Cable Machines

FeatureWorkout HandlesCable Machines
Resistance SourceBodyweight, free weightsWeight stacks
AdjustabilitySome models are adjustableAdjustable cable height and resistance
VersatilityCan be used with cables, resistance bandsSpecific to cable machine exercises
Space RequirementsLess space required than cable machinesRequire dedicated space for the machine

Best Exercises and Reps with Handles

Upper Body Exercises

ExerciseSetsReps
Bicep Curls3-410-12
Tricep Extensions3-410-12
Shoulder Raises3-412-15
Chest Flyes3-410-12
Seated Rows3-410-12

Lower Body Exercises

ExerciseSetsReps
Squats3-412-15
Lunges3-410-12 each leg
Calf Raises3-415-20
Glute Bridges3-412-15

Core Exercises

ExerciseSetsReps
Planks2-330-60 seconds
Russian Twists3-412-15 each side
Leg Raises3-410-12
Ab Wheel Rollouts3-48-10

Remember to start with a weight or resistance that allows you to maintain proper form throughout the set and gradually increase as you get stronger. Always prioritize quality over quantity when performing these exercises with handles.

Read Also: 20 Minute AMRAP CrossFit.

FAQs

What are the best workout handles for beginners?

  • For beginners, we recommend starting with straight or angled handles, as they provide a stable and comfortable grip.
  • Rotating handles may be more challenging for those new to using handles.

Read Also: CrossFit 911 Workout.

Can workout handles be used for cardio exercises?

While workout handles are primarily designed for strength training exercises, they can also be used for some cardio exercises, such as jumping jacks or mountain climbers. However, it’s important to ensure that the handles are securely attached and that you maintain proper form to avoid injury.

Read Also: High Calorie Fruit Smoothies.

How do I know if my workout handles are the right size?

The right size of handles will depend on the size of your hands and personal preference. As a general rule, the handles should fit comfortably in your hands without feeling too loose or too tight. If you’re unsure, it’s best to try out different sizes or consult with a fitness professional for guidance.

Read Also: How Many Calories Does Pilates.

Can workout handles be used with resistance bands?

Yes, handles can be used with resistance bands to add extra resistance and challenge to your exercises. Look for handles that are specifically designed for use with resistance bands or that have attachments that are compatible with resistance band clips.

Read Also: Abs and Glute Machine.

How often should I replace my workout handles?

The frequency with which you need to replace your handles will depend on how often you use them and the intensity of your workouts. As a general rule, it’s a good idea to inspect your handles regularly for signs of wear or damage and replace them as needed. If you notice cracks, splits, or excessive wear on the grip, it’s time to replace your handles.

Read Also: The Surprising Health Benefit of Celery Tea.

Conclusion

In conclusion, workout handles are a versatile and effective tool for enhancing your fitness routine. By understanding the different types of handles available and the factors to consider when choosing them, you can select the perfect ones for your needs and goals. Remember to incorporate workout handles into your routine gradually and focus on proper form to avoid injury. With regular use and maintenance, your handles will help you achieve your fitness goals and take your workouts to new heights. So, what are you waiting for? Start exploring the world of handles and take your fitness journey to the next level!

Read Also: 6 Week Glute Program Free.

Continue Reading
Click to comment

Leave a Reply

Your email address will not be published. Required fields are marked *

Exercise

Row and Kettlebell Workout for Full-Body Strength

Published

on

row and kettlebell workout
Spread the love

Here is your complete guide to row and kettlebell workout

Introduction to Row and Kettlebell Workout

Unlock the power of a combined row and kettlebell workout to transform your fitness journey. This dynamic duo of exercises not only sculpts a lean, strong physique but also boosts cardiovascular endurance and overall well-being. Whether you’re a seasoned fitness enthusiast or just starting your workout routine, this comprehensive guide will equip you with the knowledge and strategies to seamlessly integrate row and kettlebell exercises into your regimen for unparalleled results.

In this article, we’ll delve into the science behind the synergistic benefits of row and kettlebell workout, explore a variety of impactful exercises, and provide a step-by-step blueprint to craft a personalized training plan that caters to your unique fitness goals. Prepare to unlock your full potential and embark on a transformative journey towards a healthier, more resilient you.

The Science Behind Row and Kettlebell Workout

Rowing and kettlebell exercises are renowned for their ability to deliver a full-body workout that targets multiple muscle groups simultaneously. By combining these two powerful modalities, you can amplify the benefits and achieve unparalleled results in strength, endurance, and overall fitness.

Rowing engages the major muscle groups of the legs, core, and back, while also providing a low-impact, joint-friendly workout. Kettlebell exercises, on the other hand, are renowned for their ability to build explosive power, improve grip strength, and enhance cardiovascular fitness.

When you integrate these two complementary exercises, you create a synergistic effect that challenges your body in new ways, leading to accelerated muscle development, increased calorie burn, and enhanced overall conditioning. This dynamic combination not only sculpts a lean, powerful physique but also improves your functional movement patterns, reducing the risk of injury and promoting long-term well-being.

Foundational Row and Kettlebell Exercises

To maximize the benefits of your row and kettlebell workout, it’s essential to master the proper execution of key exercises. In this section, we’ll explore a variety of impactful movements that target different muscle groups and challenge your body in unique ways.

Rowing Exercises

  • Seated Row: Engage your back, biceps, and core as you pull the handle towards your chest, maintaining proper posture and form.
  • Bent-Over Row: Hinge at the hips to target your lats, traps, and rear delts with this classic rowing variation.
  • Single-Arm Row: Unilateral rowing exercises help to identify and address muscular imbalances while also engaging your core.

Kettlebell Exercises

  • Kettlebell Swing: Harness the power of your hips and generate explosive hip extension to propel the kettlebell, targeting your posterior chain and cardiovascular system.
  • Kettlebell Goblet Squat: Combine a deep squat with a kettlebell hold to engage your legs, core, and upper body.
  • Kettlebell Turkish Get-Up: This full-body movement challenges your stability, coordination, and strength, making it a valuable addition to your workout routine.

Integrated Row and Kettlebell Exercises

  • Renegade Row: Perform a row with one arm while maintaining a plank position with the opposite hand holding a kettlebell.
  • Alternating Reverse Lunge with Kettlebell: Step back with one leg while holding a kettlebell in the opposite hand, engaging your lower body and core.
  • Kettlebell Swing to Row: Seamlessly transition from a powerful kettlebell swing into a controlled rowing motion, targeting your posterior chain and upper back.

Benefits of Combining Row and Kettlebell Exercises

BenefitDescription
Full-Body WorkoutRow and kettlebell exercises engage multiple muscle groups simultaneously, leading to a comprehensive full-body workout.
Increased StrengthThe resistance provided by rowing machines and kettlebells helps build muscular strength in the upper body, lower body, and core.
Improved Cardiovascular FitnessHigh-intensity kettlebell exercises, such as swings, can elevate your heart rate and improve cardiovascular endurance.
Enhanced Functional FitnessThe compound movements involved in row and kettlebell workouts mimic everyday activities, improving overall functional fitness.
Reduced Risk of InjuryProper form and technique in these exercises help strengthen stabilizing muscles and reduce the risk of injury.

Crafting Your Personalized Row and Kettlebell Workout

Now that you’ve explored the foundational exercises, it’s time to create a personalized row and kettlebell workout plan that aligns with your fitness goals and preferences. By incorporating a variety of these exercises into a structured routine, you can maximize the benefits and see transformative results.

Goal-Setting and Workout Structure

Begin by defining your specific fitness objectives, whether it’s building strength, improving cardiovascular endurance, or achieving a lean, toned physique. This will guide the selection of exercises, intensity levels, and overall workout structure.

Consider incorporating a mix of strength-focused sessions, high-intensity interval training (HIIT), and endurance-based workouts to target different aspects of your fitness. Aim for 2-3 row and kettlebell sessions per week, allowing for adequate rest and recovery between sessions.

Workout Progression and Tracking

Consistently monitor your progress by tracking metrics such as distance covered, stroke rate, pace, weight lifted, and number of repetitions. This data-driven approach will help you identify areas for improvement, adjust your training plan accordingly, and stay motivated throughout your fitness journey.As you progress, gradually increase the intensity, challenge yourself with more advanced exercises, and periodically adjust your workout routine to prevent plateaus and continually push your boundaries.

Sample Row and Kettlebell Workout

To get you started, here’s a sample row and kettlebell workout that you can incorporate into your fitness regimen:

ExerciseSetsReps
Seated Row312-15
Kettlebell Swing420
Renegade Row28-10 per arm
Kettlebell Goblet Squat312-15
Alternating Reverse Lunge with Kettlebell210-12 per leg
Kettlebell Turkish Get-Up25-6 per side

Remember to start with a warm-up, focus on proper form, and gradually increase the intensity and challenge as you become more comfortable with the exercises.

Progression Strategies for Row and Kettlebell Workouts

StrategyDescription
Increase WeightGradually increase the weight of the kettlebell or resistance on the rowing machine to challenge your muscles further.
Add Reps or SetsIncrease the number of repetitions or sets performed for each exercise to progressively overload your muscles.
Incorporate More Challenging ExercisesAdvance to more complex exercises, such as single-leg variations or advanced rowing techniques, to continually challenge your body.
Vary Workout StructureAlternate between strength-focused workouts, HIIT, and endurance-based sessions to target different aspects of fitness.
Periodize Your TrainingImplement periodization strategies, such as cycles of higher and lower volume and intensity, to avoid plateaus and promote continued progress.

Nutrition and Recovery

To support your row and kettlebell workout and achieve optimal results, it’s essential to prioritize proper nutrition and recovery strategies.

Nutrition for Muscle Growth and Recovery

  • Consume a balanced diet rich in lean proteins, complex carbohydrates, and healthy fats to support muscle growth and repair.
  • Ensure adequate protein intake, aiming for 1.6-2.2 grams of protein per kilogram of body weight, depending on your activity level and goals.
  • Stay hydrated by drinking plenty of water throughout the day and during your workouts.

Nutrition Recommendations for Optimal Recovery

NutrientRecommended Daily IntakeFood Sources
Protein1.6-2.2 g/kg of body weightLean meats, poultry, fish, eggs, dairy, legumes, protein supplements
Carbohydrates3-5 g/kg of body weightWhole grains, fruits, vegetables, potatoes, rice, pasta
Healthy Fats20-35% of total daily caloriesNuts, seeds, avocado, olive oil, fatty fish

Recovery and Rest

  • Allow for adequate rest and recovery between workouts, aiming for at least 1-2 rest days per week.
  • Engage in active recovery activities such as light cardio, stretching, or yoga to promote blood flow and facilitate muscle recovery.
  • Consider incorporating foam rolling or massage therapy to alleviate muscle soreness and improve mobility.

Recovery Strategies for Muscle Repair and Growth

  • Prioritize sleep, aiming for 7-9 hours per night to allow your body to rest and recover.
  • Stay hydrated by drinking plenty of water throughout the day and during your workouts.
  • Engage in active recovery activities, such as light cardio or yoga, to promote blood flow and facilitate muscle recovery.
  • Consider incorporating foam rolling or massage therapy to alleviate muscle soreness and improve mobility.
  • Allow for adequate rest and recovery between workouts, aiming for at least 1-2 rest days per week.

Read Also: Belt Squat.

FAQs

How often should I incorporate row and kettlebell workouts into my fitness routine?

For optimal results, aim to include 2-3 row and kettlebell sessions per week, allowing for adequate rest and recovery between sessions.

Read Also: Best Exercises for Arm Pump.

Can I use the same kettlebell for all exercises?

While you can use the same kettlebell for various exercises, it’s recommended to have a range of kettlebell weights available to accommodate different exercises and fitness levels. This will allow you to challenge yourself appropriately and see optimal results.

Read Also: 12 Week Deadlift Program.

Can I combine row and kettlebell exercises in the same workout?

Absolutely! Integrating row and kettlebell exercises within the same workout can be highly effective, as it allows you to target multiple muscle groups and energy systems simultaneously, leading to greater overall fitness gains.

Read Also: Squat Deadlift Same Day.

How can I progress my row and kettlebell workouts over time?

To progress your row and kettlebell workouts, gradually increase the intensity, challenge yourself with more advanced exercises, and periodically adjust your workout routine to prevent plateaus and continually push your boundaries. Regularly tracking your progress will help you identify areas for improvement and guide your workout adjustments.

Read Also: The Surprising Health Benefit of Celery Tea.

Conclusion

Unlock the transformative power of a row and kettlebell workout and embark on a journey towards unparalleled fitness gains. By mastering the foundational exercises, crafting a personalized training plan, and consistently tracking your progress, you’ll witness remarkable improvements in strength, endurance, and overall well-being. Embrace the synergy of row and kettlebell exercises and unlock your full potential today.

Read Also: Front Squat Workout Program.

Continue Reading

Exercise

Front Squat Workout Program: Weekly Plan

Published

on

front squat workout program
Spread the love

Here is your complete guide to front squat workout program

Introduction to Front Squat Workout Program

The front squat is a fundamental exercise that should be a staple in any well-rounded strength training program. Not only does it target the quadriceps, glutes, and core, but it also carries over to improve performance in other compound lifts like the clean and jerk. Whether you’re an Olympic weightlifter, powerlifter, or just looking to build lower body strength, a dedicated front squat workout program can be incredibly beneficial.

In this comprehensive guide, we’ll dive deep into the ins and outs of designing an effective front squat workout program. We’ll cover proper form, programming considerations, variations, and more to help you maximize your front squat strength and development. By the end, you’ll have all the tools necessary to create a customized front squat program that fits your specific goals and needs. Let’s get started!

What is the Front Squat?

The front squat is a variation of the traditional back squat where the barbell is held in the front rack position across the front of the shoulders, rather than resting on the upper back. This subtle change in bar position shifts the load and emphasis to the quadriceps, core, and upper back musculature.

Proper front squat form requires significant mobility in the wrists, shoulders, and thoracic spine to maintain an upright torso position throughout the lift. The front rack position also challenges grip strength as the lifter must keep the elbows high and the bar secured against the front of the body.

Compared to the back squat, the front squat generally allows for less weight to be lifted due to the increased demand on the upper body. However, this exercise can be an invaluable tool for building lower body strength, improving squat mechanics, and enhancing athletic performance.

Benefits of the Front Squat

The front squat offers a multitude of benefits that make it a must-have exercise in any well-rounded strength training program. Some of the key advantages include:

  1. Increased Quadriceps Development: The front squat places a greater emphasis on the quadriceps muscles compared to the back squat, leading to more targeted hypertrophy and strength gains in this key lower body muscle group.
  1. Improved Posture and Trunk Stability: Maintaining an upright torso position during the front squat requires significant core and upper back engagement, which can carry over to better posture and trunk stability in other exercises and daily activities.
  2. Enhanced Olympic Lifting Performance: The front squat is a fundamental movement in Olympic weightlifting, as it directly translates to improved clean and jerk technique and execution.
  1. Reduced Spinal Loading: By shifting the load to the front of the body, the front squat places less compressive force on the spine compared to the back squat, making it a safer option for those with back issues or mobility limitations.
  2. Carryover to Other Compound Lifts: Improving front squat strength can lead to gains in other lower body exercises like the deadlift, back squat, and leg press.

Front Squat Muscles Worked

The front squat primarily targets the following muscle groups:

  • Quadriceps (rectus femoris, vastus lateralis, vastus medialis, vastus intermedius)
  • Gluteus maximus
  • Core (transverse abdominis, rectus abdominis, obliques)
  • Erector spinae
  • Trapezius
  • Anterior deltoids

The front rack position also requires significant engagement from the wrist flexors, elbow flexors, and shoulder stabilizers to maintain proper bar positioning throughout the lift.

Compared to the back squat, the front squat places a greater emphasis on the quadriceps, as the lifter must maintain an upright torso position and shift the load to the front of the body. This makes the front squat an excellent exercise for building quad strength and size.

Proper Front Squat Technique

Executing the front squat with proper form is crucial to maximizing the benefits of the exercise and avoiding injury. Here are the key steps to performing the front squat correctly:

  1. Grip and Rack Position: Grip the barbell with your hands slightly wider than shoulder-width apart, with your palms facing up. Lift the elbows high to create a “shelf” for the bar to rest on the front of the shoulders.
  2. Stance and Foot Positioning: Stand with your feet hip-width apart, toes slightly turned out. Keep your weight evenly distributed through the middle of your feet.
  1. Initiate the Descent: Maintain an upright torso position and send your hips back while bending at the knees to lower into the squat. Keep your elbows high and the bar secured against your body.
  2. Depth and Knee Tracking: Descend until your thighs are at least parallel to the ground, or as deep as your mobility allows. Ensure your knees track in line with your toes throughout the movement.
  3. Drive Through the Heels: Engage your quadriceps and glutes to drive through your heels and return to the starting position.
  1. Lockout: Finish the rep by fully extending your hips and knees, keeping your chest up and core braced.

Common technique errors to avoid include:

  • Losing the front rack position and allowing the elbows to drop
  • Excessive forward lean of the torso
  • Knees caving inward or outward
  • Rounding of the lower back

Mastering front squat technique takes time and practice, but the benefits are well worth the effort.

Front Squat Programming Considerations

When designing a front squat workout program, there are several key factors to consider:

Rep Ranges and Intensity:

Rep RangeIntensity (% 1RM)Training Focus
3-5 reps80-90%Maximal Strength
6-12 reps70-80%Hypertrophy and Muscle Growth
1-3 reps90-95%Power and Explosiveness

Frequency and Volume:

  • Beginners may benefit from front squatting 2-3 times per week, with 12-20 total reps per session.
  • Intermediate to advanced lifters can front squat 3-4 times per week, with 15-30 total reps per session.
  • Allow for adequate recovery between front squat sessions, especially when training at high intensities.

Variation and Accessory Exercises:

  • Incorporate front squat variations like pause front squats, front squats with chains, and front squats with a safety squat bar.
  • Pair front squats with complementary exercises like back squats, deadlifts, and overhead presses.
  • Include accessory movements to target weak points, such as core work, upper back strengthening, and grip training.

Periodization and Progression:

  • Utilize a periodized approach, cycling between phases of higher volume and lower intensity, and vice versa.
  • Gradually increase the load, reps, or volume over time to drive continued progress.
  • Monitor fatigue levels and adjust the program as needed to avoid overtraining.

By considering these key programming factors, you can create a front squat workout program that is tailored to your specific goals and training experience.

Front Squat Variations

To add variety to your front squat training and target different muscle groups, consider incorporating these front squat variations:

  1. Pause Front Squat: Perform the front squat with a 2-3 second pause at the bottom of the movement to improve strength and control.
  2. Front Squat with Chains: Attach chains to the barbell to increase resistance at the top of the lift and challenge your strength through the entire range of motion.
  1. Front Squat with Safety Squat Bar: Using a safety squat bar shifts the load to the front of the body and can help lifters with shoulder mobility limitations.
  2. Tempo Front Squat: Slow down the eccentric (lowering) phase of the lift to 4-6 seconds, focusing on control and tension throughout the movement.
  3. Front Rack Carry: Hold a heavy front rack position and walk for distance or time to build grip strength and core stability.
  1. Zercher Front Squat: Cradle the barbell in the crook of your elbows, which places more emphasis on the core and upper back.
  2. Single-Leg Front Squat: Perform the front squat on a single leg to improve balance, stability, and unilateral strength.
  3. Front Squat with Overhead Reach: As you descend into the front squat, reach your arms overhead to further challenge your thoracic mobility and core engagement.
  1. Goblet Front Squat: Hold a dumbbell or kettlebell in the front rack position to reduce the load on the upper body and focus on lower body strength.
  2. Front Squat with Bands or Chains: Attach bands or chains to the barbell to accommodate strength curves and provide variable resistance throughout the lift.

Incorporating these front squat variations can help you address weaknesses, improve technique, and add some much-needed variety to your training program.

Sample Front Squat Workout Programs

To give you a better idea of how to structure an effective front squat workout program, here are two sample templates you can use as a starting point:

Beginner Front Squat Program (3 days per week):

Day 1Day 2Day 3
– Front Squat: 3 sets of 5 reps
– Goblet Squat: 3 sets of 8-10 reps
– Leg Press: 3 sets of 10-12 reps
– Calf Raises: 3 sets of 12-15 reps
– Pause Front Squat: 3 sets of 3 reps
– Romanian Deadlift: 3 sets of 8 reps
– Leg Extensions: 3 sets of 12-15 reps
– Glute Bridges: 3 sets of 10-12 reps
– Front Squat: 4 sets of 3 reps
– Split Squats: 3 sets of 8-10 reps per leg
– Hamstring Curls: 3 sets of 10-12 reps
– Plank: 3 sets of 30-60 seconds

Intermediate Front Squat Program (4 days per week):

Day 1Day 2Day 3Day 4
– Front Squat: 5 sets of 3 reps
– Paused Front Squat: 3 sets of 2 reps
– Deadlift: 3 sets of 5 reps
– Hanging Leg Raises: 3 sets of 10-12 reps
– Back Squat: 4 sets of 5 reps
– Front Rack Carry: 2 sets of 30-60 seconds
– Leg Extensions: 3 sets of 12-15 reps
– Seated Calf Raises: 3 sets of 12-15 reps
– Front Squat with Chains: 4 sets of 3 reps
– Zercher Squat: 3 sets of 6-8 reps
– Romanian Deadlift: 3 sets of 8 reps
– Pallof Press: 3 sets of 10-12 reps per side
– Power Clean + Front Squat: 5 sets of 2+2 reps
– Single-Leg Front Squat: 3 sets of 6-8 reps per leg
– Pull-ups: 3 sets to failure
– Ab Wheel Rollouts: 3 sets of 8-10 reps

Remember, these are just sample programs to give you an idea of how to structure your front squat training. You’ll want to adjust the volume, intensity, and exercise selection based on your individual goals, training experience, and recovery capacity.

FAQs

How much should I be able to front squat?

The amount you should be able to front squat depends on several factors, including your sex, bodyweight, and training experience. According to data collected from over 623,000 lifts, a beginner male weighing 180 pounds should be able to front squat around 130 pounds, while an advanced lifter of the same weight could front squat around 363 pounds.

How often should I train the front squat?

Beginner lifters may benefit from front squatting 2-3 times per week, with 12-20 total reps per session. Intermediate to advanced lifters can front squat 3-4 times per week, with 15-30 total reps per session. Allow for adequate recovery between front squat sessions, especially when training at high intensities.

What are the best front squat variations to include in my program?

Some of the best front squat variations to consider include pause front squatsfront squats with chains or bands, Zercher front squats, and single-leg front squats. These variations can help address weaknesses, improve technique, and add variety to your training.

Read Also: Hack Squat Alternative.

How can I improve my front rack position?

To improve your front rack position, focus on mobility work for your wrists, shoulders, and thoracic spine. Exercises like wrist and shoulder circles, overhead reaches, and thoracic spine extensions can all help enhance the flexibility and stability required for a solid front rack.

Read Also: Belt Squat.

Should I use a squat rack or safety pins for front squats?

Both options have their advantages. Using a squat rack allows you to safely rerack the bar if you fail a rep, while safety pins can provide an added layer of security and allow you to focus on technique without worrying about bailing out of the lift. Ultimately, it comes down to personal preference and the equipment available in your gym.

Read Also: Best Exercises for Arm Pump.

Conclusion

The front squat is a fundamental exercise that should be a staple in any well-designed strength training program. By incorporating a dedicated front squat workout program, you can target the quadriceps, improve overall lower body strength, and enhance performance in other compound lifts.

Read Also: 12 Week Deadlift Program.

When designing your front squat program, be sure to consider factors like rep ranges, intensity, frequency, variation, and progression to ensure continued progress and adaptation. Don’t be afraid to experiment with different front squat variations to address weaknesses and keep your training fresh and challenging.

Read Also: The Surprising Health Benefit of Celery Tea.

Remember, mastering the front squat takes time and consistent practice. Stay patient, focus on proper technique, and trust the process. With a well-structured front squat program, you’ll be on your way to building a stronger, more powerful lower body in no time.

Read Also: Squat Deadlift Same Day.

Continue Reading

Exercise

Squat Deadlift Same Day: Maximize Muscle Gains

Published

on

squat deadlift same day
Spread the love

Here is your complete guide to squat deadlift same day

Introduction to Squat Deadlift Same Day

Incorporating a squat deadlift same day workout into your training regimen can be a game-changer for building strength, muscle, and overall fitness. By targeting multiple major muscle groups in a single session, you can maximize your time and effort, leading to faster progress towards your goals. In this comprehensive guide, we’ll explore the benefits, considerations, and step-by-step instructions for executing a successful squat deadlift same day routine.

The Benefits of Squat Deadlift Same Day Workouts

Performing a squat and deadlift in the same workout session offers several key advantages:

  1. Increased Muscle Activation and Growth: By working multiple large muscle groups, such as the quadricepshamstringsglutes, and back, in a single session, you can elicit greater overall muscle activation and stimulate more growth.
  1. Improved Technique and Coordination: The squat and deadlift complement each other, requiring similar movement patterns. Practicing them together can help improve your lifting technique and coordination, leading to better performance in both exercises.
  2. Time-Saving Efficiency: Combining the squat and deadlift into one workout session can save you time, allowing you to target multiple essential compound exercises in a single training session.

Considerations for Squat Deadlift Same Day Workouts

Before diving into a squat deadlift same day routine, it’s important to consider several factors to ensure a safe and effective workout:

  1. Proper Form and Technique: Maintaining proper form and technique is crucial for both the squat and deadlift to avoid injury and maximize the benefits of the exercises.
  2. Rest and Recovery: Allowing for adequate rest and recovery between sets and exercises is essential, as the combination of these two demanding movements can be taxing on the body.
  1. Exercise Order: The order in which you perform the squat and deadlift can impact your performance and recovery. Many experts recommend starting with the squat, as it is generally the more technically demanding exercise and can be more affected by fatigue from the deadlift.

Step-by-Step Guide to Squat Deadlift Same Day Workouts

Warm-up and Mobility

Begin your squat deadlift same day workout with a thorough warm-up and mobility routine. This will help prepare your body for the demanding movements ahead and reduce the risk of injury. Start with light cardio, such as jumping jacks or high knees, followed by dynamic stretches targeting the major muscle groups involved in the squat and deadlift.

Squat

Once you’ve completed your warm-up, move on to the squat portion of your workout. Start with a lighter weight and gradually increase the load over the course of your sets. Focus on maintaining proper form, with your feet shoulder-width apart, chest up, and core braced. Descend until your thighs are parallel to the ground, then drive through your heels to return to the starting position.

Deadlift

After completing the squat portion, transition to the deadlift. Again, start with a lighter weight and gradually increase the load. Maintain a neutral spine, with your shoulders back and chest up. Grip the bar with your hands slightly wider than shoulder-width, and lift the weight by driving through your heels and straightening your hips and knees.

Accessory Exercises

To further target and strengthen the muscles involved in the squat and deadlift, consider incorporating accessory exercises into your squat deadlift same day workout. Examples include Romanian deadliftsback extensions, and calf raises. These exercises can help improve your overall strength and stability, leading to better performance in the primary lifts.

Squat and Deadlift Same Day Workout Examples

WorkoutExercises
2 Days per Week– Squat (heavy or light)
– Deadlift (heavy or light)
– Abs/Hams/Low Back
– Bench
3 Days per Week– Squat (heavy or light)
– Deadlift (heavy or light)
– Abs/Hams/Low Back
– Chins
– Rows
– Biceps
– Bench
– Incline
– Military
4 Days per Week– Squat (heavy or light)
– Deadlift (heavy or light)
– Bench
– Incline/Dips
– Hamstrings
– Low Back
– Abs
– Chins
– Rows
– Curls

Squat and Deadlift Separately

BenefitDrawback
– Can pour all energy into each lift
– Can use all assistance work for that lift
– Can do a variation of the other lift for two “squat” and two “deadlift” workouts per week
– Lower back gets taxed three times in a week, which may be too much for some people

Nutrition and Hydration for Squat Deadlift Same Day Workouts

Proper nutrition and hydration are essential for maximizing the benefits and minimizing the risks of a squat deadlift same day workout. Here’s what you need to know:

Macronutrient Considerations

Protein

Adequate protein intake is crucial for muscle recovery and growth. Aim for 0.7-1 gram of protein per pound of body weight (1.5-2.2 g/kg) on training days to support the demands of your squat deadlift same day workout.

Carbohydrates

Complex carbohydrates provide the energy your body needs to power through these demanding exercises. Consume 2-4 grams of carbs per pound of body weight (4.5-8.8 g/kg) on training days.

Fats

Healthy fats support hormone production and overall health. Aim for 0.3-0.5 grams of fat per pound of body weight (0.7-1.1 g/kg) on training days.

Nutrient Timing

Pre-Workout

Consume a meal or snack containing a mix of carbohydrates and protein 30-60 minutes before your workout to fuel your performance.

Intra-Workout

Sipping on a carbohydrate-rich sports drink or consuming a simple carb source, like glucose tablets, can help maintain energy levels during your squat deadlift same day session.

Post-Workout

Prioritize a post-workout meal or shake with a 2:1 or 3:1 ratio of carbs to protein to replenish glycogen stores and support muscle recovery.

Hydration

Staying hydrated is crucial for optimal performance and recovery. Aim to drink 16-24 ounces (0.5-0.7 liters) of water in the 2-3 hours before your workout, and continue sipping water throughout your session and during your post-workout recovery period.

Supplements

Supplements like creatine, beta-alanine, and caffeine may provide additional support for squat deadlift same day workouts. Consult with a qualified professional to determine if these supplements are appropriate for your individual needs and goals.

By prioritizing proper nutrition and hydration, you can maximize the benefits of your same day workouts and support your overall health and fitness.

Recovery Strategies for Squat Deadlift Same Day Workouts

Performing a them in the same workout session can be highly demanding on the body, making proper recovery strategies crucial for continued progress and injury prevention. Here are some key considerations:

Rest and Recovery Periods

Intra-Workout Recovery

  • Allow for 3-5 minutes of rest between sets of squats and deadlifts to ensure adequate recovery and maintenance of exercise intensity.
  • Consider alternating between the two exercises, performing a set of squats followed by a set of deadlifts, to provide active recovery between the movements.

Post-Workout Recovery

  • Aim for at least 48-72 hours of rest between them same day workouts to allow your muscles, connective tissues, and central nervous system to fully recover.
  • Avoid performing other heavy lower-body exercises during this recovery period, focusing instead on active recovery activities like light cardio or mobility work.

Nutrition and Hydration

Protein Intake

  • Consume 0.7-1 gram of protein per pound of body weight (1.5-2.2 g/kg) on training days to support muscle repair and growth.
  • Prioritize high-quality protein sources like lean meats, eggs, dairy, and plant-based options.

Carbohydrate Intake

  • Aim for 2-4 grams of carbs per pound of body weight (4.5-8.8 g/kg) on training days to replenish glycogen stores and fuel your workouts.
  • Choose complex carbohydrates like whole grains, fruits, and vegetables to provide sustained energy.

Hydration

  • Drink 16-24 ounces (0.5-0.7 liters) of water in the 2-3 hours before your workout and continue sipping water throughout your session and during recovery.
  • Proper hydration supports muscle function, nutrient delivery, and overall recovery.

Supplementation

Creatine

  • Creatine supplementation can help improve exercise performance and support muscle recovery, making it a beneficial addition to a same day program.
  • Consume 3-5 grams of creatine monohydrate daily, either pre- or post-workout.

Caffeine

  • Moderate doses of caffeine (3-6 mg/kg of body weight) taken pre-workout can help enhance focus, energy, and exercise performance.
  • Avoid excessive caffeine intake, as it can disrupt sleep and recovery.

By prioritizing proper rest, nutrition, and supplementation, you can optimize your recovery and continue to make progress with your same day workouts.

Risks and Benefits

RisksBenefits
– Increased injury risk due to fatigue
– Sacrificing the rest of your workout due to exhaustion
– Strength and hypertrophy development
– Improved athletic performance

Recovery Considerations

FactorConsideration
Volume and IntensityAdjust volume and intensity to accommodate the increased demand on the body
Rest and RecoveryEnsure adequate rest and recovery periods between sessions to prevent overtraining
NutritionFocus on proper nutrition, including adequate protein intake, to support muscle repair and growth

Read Also: Arm Workout Equipment.

FAQs

How often should I perform a squat deadlift same day workout?

The frequency of your squat deadlift same day workouts will depend on your individual fitness level, training experience, and recovery capacity. As a general guideline, most experienced lifters can safely perform this type of workout 1-2 times per week, with at least 48-72 hours of rest between sessions.

Read Also: Hack Squat Alternative.

What is the optimal order for a squat deadlift same day workout?

The order of the exercises can impact your performance and recovery. Many experts recommend starting with the squat, as it is generally the more technically demanding exercise and can be more affected by fatigue from the deadlift. However, some individuals may find it beneficial to start with the deadlift, as it can help prime the body for the squat.

Read Also: Belt Squat.

How can I ensure proper form during a squat deadlift same day workout?

Maintaining proper form is crucial to avoid injury and maximize the benefits of them. Be sure to focus on your technique throughout the entire workout, and consider using a spotter or training partner to provide feedback and support. Additionally, it’s important to listen to your body and adjust the weight or exercise selection as needed to maintain good form.

Read Also: Best Exercises for Arm Pump.

What are some common mistakes to avoid in a squat deadlift same day workout?

Some common mistakes to avoid include:

  • Rushing through the exercises or sacrificing form for heavier weights
  • Failing to allow for adequate rest and recovery between sets and exercises
  • Neglecting the warm-up and mobility work
  • Performing the exercises in the wrong order (e.g., deadlift before squat)
  • Failing to properly brace the core during the lifts

Read Also: The Surprising Health Benefit of Celery Tea.

Conclusion

In conclusion, the squat deadlift same day workout is a highly effective and efficient way to build strength, muscle, and overall fitness. By targeting multiple major muscle groups in a single session, you can maximize your training time and see faster progress towards your fitness goals. Remember to prioritize proper form, allow for adequate rest and recovery, and consider incorporating accessory exercises to further support your progress. With a well-designed and executed them same day routine, you can take your strength and performance to new heights.

Read Also: 12 Week Deadlift Program.

Continue Reading

Trending