Connect with us

Exercise

Neck Pad for Squatting: Boost Performance Safely

Published

on

neck pad for squatting
Spread the love

Here is your complete guide to neck pad for squatting

Introduction to Neck Pad for Squatting

Squatting is a fundamental exercise that targets multiple muscle groups and is essential for building lower body strength and power. However, performing heavy squats can put significant strain on the neck and upper back, leading to discomfort and even injury if proper form and safety measures are not followed. One solution to this problem is the use of a neck pad for squatting.

neck pad is a simple yet effective accessory that can provide comfort, support, and safety during heavy lifts. By cushioning the bar and distributing the weight more evenly across the upper back, a neck pad can help reduce strain on the neck and shoulders, allowing you to focus on maintaining proper form and depth throughout the lift.

In this comprehensive guide, we’ll explore the importance of using a neck pad for squatting, how to choose the right one for your needs, and the proper techniques for using it to maximize your safety and performance.

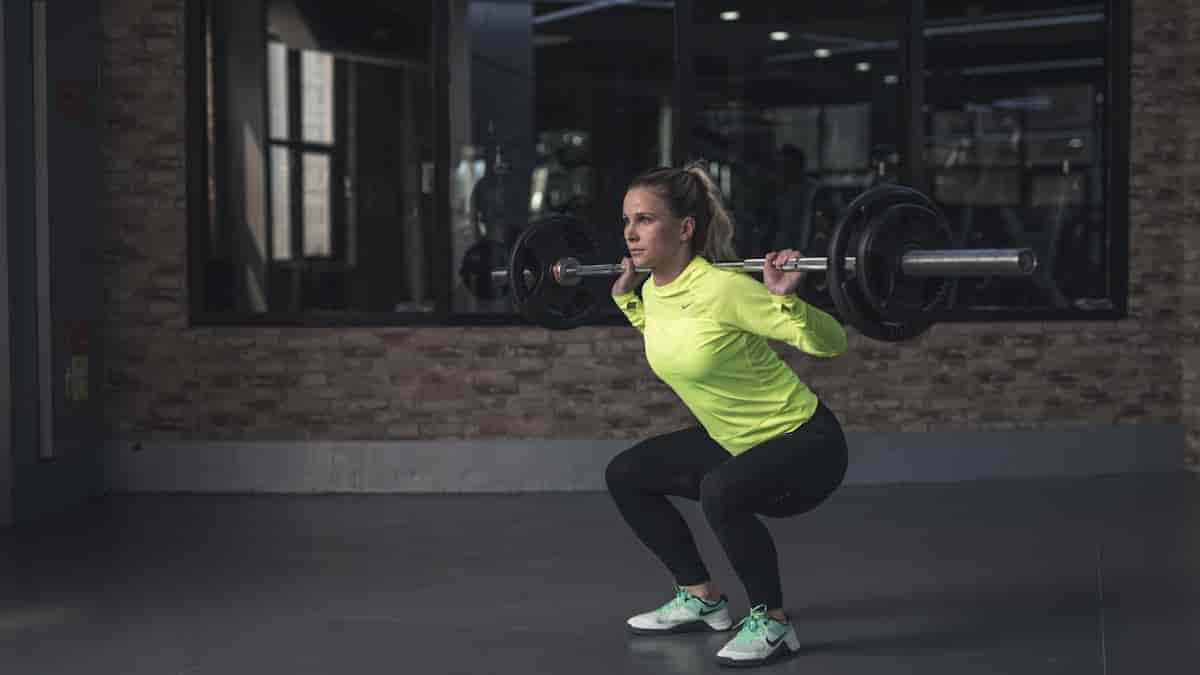
What is a Neck Pad for Squatting?

neck pad for squatting is a padded accessory designed to be placed on the upper back, between the shoulders, during a squat. It serves as a cushion between the barbell and your body, providing comfort and support while reducing the pressure and strain on the neck and upper back.

Neck pads come in various materials, such as foam, gel, and leather, each offering its own unique benefits in terms of comfort, durability, and sweat absorption. The thickness of the pad can also vary, with thicker pads providing more cushioning but potentially limiting mobility and range of motion.

Importance of Proper Form and Safety During Squats

Proper form and safety are critical when performing squats, as poor technique can lead to a variety of issues, including:

  • Increased risk of injury to the knees, hips, and lower back
  • Muscle imbalances and asymmetries
  • Reduced effectiveness of the exercise in targeting the intended muscle groups

Using a neck pad for squatting can help maintain proper form and reduce strain on the neck and upper back, allowing you to focus on executing the lift safely and effectively. By distributing the weight more evenly across the upper back, a neck pad can help you maintain a neutral spine position and avoid excessive forward lean or rounding of the upper back.

Choosing the Right Neck Pad for Your Needs

When selecting a neck pad for squatting, there are several factors to consider to ensure you choose the right one for your needs:

  1. Material: Choose a material that provides the right balance of comfort, durability, and sweat absorption for your preferences and training environment.
  2. Thickness: Thicker pads offer more cushioning but may limit mobility, while thinner pads provide less cushioning but allow for greater range of motion.
  1. Size: Make sure the neck pad fits comfortably on your upper back without being too bulky or restrictive.
  2. Comfort: The neck pad should feel secure and stable on your back without causing any discomfort or irritation.

To help you compare different neck pad options, here is a table outlining the key features of some popular models:

BrandMaterialThicknessSizePrice
Rogue Foam RollerHigh-density foam3 inches6 x 36 inches$45
Spud Inc Squat PadNeoprene-covered foam2.5 inches12 x 6 inches$39.95
Harbinger Padded Leather Lifting BeltLeather with foam padding1.5 inchesAdjustable$34.99
Inzer Gripper PadNeoprene with rubber grip1 inch12 x 6 inches$29.95
Titan Support Systems Squat PadHigh-density foam with vinyl cover2 inches12 x 6 inches$24.95

When choosing a neck pad, it’s important to consider your individual preferences, training goals, and budget to find the best fit for your needs.

How to Use a Neck Pad Correctly During Squats

Using a neck pad for squatting correctly is essential to ensure proper form and safety. Here’s a step-by-step guide on how to properly position and use a neck pad during your squats:

  1. Place the neck pad on your upper back, between your shoulder blades.
  2. Position the barbell on top of the neck pad, ensuring that it is centered and secure.
  3. Take a deep breath and brace your core.
  4. Maintain a neutral spine position throughout the lift, avoiding excessive forward lean or rounding of the upper back.
  1. Descend into the squat, keeping your chest up and your knees tracking over your toes.
  2. Drive through your heels to return to the starting position, maintaining control and tension throughout the movement.

It’s important to note that while a neck pad can provide comfort and support, it should not be used as a crutch to compensate for poor form or technique. Always prioritize proper form and safety when performing squats, and use a neck pad as an accessory to enhance your performance and reduce strain on your body.

Benefits of Using a Neck Pad for Squatting

Using a neck pad for squatting can provide numerous benefits, including:

  • Improved comfort: The cushioning of the neck pad can significantly reduce discomfort and pain in the neck and upper back during heavy lifts.
  • Enhanced safety: By distributing the weight more evenly across the upper back, a neck pad can help maintain proper form and reduce the risk of injury.
  • Increased confidence: Knowing that you have an extra layer of support and cushioning can boost your confidence and allow you to focus on executing the lift safely and effectively.
  • Longer training sessions: With reduced strain on the neck and upper back, you may be able to train for longer periods without experiencing fatigue or discomfort.

Alternatives to Using a Neck Pad

While a neck pad for squatting can be a valuable accessory, there are other methods for reducing strain on the neck and upper back during squats:

  1. Using a squat pad: Similar to a neck pad, a squat pad is a cushioned accessory that can be placed directly on the barbell to provide comfort and support.
  2. Adjusting bar placement: Experimenting with different bar positions, such as high-bar or low-bar squats, can help distribute the weight differently and reduce strain on specific areas of the upper back and neck.
  1. Strengthening the upper back: Incorporating exercises that target the upper back muscles, such as rows and pull-ups, can help improve stability and reduce strain during squats.

Each of these alternatives has its own advantages and disadvantages, so it’s important to experiment and find the method that works best for your individual needs and preferences.

FAQs

Is a neck pad necessary for all squat variations?

No, a neck pad is not necessary for all squat variations. It is most commonly used for high-bar back squats, where the barbell rests higher on the upper back.

Read Also: Best Exercises for Arm Pump.

Can a neck pad be used for other exercises besides squats?

Yes, a neck pad can be used for other exercises that involve placing a barbell on the upper back, such as overhead presses or lunges. However, it is most commonly used for squats.

Read Also: 12 Week Deadlift Program.

How do I clean and maintain my neck pad?

The cleaning and maintenance process will vary depending on the material of your neck pad. In general, you should wipe it down with a damp cloth after each use and allow it to air dry. Avoid submerging foam pads in water, as this can damage the material.

Read Also: Squat Deadlift Same Day.

Can a neck pad cause any negative effects if used incorrectly?

Yes, using a neck pad incorrectly can potentially cause issues. If the pad is too thick or positioned improperly, it can limit mobility and range of motion, leading to poor form and increased risk of injury.

Read Also: Front Squat Workout Program.

What is the best material for a neck pad?

There is no single “best” material for a neck pad. The ideal material will depend on your individual preferences and training needs. Foam pads offer good cushioning and are generally more affordable, while leather pads are more durable and easy to clean.

Read Also: Row and Kettlebell Workout.

Conclusion

Using a neck pad for squatting can be a valuable accessory for improving comfort, safety, and performance during heavy lifts. By choosing the right neck pad and using it correctly, you can reduce strain on the neck and upper back while maintaining proper form and depth throughout the lift.

Read Also: Body Beast Build Legs.

Remember, a neck pad should not be used as a crutch to compensate for poor technique. Always prioritize proper form and safety when performing squats, and use a neck pad as an accessory to enhance your performance and reduce strain on your body.

Read Also: The Surprising Health Benefit of Celery Tea.

By incorporating a neck pad into your training routine and following the tips and techniques outlined in this guide, you can unlock the benefits of a safer, more comfortable, and more effective squat.

ReadAlso: Front Squat Machine.

Continue Reading
Click to comment

Leave a Reply

Your email address will not be published. Required fields are marked *

Exercise

Cable Row Alternative at Home Tricks

Published

on

cable row alternative at home
Spread the love

Here is your complete guide to the cable row alternative at home

Introduction to Cable Row Alternative at Home

What is the best cable row alternative at home? If you’re looking to build a strong, muscular back but don’t have access to a cable machine, don’t worry! There are plenty of effective cable row alternative at home that you can do at home using various pieces of equipment or even your own bodyweight. In this comprehensive guide, we’ll explore the best cable row alternative at home, discuss their benefits, and provide step-by-step instructions on how to perform each exercise with proper form.

What is a Seated Cable Row?

The seated cable row is a popular back exercise that targets the latissimus dorsi (lats), trapezius, and biceps brachii. It involves sitting on a bench and pulling a cable handle towards your abdomen, squeezing your shoulder blades together at the end of the movement. This exercise is effective for building strength and size in the back muscles, as well as improving posture and reducing the risk of injury.

Why Alternatives are Necessary

While the seated cable row is an excellent exercise, there may be times when you can’t access a cable machine, such as when you’re traveling or working out at home. Having a variety of cable row alternatives in your arsenal ensures that you can continue to train your back effectively regardless of your location or equipment availability.

Best Cable Row Alternative at Home

1. Resistance Band Rows

Resistance band rows are a great alternative to cable rows that can be done anywhere. Here’s how to perform them:

  1. Secure a resistance band to a sturdy object at chest height, such as a door handle or a tree branch.
  2. Grasp the band with an overhand grip, palms facing down, and step back until there is tension in the band.
  3. Keeping your core engaged and your back straight, row the band towards your chest, squeezing your shoulder blades together at the end of the movement.
  4. Slowly return to the starting position and repeat for the desired number of reps.

Benefits: Resistance band rows are low-impact, easy on the joints, and can be adjusted to suit different fitness levels by using bands with varying resistance levels.

Resistance Band Resistance Levels

Resistance LevelColor
LightYellow
MediumRed
HeavyBlack
Extra HeavyPurple

2. Inverted Rows

Inverted rows are a bodyweight exercise that can be done using a sturdy table or bar. Here’s how to perform them:

  1. Set up a bar or table at about hip height.
  2. Lie down underneath the bar or table, and grasp it with an overhand grip, hands slightly wider than shoulder-width apart.
  3. Engage your core and pull your shoulder blades together as you row your body up towards the bar, keeping your body in a straight line from heels to head.
  1. Slowly lower yourself back down and repeat for the desired number of reps.

Benefits: Inverted rows are an excellent exercise for beginners and can be made more challenging by elevating your feet or adding weight to your lap.

3. Dumbbell Rows

Dumbbell rows are a classic back exercise that can be done with a single dumbbell. Here’s how to perform them:

  1. Place your left knee and left hand on a bench or sturdy surface, keeping your back flat.
  2. Hold a dumbbell in your right hand with an overhand grip, palm facing in.
  1. Engage your core and row the dumbbell towards your chest, squeezing your shoulder blade at the end of the movement.
  2. Slowly lower the dumbbell back down and repeat for the desired number of reps.
  3. Switch sides and repeat on the other side.

Benefits: Dumbbell rows allow you to train each side of your back independently, which can help to correct imbalances and improve overall strength.

Dumbbell Weight Increments

Weight (lbs)Increment
5-255
30-5010
55-10025

4. Barbell Rows

Barbell rows are a compound exercise that targets multiple muscle groups, including the back, shoulders, and legs. Here’s how to perform them:

  1. Stand in front of a barbell with your feet shoulder-width apart.
  2. Hinge at the hips to bend down and grasp the barbell with an overhand grip, hands slightly wider than shoulder-width apart.
  1. Engage your core and row the barbell towards your lower chest, squeezing your shoulder blades together at the end of the movement.
  2. Slowly lower the barbell back down and repeat for the desired number of reps.

Benefits: Barbell rows allow you to lift heavier weights than other row variations, which can lead to greater muscle growth and strength gains.

Barbell Weight Plates

Weight (lbs)Plate Color
2.5Green
5Yellow
10Red
25Blue
45Black

5. TRX Rows

TRX rows are a suspension training exercise that can be done using a TRX suspension trainer. Here’s how to perform them:

  1. Set up your TRX suspension trainer at a height that allows you to hang with your arms extended and your feet shoulder-width apart.
  2. Grasp the TRX handles with an overhand grip and walk your feet forward until your body forms a straight line from heels to head.
  1. Engage your core and row your body up towards the handles, squeezing your shoulder blades together at the end of the movement.
  2. Slowly lower yourself back down and repeat for the desired number of reps.

Benefits: TRX rows are a great way to add instability to your workout, which can help to improve core strength and balance.

TRX Suspension Trainer Adjustments

  • Foot Position: Adjust the foot straps to change the difficulty level
  • Incline: Adjust the angle of the body by moving closer or further away from the anchor point
  • Resistance Bands: Attach resistance bands to the handles for added resistance

6. Seated Cable Row with Resistance Bands

If you have access to resistance bands, you can create a makeshift cable row machine at home. Here’s how to do it:

  1. Secure a resistance band to a sturdy object at chest height, such as a door handle or a tree branch.
  2. Sit on the floor facing the band, with your legs extended and your feet shoulder-width apart.
  1. Grasp the band with an overhand grip, palms facing down, and row it towards your chest, squeezing your shoulder blades together at the end of the movement.
  2. Slowly return to the starting position and repeat for the desired number of reps.

Benefits: This variation allows you to mimic the seated cable row while using resistance bands, which can be adjusted to suit different fitness levels.

Resistance Band Attachment Points

  • Door Anchor: Secure the band to a door handle or knob
  • Wall Anchor: Secure the band to a wall-mounted anchor point
  • Tree Branch: Secure the band to a sturdy tree branch
  • Railing: Secure the band to a sturdy railing or fence post

7. Seated Cable Row with Dumbbells

If you have access to dumbbells, you can create a seated cable row variation at home. Here’s how to do it:

  1. Sit on the edge of a bench or chair, with your legs extended and your feet shoulder-width apart.
  2. Hold a dumbbell in each hand with an overhand grip, palms facing in.
  1. Engage your core and row the dumbbells towards your lower chest, squeezing your shoulder blades together at the end of the movement.
  2. Slowly lower the dumbbells back down and repeat for the desired number of reps.

Benefits: This variation allows you to mimic the seated cable row while using dumbbells, which can be adjusted to suit different fitness levels.

8. Seated Cable Row with Barbell

If you have access to a barbell, you can create a seated cable row variation at home. Here’s how to do it:

  1. Sit on the edge of a bench or chair, with your legs extended and your feet shoulder-width apart.
  2. Hold a barbell with an overhand grip, hands slightly wider than shoulder-width apart.
  1. Engage your core and row the barbell towards your lower chest, squeezing your shoulder blades together at the end of the movement.
  2. Slowly lower the barbell back down and repeat for the desired number of reps.

Benefits: This variation allows you to mimic the seated cable row while using a barbell, which can be loaded with weight plates to increase the resistance.

9. Seated Cable Row with Resistance Bands and Dumbbells

For an advanced variation, you can combine resistance bands and dumbbells to create a seated cable row alternative at home. Here’s how to do it:

  1. Secure a resistance band to a sturdy object at chest height, such as a door handle or a tree branch.
  2. Sit on the floor facing the band, with your legs extended and your feet shoulder-width apart.
  3. Hold a dumbbell in each hand with an overhand grip, palms facing in.
  1. Engage your core and row the dumbbells towards your lower chest, squeezing your shoulder blades together at the end of the movement.
  2. Slowly lower the dumbbells back down and repeat for the desired number of reps.

Benefits: This advanced variation combines the resistance of bands with the weight of dumbbells, providing a challenging workout for experienced lifters.

Comparison Table

Here’s a comparison table of the different cable row alternative at home based on equipment needed, muscles targeted, difficulty level, and effectiveness:

ExerciseEquipmentMuscles TargetedDifficultyEffectiveness
Resistance Band RowsResistance bandsLats, bicepsBeginnerHigh
Inverted RowsSturdy table or barLats, bicepsBeginnerHigh
Dumbbell RowsDumbbellsLats, bicepsIntermediateHigh
Barbell RowsBarbellLats, bicepsIntermediateHigh
TRX RowsTRX Suspension TrainerLats, bicepsIntermediateHigh
Seated Cable Row with Resistance BandsResistance bandsLats, bicepsIntermediateHigh
Seated Cable Row with DumbbellsDumbbellsLats, bicepsIntermediateHigh
Seated Cable Row with BarbellBarbellLats, bicepsIntermediateHigh
Seated Cable Row with Resistance Bands and DumbbellsResistance bands, dumbbellsLats, bicepsAdvancedHigh

Tips for Effective Cable Row Alternative at Home

Focus on Proper Form

  • Maintaining good posture and using a full range of motion is crucial for maximizing the effectiveness of these exercises and reducing the risk of injury.
  • Keep your core engaged and avoid arching your back during the movement.
  • Squeeze your shoulder blades together at the top of the movement to fully engage your back muscles.

Start with a Lighter Weight or Resistance

  • Begin with a weight or resistance level that allows you to maintain proper form.
  • Gradually increase the weight or resistance as you get stronger.

Incorporate a Variety of Exercises

  • Mixing up your back exercises by using different cable row alternative at home can help to target the muscles from different angles and prevent plateaus.
  • Try different grips (overhand, underhand, neutral) to emphasize different parts of your back.

Allow for Adequate Rest and Recovery

  • Your muscles grow during the rest period between workouts, so make sure to give your back at least one day of rest between training sessions.
  • Aim for 2-3 back workouts per week, with at least one day of rest between sessions.

Use Proper Breathing Technique

  • Exhale as you pull the weight towards your body, and inhale as you return to the starting position.
  • Avoid holding your breath during the exercise, as this can increase blood pressure and strain your back.

Adjust the Difficulty Level

  • Many cable row alternative at home can be made easier or more challenging by adjusting the angle of your body, the weight used, or the resistance of the bands.
  • For example, you can elevate your feet during inverted rows to increase the difficulty, or use lighter resistance bands for seated cable row alternative at home.

Incorporate Progressions

  • As you get stronger, look for ways to progressively overload your back exercises by adding weight, increasing reps, or trying more advanced variations.
  • For example, you can move from dumbbell rows to barbell rows, or add weight to your lap during inverted rows.

Listen to Your Body

  • If you experience pain or discomfort during any of these exercises, stop immediately and consult with a healthcare professional.
  • It’s important to respect your body’s limitations and avoid pushing through pain, as this can lead to injury.

By following these tips and incorporating a variety of cable row alternative at home into your workout routine, you can build a strong, muscular back without access to a cable machine. Remember to prioritize proper form, gradually increase the difficulty, and allow for adequate rest and recovery for best results.

Read Also: Build a Booty Supplement.

FAQs

Can I do cable row alternatives every day?

No, it’s important to allow for rest and recovery between workouts. Aim for 2-3 back workouts per week, with at least one day of rest between sessions.

Read Also: Creatine for Bigger Booty.

What equipment do I need for cable row alternatives?

The equipment needed varies depending on the exercise. Resistance bands, dumbbells, barbells, and suspension trainers are common options.

Read Also: Supplements for Booty Growth.

How do I progress with cable row alternatives?

Start with a lighter weight or resistance and gradually increase as you get stronger. Focus on proper form and range of motion before adding more weight.

Read Also: What Supplements Should I Take for a Bigger Booty?

Can I do cable row alternatives at the gym?

Yes, many of these exercises can be performed at the gym using equipment like barbells and dumbbells. However, the focus of this article is on alternatives that can be done at home.

Read Also: Build Back and Biceps Body Beast.

How do I incorporate cable row alternatives into my workout routine?

Include cable row alternative at home as part of your back and biceps workout. Aim for 3-4 sets of 8-12 repetitions per exercise, allowing for adequate rest between sets and exercises.

Read Also: The Surprising Health Benefit of Celery Tea.

Conclusion

In conclusion, there are many effective cable row alternative at home that you can do at home to build a strong, muscular back. Whether you prefer to use resistance bands, dumbbells, barbells, or your own bodyweight, there’s an exercise on this list that will challenge your back muscles and help you achieve your fitness goals. Remember to focus on proper form, gradually increase the difficulty, and incorporate a variety of exercises into your routine for best results.

Read Also: Bicep Tricep Curl Machine.

Continue Reading

Exercise

Bicep Tricep Curl Machine Workout Plans

Published

on

bicep tricep curl machine
Spread the love

Here is your complete guide to bicep tricep curl machine

Introduction to Bicep Tricep Curl Machine

If you’re looking to build impressive arms and achieve that sought-after “gun show,” incorporating a bicep tricep curl machine into your workout routine is a game-changer. These machines are designed to target both the biceps and triceps simultaneously, making them an efficient and convenient choice for arm development. In this comprehensive guide, we’ll explore the benefits of using a bicep tricep curl machine, the anatomy of the biceps and triceps, different types of machines, proper form and technique, sample workouts, maintenance, and more. Let’s dive in!

Anatomy of the Biceps and Triceps

Before we delve into the specifics of bicep tricep curl machine, it’s essential to understand the muscles involved and how they work together. The biceps, located on the front of the upper arm, are responsible for flexing the elbow and supinating the forearm. The triceps, on the other hand, are located on the back of the upper arm and are primarily responsible for extending the elbow. Both muscle groups work together to provide stability and strength to the arm during various movements.

Types of Bicep Tricep Curl Machines

When it comes to bicep tricep curl machine, there are several types to choose from, each with its own unique features and benefits. Let’s take a closer look at the most common types:

Selectorized Bicep Tricep Curl Machine

Selectorized machines are known for their ease of use and adjustability. They typically feature a weight stack that allows you to select the desired resistance with a pin. These machines often come with adjustable seats and back supports to accommodate users of different heights and sizes.

Plate-Loaded Bicep Tricep Curl Machine

Plate-loaded machines require you to load weight plates onto a lever arm or sled. This type of machine offers a more customizable resistance range, as you can choose the exact amount of weight you want to lift. However, they may require more setup time compared to selectorized machines.

Cable Bicep Tricep Curl Machine

Cable machines use a system of pulleys and cables to provide resistance. They often come with multiple attachment points, allowing you to perform a variety of exercises targeting the biceps and triceps. Cable machines are known for their versatility and the ability to create variable resistance throughout the range of motion.

To help you choose the best bicep tricep curl machine for your needs, consider the following factors:

FactorSelectorizedPlate-LoadedCable
Ease of UseHighModerateHigh
AdjustabilityHighModerateHigh
Resistance RangeLimited by weight stackCustomizableCustomizable
Setup TimeLowHighModerate
VersatilityModerateModerateHigh

Proper Form and Technique

Proper form and technique are crucial when using a curl machine to ensure safety, effectiveness, and optimal results. Here are some tips to keep in mind:

  • Adjust the seat and back support to ensure your elbows are positioned directly under the handles.
  • Keep your core engaged and avoid swinging or using momentum to lift the weight.
  • Maintain a slight bend in the elbows throughout the movement.
  • Exhale as you curl the weight up, focusing on contracting the biceps.
  • Inhale as you slowly lower the weight back to the starting position.
  • Avoid locking out the elbows at the bottom of the movement.

Common mistakes to avoid include:

  • Using too much weight and sacrificing form
  • Arching the back or leaning back excessively
  • Swinging the weight or using momentum
  • Locking out the elbows at the bottom of the movement

Frequency and Volume for Bicep Tricep Curl Machine Workouts

Frequency

  • Train biceps and triceps 2-3 times per week for optimal growth.
  • Allow for at least 48 hours of rest between sessions targeting the same muscle groups.

Volume

  • Aim for 10-20 sets per muscle group per week for hypertrophy (muscle growth).
  • Beginners may start with 6-12 sets per week and gradually increase volume over time.

Bicep Tricep Curl Machine Workouts

Incorporating a bicep tricep curl machine into your workout routine can help you build impressive arms and achieve your fitness goals. Here are some sample workouts to get you started:

Beginner Workout

  • 3 sets of 12-15 reps of bicep curls
  • 3 sets of 12-15 reps of tricep extensions
  • 2 minutes rest between sets

Intermediate Workout

  • 4 sets of 10-12 reps of alternating bicep curls and tricep extensions
  • 3 sets of 8-10 reps of close-grip bicep curls
  • 2 minutes rest between sets

Advanced Workout

  • 5 sets of 8-10 reps of bicep curls, increasing weight each set
  • 4 sets of 6-8 reps of tricep extensions, increasing weight each set
  • 3 sets of 10-12 reps of hammer curls
  • 2 minutes rest between sets

Remember to start with a weight that allows you to maintain proper form and gradually increase the resistance as you get stronger.

Maintenance and Care

To ensure the longevity and safety of your bicep tricep curl machine, it’s essential to perform regular maintenance and care. Here are some tips:

  • Wipe down the machine after each use with a clean cloth and a mild cleaning solution.
  • Inspect the machine regularly for any loose or damaged parts, and tighten or replace them as needed.
  • Lubricate moving parts according to the manufacturer’s instructions to keep the machine running smoothly.
  • Store the machine in a dry, clean environment to prevent rust and corrosion.
  • Follow the manufacturer’s guidelines for weight capacity and usage to avoid overloading the machine.

By taking care of your curl machine, you can ensure it remains a reliable and safe tool for your arm workouts for years to come.

The Best Nutrition for Bicep and Tricep Growth

Protein for Muscle Building

  • Aim for 1-1.5 grams of protein per pound of body weight to support muscle growth and recovery.
  • High-quality protein sources include lean meats, poultry, fish, eggs, dairy, and plant-based options like beans, lentils, and soy.

Carbohydrates for Energy

  • Complex carbohydrates provide sustained energy for your bicep and tricep workouts.
  • Good sources include whole grains, fruits, vegetables, and starchy foods like brown rice, sweet potatoes, and oats.

Healthy Fats for Hormone Production

  • Fats are essential for hormone production and overall health.
  • Include healthy fats like those found in avocados, nuts, seeds, olive oil, and fatty fish.

Hydration for Muscle Function

  • Drink plenty of water before, during, and after your workouts to stay hydrated.
  • Dehydration can impair muscle function and recovery.

Supplements for Bicep and Tricep Growth

  • Supplements like whey protein, creatine, and beta-alanine may support muscle growth and recovery.
  • However, supplements should not replace a balanced diet and proper training.

By focusing on a diet rich in protein, complex carbohydrates, and healthy fats, staying hydrated, and incorporating proper training and rest, you can support optimal bicep and tricep growth and recovery. Remember to listen to your body, track your progress, and make adjustments as necessary to achieve your goals.

FAQs

How often should I use a bicep tricep curl machine?

Aim for 2-3 sessions per week, allowing for at least one day of rest between sessions.

Read Also: Build a Booty Supplement.

Can I use a bicep tricep curl machine to target other muscle groups?

While curl machine is primarily designed for arm development, you can perform exercises that target the shoulders and back as well.

Read Also: Creatine for Bigger Booty.

Is it better to use a bicep tricep curl machine or free weights?

Both have their advantages. curl machine offers stability and isolation, while free weights engage more stabilizer muscles and allow for a more natural range of motion.

Read Also: Supplements for Booty Growth.

How do I adjust the seat and back support on a bicep tricep curl machine?

Consult the manufacturer’s instructions for specific adjustments. Generally, you’ll want to position the seat so your elbows are directly under the handles and the back support provides stability without restricting movement.

Read Also: What Supplements Should I Take for a Bigger Booty?

Can I use a bicep tricep curl machine if I have joint pain or injuries?

If you have any pre-existing conditions or injuries, it’s best to consult with a healthcare professional or certified personal trainer before using a bicep tricep curl machine. They can provide guidance on modifications or alternative exercises that may be more suitable for your needs.

Read Also: The Surprising Health Benefit of Celery Tea.

Conclusion

Incorporating a bicep tricep curl machine into your fitness routine is an excellent way to build impressive arms and achieve your fitness goals. By understanding the anatomy of the biceps and triceps, choosing the right type of machine, using proper form and technique, and following a well-designed workout plan, you’ll be on your way to sculpting the arms of your dreams. Remember to prioritize safety, listen to your body, and enjoy the process of building strength and muscle. Happy lifting!

Read Also: Build Back and Biceps Body Beast.

Continue Reading

Exercise

Build Back and Biceps Body Beast Routine Revealed

Published

on

Spread the love

Here is your complete guide to build back and biceps body beast

Introduction to Build Back and Biceps Body Beast

How to build back and biceps body beast? Are you ready to unlock the power of your back and biceps with Body Beast’s “Build Back and Biceps” workout? In this comprehensive guide, we’ll dive deep into this transformative workout, exploring its benefits, proper form, and how to incorporate it into your fitness routine for maximum results. Get ready to sculpt a stronger, more defined upper body and unleash your inner beast!

Build Back and Biceps Body Beast is a game-changer for those seeking to build muscle, increase strength, and improve overall upper body performance. By focusing on the back and biceps, this workout targets two of the most important muscle groups for a well-rounded physique. Whether you’re a seasoned fitness enthusiast or just starting your journey, this guide will provide you with the knowledge and tools necessary to conquer the “Build Back & Biceps” workout and take your fitness to new heights.

Benefits of the Build Back and Biceps Body Beast Workout

Incorporating the Build Back and Biceps Body Beast workout into your routine offers a multitude of benefits:

  1. Increased strength and muscle definition in the back and biceps
  2. Improved posture and reduced risk of injury
  1. Enhanced overall upper body strength and power

By targeting the back and biceps, this workout helps to create a strong foundation for your upper body, enabling you to perform daily tasks with ease and tackle more challenging exercises with confidence. Additionally, the improved posture and reduced risk of injury can have a positive impact on your overall well-being, allowing you to train harder and more consistently.

Proper Form and Technique

Proper form and technique are crucial when performing the Build Back and Biceps Body Beast workout. Maintaining correct form not only ensures the effectiveness of the exercises but also minimizes the risk of injury. Let’s dive into the step-by-step instructions for each exercise:

Barbell Rows

  1. Stand with your feet shoulder-width apart, knees slightly bent, and hinge at the hips to bend forward, keeping your back flat.
  2. Grip the barbell with an overhand grip, hands slightly wider than shoulder-width.
  3. Engage your core and pull the barbell towards your lower chest, squeezing your shoulder blades together at the top of the movement.
  4. Slowly lower the barbell back to the starting position, maintaining control throughout the movement.

Lat Pulldowns

  1. Sit at a lat pulldown machine with your thighs under the thigh pads and your feet shoulder-width apart.
  2. Grip the bar with an overhand grip, hands slightly wider than shoulder-width.
  3. Engage your core and pull the bar down towards your upper chest, leading with your elbows and squeezing your shoulder blades together at the bottom of the movement.
  4. Slowly return the bar to the starting position, keeping tension on the muscles throughout the movement.

Bicep Curls

  1. Stand with your feet shoulder-width apart, knees slightly bent, and engage your core.
  2. Hold a dumbbell in each hand with an underhand grip, palms facing up.
  3. Keeping your upper arms stationary and elbows close to your sides, curl the weights up towards your shoulders by bending at the elbows.
  4. Pause briefly at the top of the movement, then slowly lower the weights back to the starting position.

Hammer Curls

  1. Stand with your feet shoulder-width apart, knees slightly bent, and engage your core.
  2. Hold a dumbbell in each hand with a neutral grip, palms facing your body.
  3. Keeping your upper arms stationary and elbows close to your sides, curl the weights up towards your shoulders by bending at the elbows.
  4. Pause briefly at the top of the movement, then slowly lower the weights back to the starting position.

To ensure proper form and technique, it’s essential to avoid common mistakes such as:

  • Swinging or using momentum to lift the weights
  • Arching your back excessively during rows or pulldowns
  • Locking out your elbows at the bottom of the movement
  • Allowing your elbows to flare out during bicep curls

By focusing on proper form and technique, you’ll maximize the effectiveness of the exercises, target the desired muscle groups, and minimize the risk of injury.

Incorporating Build Back and Biceps Body Beast into Your Routine

To get the most out of the Build Back and Biceps Body Beast workout, it’s important to understand how to incorporate it into your overall fitness routine. Here are some key considerations:

Frequency and Timing

The Build Back and Biceps Body Beast workout should be performed 2-3 times per week, with at least one day of rest between sessions. This allows your muscles sufficient time to recover and grow. Aim to complete the workout on non-consecutive days, such as Monday, Wednesday, and Friday.

Fitting into a Full-Body or Split Routine

The Build Back and Biceps Body Beast workout can be easily incorporated into either a full-body or split routine. If you’re following a full-body routine, perform the workout as one of your three weekly sessions. If you’re following a split routine, such as upper body/lower body or push/pull, incorporate the “Build Back & Biceps” workout into your upper body or pull day.

Complementary Exercises and Muscle Groups

To ensure a well-rounded upper body workout, consider incorporating complementary exercises that target the chest, shoulders, and core. Some examples include:

  • Bench press or push-ups for the chest
  • Overhead press or lateral raises for the shoulders
  • Planks or ab wheel rollouts for the core

By pairing the Build Back and Biceps Body Beast workout with these complementary exercises, you’ll create a comprehensive upper body routine that promotes overall strength and muscle development.

Nutrition and Recovery

Proper nutrition and recovery are essential for muscle growth and overall fitness. Let’s explore the key considerations for fueling your body and allowing it to recover effectively:

Macronutrient Ratios and Calorie Needs

To support muscle growth and recovery, aim for a balanced diet that includes:

  • 1.6-2.2 grams of protein per kilogram of body weight
  • 20-35% of total calories from fat
  • The remaining calories from complex carbohydrates

Adjust your calorie intake based on your specific goals and body composition. If you’re looking to build muscle, aim for a slight calorie surplus of 250-500 calories above your maintenance level. If you’re looking to maintain muscle while losing fat, aim for a moderate calorie deficit of 300-500 calories below your maintenance level.

Recommended Supplements

While supplements are not necessary for muscle growth and recovery, some may provide additional support:

  • Whey protein powder: Helps meet daily protein needs and supports muscle recovery
  • Creatine monohydrate: May enhance exercise performance and promote muscle growth
  • Beta-alanine: May delay the onset of muscle fatigue during high-intensity exercise

Always consult with a healthcare professional before starting any supplement regimen.

Best Tips for the Build Back and Biceps Body Beast Workout

Based on the search results, here are some of the best tips for getting the most out of the Build Back and Biceps Body Beast workout:

Focus on Proper Form

Maintaining proper form is crucial for maximizing the effectiveness of the exercises and minimizing the risk of injury. Avoid common mistakes such as swinging the weights, arching your back excessively, or allowing your elbows to flare out during bicep curls.

Progressively Increase the Weight

Gradually increase the weight as you get stronger to continue challenging your muscles. For example, during the barbell row, one-arm row, and reverse fly exercises, increase the weight for each successive round (15 reps, 12 reps, 8 reps).

Incorporate Compound and Isolation Exercises

The Build Back and Biceps Body Beast workout combines compound exercises like rows and pulldowns that work multiple muscle groups with isolation exercises like bicep curls that target the biceps specifically. This combination helps to build overall upper body strength and muscle definition.

Allow for Adequate Recovery

Rest and recovery are essential for muscle growth and injury prevention. Aim for 2-3 Build Back and Biceps Body Beast workouts per week, with at least one day of rest between sessions. Strive for 7-9 hours of quality sleep each night, and incorporate active recovery activities such as light cardio or stretching on your rest days.

Fuel Your Body with Proper Nutrition

Proper nutrition is key for supporting muscle growth and recovery. Aim for a balanced diet that includes 1.6-2.2 grams of protein per kilogram of body weight, 20-35% of total calories from fat, and the remaining calories from complex carbohydrates. Adjust your calorie intake based on your specific goals and body composition.

By incorporating these tips into your Build Back and Biceps Body Beast routine, you’ll be well on your way to building a stronger, more defined upper body and unleashing your inner beast!

Importance of Rest and Recovery

Rest and recovery are crucial for muscle growth and injury prevention. Aim for 7-9 hours of quality sleep each night, as this is when your body repairs and rebuilds muscle tissue. Additionally, incorporate active recovery activities such as light cardio or stretching on your rest days to promote blood flow and reduce muscle soreness.

Frequently Asked Questions (FAQs)

How long should I rest between sets?

Rest periods should be 60-90 seconds between sets, depending on the intensity of the exercise and your fitness level.

Read Also: Neck Pad for Squatting.

Can I do this workout every day?

No, it’s important to allow your muscles adequate time to recover between workouts. Aim for 2-3 “Build Back and Biceps Body Beast” workouts per week, with at least one day of rest between sessions.

Read Also: Build a Booty Supplement.

What equipment do I need?

For the “Build Back and Biceps Body Beast” workout, you’ll need access to a barbell, lat pulldown machine, and dumbbells. If you don’t have access to a gym, you can modify the exercises using resistance bands or bodyweight exercises.

Read Also: Creatine for Bigger Booty.

How long will it take to see results?

The time it takes to see results can vary depending on factors such as your starting point, consistency with the workout and nutrition, and overall recovery. Most people can expect to see noticeable improvements in strength and muscle definition within 4-8 weeks of consistent training.

Read Also: Supplements for Booty Growth.

Can I modify the exercises for injury or mobility limitations?

Yes, you can modify the exercises to accommodate injuries or mobility limitations. For example, if you have shoulder issues, you can use a neutral grip during lat pulldowns or opt for seated cable rows instead of barbell rows. Always prioritize proper form and consult with a healthcare professional if you have any concerns.

Read Also: The Surprising Health Benefit of Celery Tea.

Conclusion

The Build Back and Biceps Body Beast workout is a game-changer for those seeking to build a stronger, more defined upper body. By incorporating proper form, a balanced nutrition plan, and adequate rest and recovery, you’ll be well on your way to unlocking your full potential and unleashing your inner beast. Remember, consistency is key, so stick with it, and watch as your back and biceps transform before your eyes. Get ready to dominate your fitness goals and take your physique to new heights with the Build Back and Biceps Body Beast workout!

Read Also: What Supplements Should I Take for a Bigger Booty?

Continue Reading

Trending