Exercise
B Bars Workout: A Total Body Transformation
![b bars workout](https://fitmusclee.com/wp-content/uploads/2023/10/strong-tattooed-white-unlabeled-tank-t-shirt-male-athlete-shows-calisthenic-moves-holding-tucked-planche-position-parallel-bars-1-min.jpg)
Here is your complete guide to b bars workout
Introduction to B Bars Workout
In the pursuit of a healthy and fit lifestyle, finding the right workout routine is paramount. B Bars Workout is a versatile and effective approach that has gained popularity in recent years, offering a unique set of exercises and benefits. In this comprehensive guide, we’ll delve into what B Bars Workout is all about, the science behind it, a range of exercises, and much more.
What is a B Bars Workout?
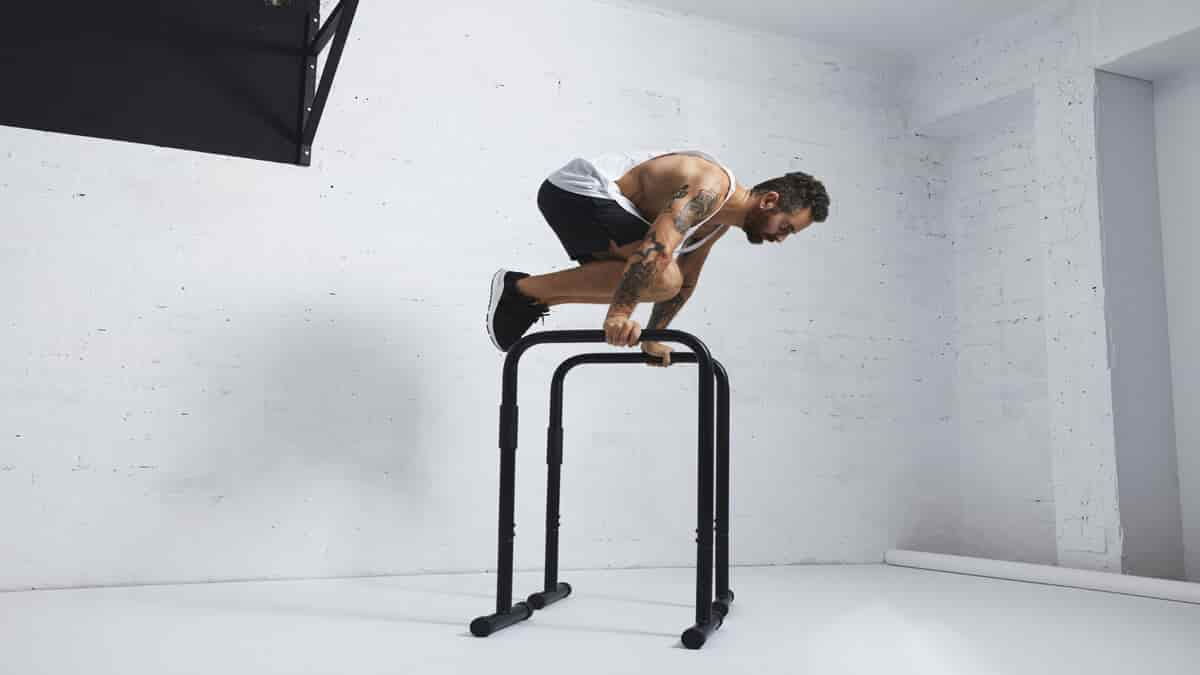
B Bars are a simple yet highly effective piece of workout equipment designed for a wide range of exercises. This fitness routine focuses on using B Bars to improve strength, flexibility, and overall body conditioning. So, what makes it stand out?
- Versatility: B Bars can be adapted for various workouts, making it suitable for beginners and seasoned fitness enthusiasts.
- Full-body Engagement: B Bars engage multiple muscle groups simultaneously, making your workout more efficient.
- Minimal Equipment: All you need is a pair of B Bars and some space, making it perfect for home workouts.
- Progressive Overload: B Bars allow for progressive overload, a key factor in building strength and endurance.
B Bars Workout Exercises
Let’s dive into the core of B Bars Workout – the exercises. Here are some essential moves that you can incorporate into your fitness routine:
Push-Ups with B Bars
- Place B Bars parallel to each other.
- Grip the bars and perform push-ups.
- Engages chest, triceps, and shoulders.
Dips
- Set the bars slightly wider than shoulder-width.
- Hold the bars and perform dip exercises.
- Works on triceps, chest, and shoulders.
L-Sit
- Sit between the bars and lift your legs.
- Core and triceps exercise.
Hanging Leg Raise
- Hang from the bars and raise your legs.
- Focuses on core and hip flexors.
Inverted Rows
- Lie under the bars, grip them, and pull yourself up.
- Strengthens the back and biceps.
How Much Time Does It Take for a Transformation with B Bars Workout?
Factors Influencing Your B Bars Workout Transformation
The timeline for a transformation with B Bars Workout can vary based on several factors:
- Starting Point: Your initial fitness level and muscle mass influence how quickly you see results.
- Consistency: Regular workouts and adherence to a workout schedule are crucial for a noticeable transformation.
- Diet: Proper nutrition and caloric intake play a significant role in shaping your body.
- Intensity: Higher-intensity workouts may yield quicker results, but they require a balanced approach to prevent overtraining.
- Genetics: Your genetic predisposition can affect the speed of your transformation.
- Goals: The magnitude of your transformation goals also determines how long it will take to achieve them.
Milestones in Your B Bars Workout Journey
1 Month: You may start to feel stronger, with improved endurance and muscle tone.
3 Months: Visible changes become more apparent, with increased muscle definition and better overall fitness.
6 Months: Significant improvements in strength, body composition, and flexibility are achievable at this stage.
1 Year: With consistent effort and dedication, you can achieve remarkable transformations, with well-defined muscles and enhanced physical performance.
Remember, every individual’s transformation timeline is unique, so patience and perseverance are key to reaching your B Bars Workout goals.
The Science Behind B Bars Workouts
Understanding the science behind a workout routine can be motivating. B Bars Workouts are no exception:
- Muscle Engagement: B Bars engage various muscle groups, leading to a balanced physique.
- Calorie Burning: The compound movements in B Bars Workout can help you burn calories efficiently.
- Joint Health: B Bars are gentle on the joints, making it accessible to people of all ages.
B Bars vs. Other Workout Equipment
Comparing B Bars with other popular workout equipment helps you appreciate its unique benefits:
- Dumbbells: B Bars engage more muscle groups, offering a full-body workout.
- Resistance Bands: B Bars provide more resistance and stability for strength-building exercises.
- Machines: B Bars are cost-effective, versatile, and ideal for home workouts.
Beginners’ Guide to B Bars Workout
If you’re new to B Bars Workout, here’s a beginner’s guide to get you started:
- Start Slow: Begin with basic exercises and gradually progress to more complex ones.
- Form Matters: Focus on proper form to prevent injuries and maximize results.
- Consistency is Key: Dedicate time to your B Bars Workout routine to see long-term benefits.
Advanced B Bars Workout Techniques
For those looking to take their fitness journey to the next level, advanced B Bars exercises await:
- One-Arm Push-Ups: A challenging variation of the standard push-up.
- Muscle-Ups: Combining a pull-up with a dip using B Bars.
- Handstand Push-Ups: A demanding exercise targeting the shoulders.
B Bars Workout Nutrition
While exercise is essential, diet plays a significant role in achieving your fitness goals. Proper nutrition can enhance your B Bars Workout results:
- Protein: Supports muscle recovery and growth.
- Carbohydrates: Provide energy for intense workouts.
- Hydration: Staying hydrated is crucial for performance.
Comparing B Bars Workout with Other Workouts
Aspect | B Bars Workout | Dumbbell Workout | Resistance Band Training | Machine Workouts |
---|---|---|---|---|
Equipment Needed | B Bars, minimal space | Dumbbells, bench | Resistance bands | Various gym machines |
Muscle Engagement | Engages multiple muscle groups | Primarily isolated muscles | Engages multiple muscles | Targeted muscles |
Versatility | Highly versatile | Versatile, but not as mobile | Versatile, portable | Limited to machine exercises |
Progressive Overload | Achievable | Achievable | Limited resistance progression | Fixed resistance |
Space Requirement | Minimal | Requires space for exercises | Minimal space needed | Requires gym equipment space |
Cost | Affordable | Affordable | Affordable | Varied (machines can be costly) |
Home-Friendly | Ideal for home workouts | Suitable for home workouts | Ideal for home workouts | Typically gym-based |
Benefits of B Bars Workout
The advantages of B Bars Workout extend beyond physical fitness:
- Enhanced Strength: B Bars improve strength and endurance.
- Flexibility: The range of motion in B Bars exercises increases flexibility.
- Mental Focus: Concentrating on form and balance enhances mental clarity.
B Bars Workout Accessories
To optimize your B Bars Workout, consider investing in these accessories:
- Gloves: Protect your hands during high-intensity exercises.
- Mats: Prevent slipping and provide cushioning.
- Ankle Weights: Add resistance to leg exercises.
- Resistance Bands: Combine with B Bars for additional resistance.
- B Bars Station: A dedicated workout station for convenience.
FAQs – Based on “People Also Ask”
Can I use B Bars at home?
Yes, B Bars are excellent for home workouts. They require minimal space and equipment.
Are B Bars suitable for beginners?
Absolutely! B Bars offer a range of exercises for all fitness levels.
What are the best exercises for building muscle with B Bars?
Dips, push-ups, and inverted rows are great for muscle building.
How can I avoid injury during B Bars Workout?
Proper form and gradual progression are essential to prevent injuries.
What is the best split for muscle growth?
The best split for muscle growth often depends on individual preferences and goals. However, a popular choice is the “Push-Pull-Legs” (PPL) split, which targets specific muscle groups on different days, allowing for adequate rest and recovery. Other effective splits include the “Upper-Lower Split” and “Full-Body Workouts” performed several times a week. The key is to find a split that aligns with your schedule and allows you to progressively increase resistance and volume to stimulate muscle growth.
What are bars in exercise?
In the context of exercise, “bars” can refer to different equipment, such as pull-up bars, dip bars, or even B Bars. Pull-up bars are used for performing pull-ups and chin-ups, targeting the back and biceps. Dip bars are ideal for exercises like dips, which work the triceps and chest. B Bars, as discussed in this article, are versatile fitness equipment used for various bodyweight exercises, providing a unique approach to strength training.
Is PPL the best split?
The PPL (Push-Pull-Legs) split is considered one of the best splits for many individuals seeking muscle growth and overall fitness. It provides a balanced approach, working on major muscle groups and allowing sufficient recovery time. However, whether it’s the “best” split depends on individual preferences, goals, and body types. Some people may find other splits, like the Upper-Lower split or Full-Body routines, to be more suitable for their needs.
How do you use weight bars?
Weight bars are typically used in strength training to add resistance to various exercises. Common types of weight bars include barbells and dumbbells. To use weight bars effectively:
- Select the appropriate weight: Choose the weight that suits your fitness level and exercise goals.
- Maintain proper form: Perform exercises with correct technique to prevent injury.
- Gradually increase resistance: As you become stronger, progressively add weight to challenge your muscles.
- Incorporate a variety of exercises: Weight bars can be used for a wide range of movements, such as squats, deadlifts, bench presses, curls, and more.
Is 5-day split good?
A 5-day split can be an effective workout routine for those looking to target specific muscle groups with greater intensity and volume. Common 5-day splits include training different muscle groups each day, such as chest, back, legs, shoulders, and arms. However, the suitability of a 5-day split depends on individual goals and schedules. It’s essential to ensure that you’re allowing enough time for rest and recovery between workouts to prevent overtraining.
What split do most bodybuilders do?
Many bodybuilders follow splits that target individual muscle groups to ensure thorough development. The “Bro-Split” is a common choice, where each day is dedicated to a specific muscle group (e.g., chest, back, legs, arms, and shoulders). Others prefer more balanced splits, such as the PPL (Push-Pull-Legs) split or Upper-Lower splits. The choice of split may vary among bodybuilders, depending on their preferences and goals.
Which gym schedule is best?
The best gym schedule depends on individual goals, fitness levels, and availability. Popular schedules include:
- 3-Day Full-Body Routine: Suitable for beginners or those with limited time.
- 4-5 Day Splits: Effective for targeted muscle development.
- 6-Day Splits: For advanced athletes focusing on specific muscle groups.
The “best” schedule is the one that aligns with your fitness goals and can be consistently maintained.
Is 4 days in the gym enough?
Four days in the gym can be sufficient for many individuals to make substantial progress in strength and fitness. It’s essential to structure these workouts effectively, focusing on compound exercises and ensuring adequate rest between muscle groups. The key is quality over quantity; it’s better to have productive workouts on fewer days than to spend more days at the gym with less intensity and purpose.
How many rest days a week?
The number of rest days needed varies from person to person. A general guideline is to have at least 1-2 full rest days a week. However, it’s essential to listen to your body. If you feel fatigued or experience muscle soreness, additional rest days may be necessary. Rest is crucial for muscle recovery and overall health.
Read Also: Carb Cycling Diets.
Is it OK to do the splits every day?
Performing intense splits (like the PPL or Bro-Split) every day may not be advisable, as it can lead to overtraining and increased risk of injury. It’s important to allow muscles to recover adequately. Instead, incorporate rest days or lighter workouts in between intense split workouts to promote recovery and avoid overexertion.
Read Also: Dumbbell Stress Ball Benefits.
How many reps to build muscle?
Building muscle is often optimized by incorporating a variety of rep ranges. For muscle growth, a common approach is to perform 6-12 repetitions per set. This range stimulates both muscle hypertrophy and strength. Including different rep ranges in your workout routine can help ensure well-rounded muscle development.
Read Also: Why is My Right Lat Bigger than My Left.
Is it enough to lift 4 days a week?
Lifting weights four days a week can be sufficient for many people to make progress in strength and muscle building. The key is to structure your workouts efficiently, focusing on compound exercises and providing adequate rest between muscle groups. Consistency and the quality of your workouts are more critical than the number of days spent in the gym.
Read Also: Bench Glute Workout.
How long should a workout be?
The ideal workout duration varies, but most effective workouts typically last 45 minutes to 1 hour. This time frame allows for an efficient workout, targeting specific muscle groups, and maintaining intensity. However, shorter, high-intensity workouts or longer sessions for advanced athletes are also valid, depending on individual goals and preferences.
Read Also: Not Feeling Lats in Lat Pulldown.
How to bulk up?
Bulking up involves gaining muscle and size through a structured approach:
- Caloric Surplus: Consume more calories than you burn to support muscle growth.
- Protein-Rich Diet: Ensure an adequate protein intake to repair and build muscle.
- Strength Training: Focus on compound exercises with progressive overload.
- Adequate Rest: Allow muscles to recover and grow during rest periods.
- Consistency: Stick to your training and nutrition plan over an extended period.
Read Also: Dumbbell Supinating Curl.
Which split is best for cutting?
When cutting (losing body fat while maintaining muscle), the goal is often to maintain strength and muscle mass. Splits like the PPL or Upper-Lower are popular choices. They allow you to continue resistance training while incorporating cardio and a calorie deficit into your routine. The key is to monitor your progress and adjust your workouts and nutrition as needed during the cutting phase.
Read Also: Detoxifying Breakfast Recipes.
Can B Bars help with weight loss?
B Bars can aid weight loss by burning calories and improving overall fitness.
Read Also: Shred Meals.
Conclusion
B Bars Workout is an exciting and versatile fitness routine that can help you achieve your fitness goals efficiently. Whether you’re a beginner looking to kickstart your fitness journey or an advanced athlete seeking a new challenge, B Bars Workout has something to offer. With the right equipment and dedication, you can unlock your full potential and experience a healthier, fitter you.
Read Also: Tricep Pushdown Machine Workouts.
Remember, consistency is key. Make B Bars Workout a part of your daily routine, and you’ll witness remarkable improvements in strength, flexibility, and overall well-being.
Read Also: Best Trap Exercises Dumbbells.
Exercise
Does Creatine Help Grow Glutes? Proven Methods Inside
![does creatine help grow glutes](https://fitmusclee.com/wp-content/uploads/2024/07/pexels-yankrukov-8436703-min.jpg)
Here is your complete guide to does creatine help grow glutes.
Introduction to Does Creatine Help Grow Glutes
Does creatine help grow glutes? Creatine is a well-known supplement in the fitness community, celebrated for its ability to enhance muscle growth and improve athletic performance. However, with the rising interest in developing a stronger and more defined posterior, many individuals are asking: does creatine help grow glutes? In this article, we will explore the science behind creatine, its effects on muscle growth, and specifically its role in glute development.
What is Creatine?
Creatine is a naturally occurring compound found in small amounts in certain foods and synthesized in the body from amino acids. It is primarily stored in skeletal muscle and plays a vital role in energy production, particularly during high-intensity exercise.
Key Facts About Creatine
Fact | Details |
---|---|
Chemical Structure | A compound made from three amino acids: arginine, glycine, and methionine. |
Sources | Found in red meat, fish, and dairy products. |
Forms | Available as creatine monohydrate, ethyl ester, and buffered creatine. |
Function | Increases ATP production, enhancing energy availability during workouts. |
Creatine and Muscle Growth
One of the primary benefits of creatine supplementation is its ability to increase the availability of adenosine triphosphate (ATP), the energy currency of the cell. During high-intensity workouts, ATP is rapidly consumed, and creatine helps replenish it, allowing for sustained performance.
- Increased ATP Availability: Creatine enhances the regeneration of ATP, enabling you to perform more repetitions or lift heavier weights.
- Improved Performance: Enhanced energy production can lead to better workout performance, which is crucial for muscle growth.
Creatine and Protein Synthesis
Creatine not only improves energy production but also plays a role in protein synthesis, a critical process for muscle repair and growth. Research indicates that creatine supplementation can stimulate pathways involved in muscle protein synthesis, leading to greater muscle hypertrophy.
- Muscle Recovery: By promoting protein synthesis, creatine aids in muscle recovery after intense workouts.
- Enhanced Muscle Growth: Increased protein synthesis contributes to greater muscle mass over time.
Creatine and Cell Hydration
Creatine has a unique property of drawing water into muscle cells, a phenomenon known as cell volumization. This increased hydration can lead to:
- Fuller Muscles: Hydrated muscle cells appear larger and more defined.
- Improved Muscle Function: Hydration is essential for optimal muscle function and performance.
Creatine and Glute Growth
While creatine can benefit all muscle groups, it is particularly effective for glute growth when combined with targeted exercises. Some of the most effective glute exercises include:
- Squats: Engages the entire lower body, particularly the glutes.
- Lunges: Targets the gluteus maximus and medius.
- Hip Thrusts: Specifically isolates the glutes for maximum activation.
- Deadlifts: Engages the posterior chain, including the glutes.
Exercise | Muscle Groups Targeted | Benefits |
---|---|---|
Squats | Quadriceps, Hamstrings, Glutes | Builds overall lower body strength |
Lunges | Glutes, Quadriceps, Hamstrings | Improves balance and coordination |
Hip Thrusts | Glutes, Hamstrings | Maximizes glute activation |
Deadlifts | Glutes, Hamstrings, Lower Back | Strengthens posterior chain |
Creatine and Glute Muscle Fiber Composition
The glute muscles consist of both fast-twitch and slow-twitch muscle fibers. Creatine supplementation is particularly effective for enhancing the size and strength of fast-twitch fibers, which are responsible for generating power and explosiveness.
- Fast-Twitch Fibers: These fibers are more responsive to creatine, leading to greater strength gains.
- Muscle Definition: Increased fast-twitch fiber size contributes to a more muscular and defined appearance.
Creatine and Gender Differences
Research suggests that there may be differences in how men and women respond to creatine supplementation. Some studies indicate that women may experience greater relative gains in lean muscle mass compared to men when taking creatine.
- Hormonal Factors: Hormonal differences may influence how each gender responds to creatine.
- Muscle Composition: Women generally have a higher percentage of slow-twitch fibers, which may affect the overall response to creatine.
How Much Creatine to Take to Help Grow Glutes
When considering supplements for muscle growth, particularly for enhancing the glutes, creatine is a popular choice. Understanding the appropriate dosage and method of supplementation is crucial for maximizing its benefits. This guide explores how much creatine to take to help grow glutes effectively.
Recommended Dosage of Creatine
There are two primary methods for taking creatine: the loading phase and the non-loading phase. Each method has its benefits, and the choice depends on your personal goals and timeline.
Loading Phase
The loading phase involves a higher initial intake of creatine to saturate the muscles quickly. Here’s how it works:
- Dosage: 20 grams of creatine per day.
- Duration: 5-7 days.
- Administration: Split into four doses of 5 grams throughout the day to minimize potential stomach discomfort.
This method allows for rapid saturation of creatine stores in the muscles, which can lead to quicker results in terms of strength and muscle growth.
Non-Loading Phase
The non-loading phase is a more gradual approach that some individuals prefer. Here’s how it functions:
- Dosage: 3-5 grams of creatine per day.
- Duration: Continuous, until optimal muscle saturation is achieved (approximately 28 days).
This method avoids the initial high dosage and is often easier on the stomach. It still effectively increases muscle creatine levels over time.
Summary of Dosage Methods
Method | Daily Dosage | Duration | Notes |
---|---|---|---|
Loading Phase | 20 grams | 5-7 days | Split into four doses to reduce discomfort. |
Non-Loading Phase | 3-5 grams | Ongoing | Takes longer to saturate muscles but is gentler. |
Timing of Creatine Intake
While the exact timing of creatine supplementation may not significantly impact its effectiveness, some users prefer to take it around their workouts. Here are some considerations:
- Post-Workout: Taking creatine after training may enhance recovery and muscle repair.
- Convenience: Choose a time that fits your routine best. Consistency is more important than timing.
Additional Tips for Maximizing Glute Growth with Creatine
To enhance the effectiveness of creatine for glute growth, consider the following strategies:
- Combine with Resistance Training: Focus on glute-targeted exercises such as squats, lunges, and hip thrusts. Creatine can help you lift heavier and perform more repetitions, promoting greater muscle stress and growth.
- Stay Hydrated: Creatine draws water into muscle cells, so it’s essential to drink plenty of fluids to avoid dehydration and ensure optimal muscle function.
- Nutrition Matters: Ensure a balanced diet rich in protein, carbohydrates, and healthy fats to support muscle growth and recovery.
Realistic Expectations and Considerations
It’s essential to understand that no supplement, including creatine, can specifically target fat loss or muscle growth in a particular area of the body. The body operates as a whole, and achieving significant glute growth requires a comprehensive approach.
- Holistic Approach: Focus on overall body composition and strength training.
- Fat Loss: Reducing body fat through diet and exercise will enhance glute definition.
Patience and Consistency
Building significant muscle, including in the glutes, takes time and consistent effort. Creatine can be a valuable addition to a muscle-building routine, but it is not a magic solution.
- Gradual Improvements: Expect to see changes over several weeks or months.
- Consistency is Key: Regular training and supplementation are crucial for success.
Proper Dosage and Hydration
To maximize the benefits of creatine, it’s vital to follow proper dosage guidelines and maintain adequate hydration.
- Loading Phase: Many experts recommend starting with a loading phase of 20-25 grams per day for 5-7 days.
- Maintenance Phase: Follow with a maintenance dose of 2-5 grams per day.
Phase | Dosage | Duration |
---|---|---|
Loading Phase | 20-25 grams per day | 5-7 days |
Maintenance Phase | 2-5 grams per day | Ongoing |
Incorporating Creatine into Your Fitness Plan
For optimal results, consider the timing of your creatine supplementation. Taking creatine around your workout can help maximize its benefits.
- Pre-Workout: Taking creatine 30-60 minutes before your workout can enhance performance.
- Post-Workout: Consuming creatine after your workout can aid in recovery.
Creatine and Nutrition
Creatine supplementation is most effective when combined with a balanced diet that supports muscle growth. Here are some nutritional tips:
- Protein Intake: Ensure adequate protein consumption to support muscle repair and growth.
- Carbohydrates: Include complex carbohydrates to provide energy for workouts.
- Healthy Fats: Incorporate healthy fats to support overall health and hormone production.
Nutrient | Recommended Intake | Sources |
---|---|---|
Protein | 1.6-2.2 grams per kg body weight | Chicken, fish, eggs, legumes |
Carbohydrates | 3-7 grams per kg body weight | Whole grains, fruits, vegetables |
Healthy Fats | 20-35% of total calories | Avocados, nuts, olive oil |
Read Also: Quad Exercises Dumbbells.
FAQs About Does Creatine Help Grow Glutes
Can creatine help build bigger glutes?
Yes, creatine can help build bigger glutes when combined with targeted glute exercises and proper nutrition. Creatine enhances energy production, protein synthesis, and muscle hydration, contributing to overall muscle growth, including in the glutes.
Read Also: Quad Machine.
How long does it take to see glute growth with creatine?
Building significant muscle, including in the glutes, takes time and consistent effort. Expect to see gradual improvements over several weeks or months of consistent supplementation and training.
Read Also: Free Weight Exercises for Quadriceps.
Is creatine safe for women?
Yes, creatine is generally considered safe for women when taken at the recommended dosage. Some studies suggest that women may experience greater relative gains in lean muscle mass compared to men when supplementing with creatine.
Read Also: Overhead Squat WOD.
Can creatine cause weight gain?
Creatine can cause a temporary increase in weight due to water retention in the muscles. This is a normal and expected response to creatine supplementation and does not necessarily indicate fat gain.
Read Also: Front Squat Program.
What are the best exercises to do with creatine for glute growth?
Exercises like squats, lunges, hip thrusts, and deadlifts are particularly effective for glute growth when combined with creatine supplementation. These exercises place significant stress on the glute muscles, and creatine can enhance performance and recovery during these workouts.
Read Also: 31 Day Squat Challenge.
Conclusion
In conclusion, creatine can be a valuable addition to a glute-focused training program. It enhances energy production, protein synthesis, and muscle hydration, all of which contribute to muscle growth. However, it is crucial to understand that creatine alone cannot specifically target or “spot grow” the glutes. Achieving significant glute growth requires a comprehensive approach that includes targeted exercises, proper nutrition, and consistent training over time.
Read Also: The Surprising Health Benefit of Celery Tea.
By incorporating creatine into your fitness plan, following proper dosage guidelines, and maintaining a balanced diet, you can optimize your glute growth potential. Remember to be patient and consistent in your efforts, as building muscle takes time and dedication.
Read Also: Does Creatine Cause Gyno?
Exercise
31 Day Squat Challenge to Build Strength
![31 day squat challenge](https://fitmusclee.com/wp-content/uploads/2024/07/pexels-olly-3775566-min.jpg)
Here is your complete guide to 31 day squat challenge.
Introduction to 31 Day Squat Challenge
Are you ready to take your fitness to the next level? The 31 day squat challenge is an exciting and effective way to improve your strength, endurance, and overall fitness. This challenge is not just about squats; it’s about building a healthier lifestyle and achieving your personal fitness goals.In this article, we will explore the 31 day squat challenge in detail, including its benefits, how to prepare, a day-by-day breakdown, proper techniques, variations, nutrition, and recovery tips. By the end, you’ll be equipped with everything you need to embark on this journey and achieve remarkable results.
What is a 31 Day Squat Challenge?
The 31 day squat challenge is a structured program designed to gradually increase the number of squats you perform each day over the course of a month. This challenge is suitable for individuals of all fitness levels, from beginners to advanced athletes.
Benefits of Doing a 31 Day Squat Challenge
- Increased Strength: Squats target multiple muscle groups, including the quadriceps, hamstrings, glutes, and core.
- Improved Endurance: Regular squatting enhances stamina and overall fitness.
- Enhanced Flexibility: Squats promote better flexibility in the hips, knees, and ankles.
- Boosted Metabolism: Engaging large muscle groups helps increase calorie burn.
- Better Posture: Strengthening the core and lower body can lead to improved posture.
How to Get Started with a 31 Day Squat Challenge
To successfully complete the 31 day squat challenge, follow these steps:
- Assess Your Fitness Level: Determine how many squats you can comfortably perform.
- Set Realistic Goals: Aim for achievable milestones throughout the challenge.
- Create a Plan of Action: Schedule your workouts and stick to them.
- Gather Necessary Equipment: While bodyweight squats are effective, consider using weights for added resistance.
- Schedule Your Workouts: Consistency is key. Choose a time that works best for you.
Preparing for the Challenge
Before diving into the 31 day squat challenge, it’s essential to prepare adequately. Here are some tips:
Assessing Your Current Fitness Level
- Test Your Squats: Perform as many squats as you can in one minute. This will help gauge your starting point.
- Identify Strengths and Weaknesses: Recognize areas where you excel and those that need improvement.
Setting Realistic Goals
- Short-Term Goals: Aim to increase your squat count weekly.
- Long-Term Goals: Consider how you want to feel at the end of the challenge.
Creating a Plan of Action
- Daily Schedule: Decide when you’ll perform your squats each day.
- Incorporate Rest Days: Allow your muscles to recover.
Gathering Necessary Equipment
Equipment | Purpose |
---|---|
Yoga Mat | Provides comfort during floor exercises |
Dumbbells | Adds resistance for advanced squats |
Resistance Bands | Enhances strength training |
Foam Roller | Aids in recovery and muscle relaxation |
Scheduling Your Workouts
- Morning vs. Evening: Choose a time that fits your lifestyle.
- Consistency: Stick to your schedule for the best results.
The 31 Day Squat Challenge
The heart of the 31 day squat challenge is the daily progression of squat repetitions. Below is a detailed breakdown of what to expect each week.
Day 1-7: Beginner Level (25 Squats Per Day)
- Day 1: 25 bodyweight squats
- Day 2: 25 bodyweight squats
- Day 3: 25 bodyweight squats
- Day 4: 25 bodyweight squats
- Day 5: 25 bodyweight squats
- Day 6: 25 bodyweight squats
- Day 7: 25 bodyweight squats
Day 8-14: Intermediate Level (50 Squats Per Day)
- Day 8: 50 bodyweight squats
- Day 9: 50 bodyweight squats
- Day 10: 50 bodyweight squats
- Day 11: 50 bodyweight squats
- Day 12: 50 bodyweight squats
- Day 13: 50 bodyweight squats
- Day 14: 50 bodyweight squats
Day 15-21: Advanced Level (75 Squats Per Day)
- Day 15: 75 bodyweight squats
- Day 16: 75 bodyweight squats
- Day 17: 75 bodyweight squats
- Day 18: 75 bodyweight squats
- Day 19: 75 bodyweight squats
- Day 20: 75 bodyweight squats
- Day 21: 75 bodyweight squats
Day 22-28: Expert Level (100 Squats Per Day)
- Day 22: 100 bodyweight squats
- Day 23: 100 bodyweight squats
- Day 24: 100 bodyweight squats
- Day 25: 100 bodyweight squats
- Day 26: 100 bodyweight squats
- Day 27: 100 bodyweight squats
- Day 28: 100 bodyweight squats
Day 29-31: Maintenance Level (75 Squats Per Day)
- Day 29: 75 bodyweight squats
- Day 30: 75 bodyweight squats
- Day 31: 75 bodyweight squats
Proper Squat Technique
To maximize the benefits of the 31 day squat challenge, it’s crucial to perform squats with proper form. Here’s how:
- Feet Shoulder-Width Apart: Position your feet so they are aligned with your shoulders.
- Toes Slightly Turned Out: This helps with balance and stability.
- Chest Up, Shoulders Back: Maintain an upright posture to protect your back.
- Engage Core: Tighten your abdominal muscles to support your spine.
- Sit Back and Down: Imagine sitting in a chair, pushing your hips back.
- Knees Tracking Over Toes: Ensure your knees don’t extend past your toes.
- Depth of Squat: Aim to lower your hips below your knees for maximum effectiveness.
- Breathing Pattern: Inhale as you lower down, exhale as you push back up.
Proper Squat Form
Component | Description |
---|---|
Feet Position | Shoulder-width apart, toes slightly out |
Back Position | Straight, chest up |
Core Engagement | Tighten abdominal muscles |
Knee Alignment | Knees should not pass toes |
Depth | Lower hips below knees |
Breathing | Inhale down, exhale up |
Squat Variations
To keep your workouts interesting and challenging, consider incorporating different squat variations. Here are some effective options:
- Bodyweight Squats: The basic squat, great for beginners.
- Goblet Squats: Hold a dumbbell or kettlebell at chest level to add resistance.
- Sumo Squats: Wider stance to target inner thighs.
- Pistol Squats: A challenging single-leg squat for advanced athletes.
- Overhead Squats: Hold a weight overhead to engage the core and improve stability.
- Jump Squats: Add a jump at the top of the squat for a cardio boost.
Squat Variations
Variation | Benefits |
---|---|
Bodyweight Squats | Great for beginners |
Goblet Squats | Adds resistance, engages core |
Sumo Squats | Targets inner thighs |
Pistol Squats | Improves balance and strength |
Overhead Squats | Enhances core stability |
Jump Squats | Boosts cardio and explosiveness |
Nutrition and Recovery
Proper nutrition and recovery are essential components of the 31 day squat challenge. Here’s how to optimize both:
Importance of Proper Nutrition
- Balanced Diet: Focus on whole foods, including lean proteins, healthy fats, and complex carbohydrates.
- Pre-Workout Fuel: Consume a light snack rich in carbohydrates and protein before workouts.
- Post-Workout Recovery: Eat a meal high in protein and carbohydrates to aid muscle recovery.
Protein Intake for Muscle Recovery
- Aim for 1.2 to 2.0 grams of protein per kilogram of body weight, depending on your activity level.
- Include sources like chicken, fish, beans, and legumes.
Hydration and Its Benefits
- Drink plenty of water before, during, and after workouts.
- Consider electrolyte drinks for intense sessions.
Stretching and Mobility Exercises
- Incorporate stretching routines to improve flexibility and prevent injuries.
- Focus on hip flexors, quadriceps, hamstrings, and calves.
Rest and Recovery Days
- Schedule at least one rest day per week.
- Listen to your body; if you feel fatigued, take additional rest.
Nutrition and Recovery
Aspect | Recommendations |
---|---|
Balanced Diet | Whole foods, lean proteins, healthy fats |
Pre-Workout Fuel | Light snack with carbs and protein |
Post-Workout Meal | High in protein and carbohydrates |
Protein Intake | 1.2 to 2.0 g/kg of body weight |
Hydration | Plenty of water, consider electrolytes |
Stretching | Focus on major muscle groups |
Rest Days | At least one per week |
Frequently Asked Questions About 31 Day Squat Challenge
Can I do the challenge every day?
Yes, the 31 day squat challenge is designed for daily practice, but it’s essential to listen to your body and take rest days as needed.
Read Also: Quad Exercises Dumbbells.
What if I miss a day?
If you miss a day, don’t be discouraged. Simply continue from where you left off. Consistency is key.
Read Also: Quad Machine.
Can I modify the challenge?
Absolutely! Adjust the number of squats based on your fitness level and comfort.
Read Also: Free Weight Exercises for Quadriceps.
How long should I rest between sets?
Rest for 30-60 seconds between sets, depending on your fitness level and how you feel.
Read Also: CrossFit Back Exercises.
Can I combine the challenge with other workouts?
Yes, you can integrate the 31 day squat challenge with other strength or cardio workouts, but ensure you allow for adequate recovery.
Read Also: Overhead Squat WOD.
Conclusion
The 31 day squat challenge is more than just a fitness program; it’s a commitment to improving your strength, endurance, and overall well-being. By following the guidelines outlined in this article, you can embark on a transformative journey that not only enhances your physical fitness but also boosts your confidence and motivation.
Read Also: The Surprising Health Benefit of Celery Tea.
Celebrate your progress, stay consistent, and encourage others to join you in this challenge. Remember, every squat brings you one step closer to your goals. Let’s get started on this exciting journey together! This comprehensive guide to the 31 day squat challenge is designed to inspire and equip you with the knowledge you need to succeed. Whether you’re a beginner or an experienced athlete, this challenge can be tailored to your fitness level, helping you achieve remarkable results. Happy squatting!
Read Also: Front Squat Program.
Exercise
Front Squat Program for Strength
![front squat program](https://fitmusclee.com/wp-content/uploads/2024/07/pexels-binyaminmellish-116078-min-1.jpg)
Here is your complete guide to front squat program.
Introduction to Front Squat Program
Let’s explore the best front squat program. Front squats are a powerhouse exercise that can significantly enhance your strength training routine. Whether you’re a seasoned athlete or a beginner looking to improve your fitness, incorporating a front squat program into your regimen can yield impressive results. This exercise not only targets major muscle groups but also promotes better posture, core stability, and overall athletic performance.
In this article, we will explore the intricacies of a front squat program, including its benefits, proper technique, and how to create an effective training plan. By the end, you’ll have all the tools necessary to elevate your front squat game and achieve your fitness goals.
Understanding the Front Squat
The front squat is a variation of the traditional squat where the barbell is positioned on the front of your shoulders, rather than across your back. This unique positioning shifts the center of gravity, requiring greater core engagement and balance.
Muscles Targeted
The front squat primarily targets the following muscle groups:
- Quadriceps: The main muscles responsible for extending your knees.
- Hamstrings: Assist in stabilizing the movement and flexing the knees.
- Glutes: Critical for hip extension and overall power.
- Core: Engaged throughout the lift to maintain stability and posture.
Comparison with Other Squats
Aspect | Front Squat | Back Squat |
---|---|---|
Bar Position | Front of shoulders | Across upper back |
Muscle Emphasis | Quadriceps and core | Hamstrings and glutes |
Posture Requirement | Upright torso | More forward lean |
Load Capacity | Generally lower than back squat | Higher load capacity |
Core Engagement | Higher due to upright position | Moderate |
Understanding these differences can help you choose the right squat variation for your training goals.
Creating a Front Squat Program
Before diving into a front squat program, it’s crucial to assess your current fitness level. Here are some steps to help you gauge your readiness:
- Mobility Assessment: Check your ankle, hip, and thoracic spine mobility. Poor mobility can hinder your squat depth and form.
- Strength Assessment: Perform a bodyweight squat to evaluate your technique and strength. If you struggle with form, consider focusing on bodyweight squats or lighter weights before progressing.
Program Structure
A well-structured front squat program should include the following components:
- Frequency: Aim to train front squats 2-3 times per week, allowing sufficient recovery between sessions.
- Volume: Start with 3-4 sets of 6-8 reps, adjusting based on your experience and goals.
- Progression: Gradually increase the weight as you become more comfortable with the movement. Aim for a 5-10% increase in weight every 2-3 weeks.
Sample 4-Week Front Squat Program
Here’s a sample program to get you started:
Week | Day 1 (Heavy) | Day 2 (Volume) | Day 3 (Technique) |
---|---|---|---|
1 | 4×6 @ 70% 1RM | 4×8 @ 65% 1RM | 4×5 @ 60% 1RM |
2 | 4×5 @ 75% 1RM | 4×7 @ 70% 1RM | 4×4 @ 65% 1RM |
3 | 4×4 @ 80% 1RM | 4×6 @ 75% 1RM | 4×3 @ 70% 1RM |
4 | 4×3 @ 85% 1RM | 4×5 @ 80% 1RM | 4×2 @ 75% 1RM |
Key Points for Each Training Day
- Day 1 (Heavy): Focus on lifting heavier weights with fewer reps. This day is about building strength.
- Day 2 (Volume): Increase the number of reps with moderate weights. This helps build endurance and muscle hypertrophy.
- Day 3 (Technique): Concentrate on form and technique with lighter weights. This is crucial for preventing injuries and improving overall performance.
Technique and Form
Executing a front squat with proper form is essential for maximizing benefits and minimizing injury risk. Follow these steps:
- Setup: Stand with your feet shoulder-width apart. Position the barbell across the front of your shoulders, using a clean grip or crossed-arm grip.
- Brace Your Core: Engage your core muscles to maintain stability throughout the lift.
- Squat Down: Initiate the squat by bending at the hips and knees, keeping your torso upright and chest lifted.
- Depth: Aim to squat down until your thighs are at least parallel to the ground. Deeper squats can be beneficial if your mobility allows.
- Ascent: Push through your heels to return to the starting position, ensuring your knees track over your toes.
Common Mistakes to Avoid
- Leaning Forward: Keep your torso upright to avoid excessive strain on your back.
- Knees Caving In: Ensure your knees track in line with your toes to prevent injury.
- Not Engaging the Core: A strong core is vital for maintaining proper posture and balance.
Tips for Improving Form
- Mobility Exercises: Incorporate stretches and mobility drills for your hips, ankles, and thoracic spine.
- Video Analysis: Record your squats to identify areas for improvement.
- Practice with Lighter Weights: Focus on form before increasing the load.
Accessory Exercises
Incorporating accessory exercises into your training can help improve your front squat performance. Here are some effective options:
- Lunges: Target the quads and glutes while enhancing balance and stability.
- Deadlifts: Strengthen the posterior chain, which is crucial for overall squat performance.
- Core Exercises: Planks, Russian twists, and hanging leg raises can help build core strength, supporting your front squat technique.
Sample Accessory Exercise Routine
Exercise | Sets | Reps |
---|---|---|
Lunges | 3 | 10-12 |
Deadlifts | 3 | 6-8 |
Planks | 3 | 30-60 seconds |
Russian Twists | 3 | 15-20 per side |
Nutrition for Optimal Performance
Nutrition plays a crucial role in your strength training journey. Here are some tips to optimize your diet for a front squat program:
- Macronutrient Ratios: Aim for a balanced intake of carbohydrates, proteins, and fats. A common ratio is 40% carbs, 30% protein, and 30% fats.
- Protein Sources: Include lean meats, fish, eggs, dairy, legumes, and plant-based proteins to support muscle recovery and growth.
- Carbohydrate Timing: Consume complex carbohydrates before and after workouts to fuel your performance and aid recovery.
Hydration Tips
- Stay Hydrated: Drink plenty of water throughout the day, especially before and after workouts.
- Electrolyte Balance: Consider electrolyte drinks during intense training sessions to maintain hydration levels.
Should You Contact a Coach for a Front Squat Program or Can You Do It Yourself?
When it comes to strength training, particularly with complex movements like the front squat, many individuals find themselves at a crossroads: Should they seek the guidance of a coach or attempt to develop their own program? This article explores both options, weighing the benefits of professional coaching against the possibility of self-directed training.
Benefits of Working with a Coach
One of the primary advantages of hiring a coach is their expertise in strength training and biomechanics. A qualified coach can provide:
- Personalized Programming: Coaches can tailor a front squat program to your specific needs, goals, and fitness level. They can adjust the volume, intensity, and frequency based on your progress and any limitations you may have.
- Technique Correction: Proper form is crucial for maximizing gains and preventing injuries. A coach can observe your technique in real-time and provide immediate feedback, helping you avoid common mistakes such as caving elbows or improper squat depth.
Accountability and Motivation
Having a coach can significantly enhance your motivation and accountability. With a coach, you are more likely to:
- Stay Committed: Scheduled sessions create a sense of responsibility, encouraging you to stick to your training plan.
- Push Your Limits: Coaches can challenge you to lift heavier weights or try new techniques that you might shy away from when training alone.
When You Might Consider Training Yourself
If you have a solid understanding of strength training principles and access to reliable resources, you may feel confident in developing your own front squat program. Here are some reasons why self-training could be a viable option:
- Cost-Effective: Training on your own eliminates the financial burden of hiring a coach, allowing you to allocate those funds toward gym memberships or equipment.
- Flexibility: You can design your training schedule around your lifestyle, making it easier to fit workouts into your day without the constraints of a coach’s availability.
Learning Through Experience
Training yourself can also provide valuable learning experiences:
- Self-Discovery: You will learn to listen to your body and understand what works best for you, which can enhance your overall training experience.
- Adaptability: You can experiment with different techniques, rep ranges, and accessory exercises without the need for approval or guidance, allowing for a more personalized approach.
Key Considerations for Self-Training
If you decide to go the self-training route, keep these considerations in mind to ensure a successful front squat program:
Assess Your Current Level
Before starting, evaluate your current strength and mobility. This assessment will help you determine the appropriate starting weight and volume for your front squat program.
Prioritize Technique
Focus on mastering the proper technique before increasing weights. Resources such as instructional videos, articles, and online forums can provide valuable insights into correct form and common pitfalls.
Incorporate Progress Tracking
Keep a training log to track your progress. Documenting your lifts, sets, and reps can help you identify patterns and make necessary adjustments to your program.
Ultimately, the decision to work with a coach or train yourself for a front squat program depends on your individual circumstances, goals, and preferences. If you’re new to strength training or struggle with technique, seeking a coach’s guidance can be invaluable. On the other hand, if you have experience and feel confident in your ability to self-manage your training, you can successfully develop a program on your own.
Common Challenges and Solutions
While training for front squats, you may encounter some challenges. Here are common issues and their solutions:
- Lack of Mobility: If you struggle with depth, incorporate mobility exercises such as hip openers and ankle stretches into your routine.
- Discomfort During the Lift: Experiment with different grip styles (clean grip vs. crossed-arm grip) to find what feels most comfortable.
- Mental Barriers: Fear of heavy lifting can be daunting. Start with lighter weights and gradually increase as your confidence builds.
Solutions and Tips
- Stretching Routines: Dedicate time to stretching before and after workouts to improve flexibility and reduce soreness.
- Mental Strategies: Visualization techniques can help you mentally prepare for lifting heavier weights.
Read Also: Keto Vegetarian Breakfast.
FAQs About Front Squat Program
What is the best way to start a front squat program?
Begin by assessing your fitness level, focusing on mobility and form. Start with bodyweight squats and gradually introduce weights as you become more comfortable.
Read Also: Salmon Breakfast Recipes.
How often should I do front squats?
Aim for 2-3 times per week, allowing for recovery days in between sessions to prevent overtraining.
Read Also: Quad Exercises Dumbbells.
Can beginners perform front squats?
Yes! Beginners can start with bodyweight squats or light weights to master the technique before progressing to heavier loads.
Read Also: Quad Machine.
What are the benefits of front squats compared to back squats?
Front squats emphasize the quadriceps and core, promote better posture, and reduce strain on the lower back compared to back squats.
Read Also: Free Weight Exercises for Quadriceps.
How can I prevent injuries while doing front squats?
Focus on proper form, gradually increase weights, and incorporate mobility work to enhance flexibility and prevent injuries.
Read Also: CrossFit Back Exercises.
Conclusion
Incorporating a front squat program into your training can lead to significant improvements in strength, power, and overall fitness. By understanding the mechanics, following a structured program, and maintaining proper nutrition, you can maximize your results and enjoy the numerous benefits of this essential exercise.
Read Also: The Surprising Health Benefit of Celery Tea.
Now that you have the knowledge and tools to embark on your front squat journey, it’s time to hit the gym and start squatting! Remember, consistency and dedication are key to achieving your fitness goals. Happy squatting!
Read Also: Overhead Squat WOD.
-
Nutrition1 year ago
Dates Eating Benefits: Here Is Your Complete Guide
-
Fitness1 year ago
Abs Workout for Beginner: Your Ultimate Guide!
-
Exercise1 year ago
Best Exercises For Bicep: Your Complete Guide
-
Fitness1 year ago
How Many Calories in a Potato? Nutrition Facts
-
Exercise1 year ago
Warmup for Back Workout: Your Complete Guide
-
fitness diet1 year ago
Fast Food That’s Gluten Free: Your Complete Guide
-
Nutrition1 year ago
Nutrition Facts Of Strawberries: Your Ultimate Guide
-
fitness diet1 year ago
Effects of Sugar in the Body? Your Complete Guide