Exercise
Compound vs Isolated Exercise: The Ultimate Guide
Here is your complete guide to compound vs isolated exercise
Introduction to Compound vs Isolated Exercise
When it comes to designing an effective workout routine, exercise selection plays a crucial role in achieving your fitness goals. Two popular categories of exercises that often come into focus are compound exercises and isolated exercises. Understanding the differences and benefits of each can significantly impact your workout results. In this comprehensive guide, we’ll dive deep into the world of compound and isolated exercises, exploring their unique advantages and how to strike the right balance between the two for an optimal workout routine. So what you need to know about the compound vs isolated exercise. Why the compound vs isolated exercise is so important. Here is your complete guide to the difference between compound vs isolated exercise. So let’s explore step by step the compound vs isolated exercise. So what is compound vs isolated exercise?
Benefits of Compound Exercises
Compound exercises are multi-joint movements that engage multiple muscle groups simultaneously. They provide numerous advantages that make them an essential component of any workout routine.
Firstly, compound exercises are highly efficient in terms of time. Since they target multiple muscle groups at once, you can work on your strength, endurance, and coordination in a single movement. Exercises like squats, deadlifts, bench press, and pull-ups are excellent examples of compound exercises that activate various muscles throughout the body.
In addition to saving time, compound exercises also promote functional strength and coordination. By mimicking real-life movements, they enhance your ability to perform everyday tasks with ease. Whether you’re lifting heavy objects or participating in sports, the increased overall strength and coordination gained from compound exercises prove invaluable.
Moreover, compound exercises boost your metabolic rate and promote calorie burn. As multiple muscles are engaged simultaneously, more energy is required to perform these movements, leading to an increased calorie expenditure. This aspect makes compound exercises a great choice for individuals aiming to lose weight or improve their body composition.
Examples of Compound Exercises
Let’s explore some popular compound exercises that you can incorporate into your workout routine:
Squats

This exercise primarily targets the lower body, engaging muscles like the quadriceps, hamstrings, and glutes. It also recruits core muscles for stability and balance.
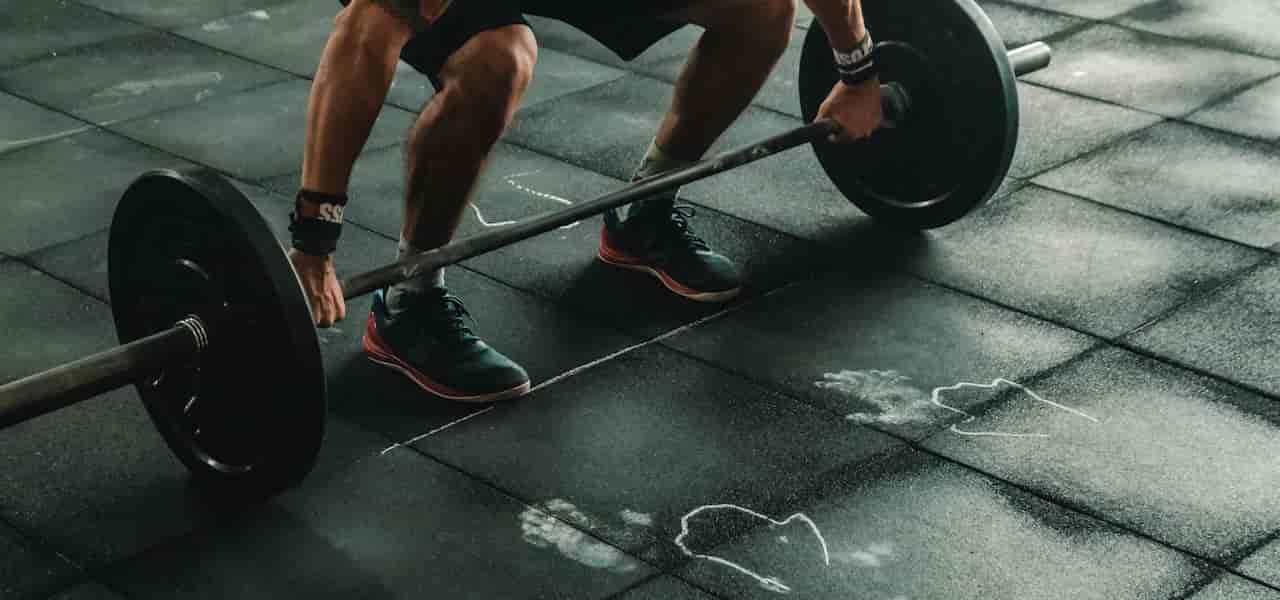
Deadlifts
Deadlifts work the entire posterior chain, including the glutes, hamstrings, lower back, and upper back. They are fantastic for building overall strength and improving posture.
Bench Press
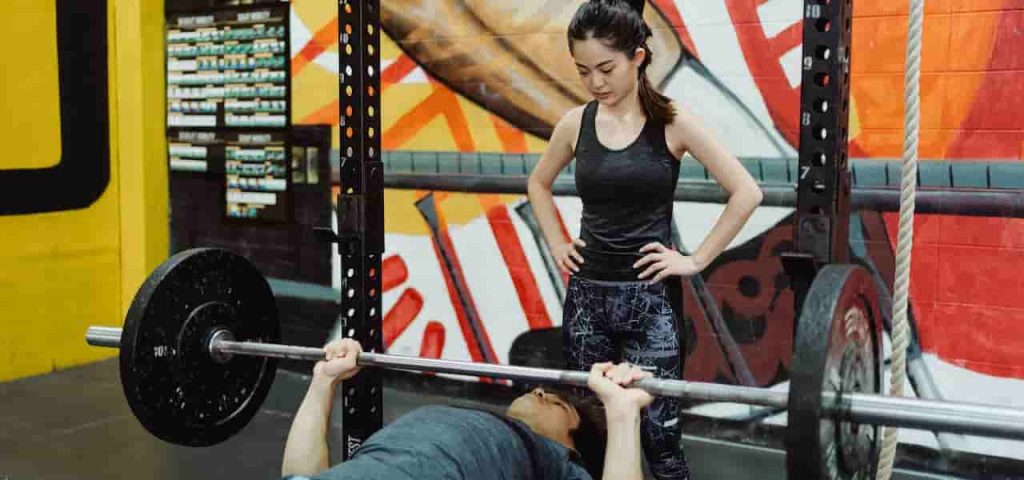
This compound exercise primarily targets the chest, shoulders, and triceps. It also engages stabilizer muscles in the core and upper back.
Pull-Ups
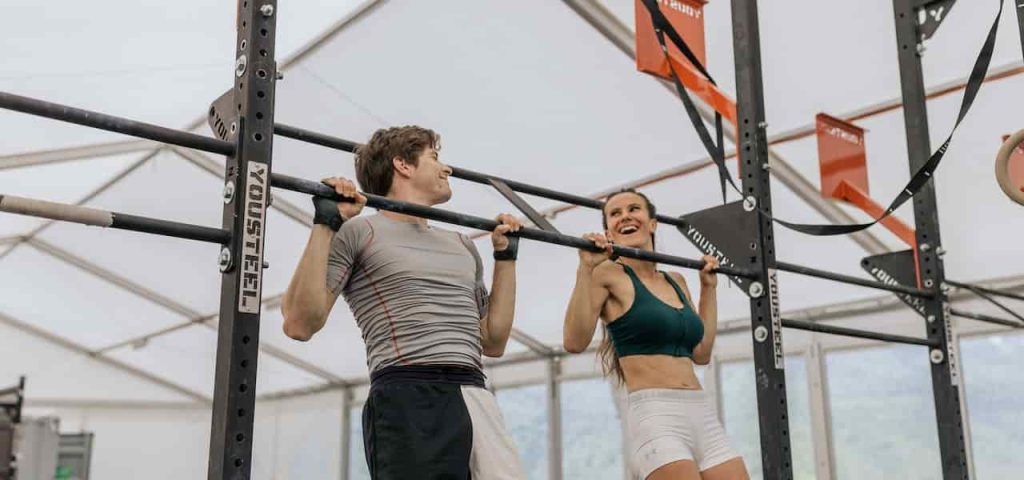
Pull-ups activate a wide range of upper body muscles, including the back, biceps, and shoulders. They are highly effective for building upper body strength and improving grip strength.
How Isolated Exercises Target Specific Muscles
While compound exercises offer numerous benefits, isolated exercises shouldn’t be overlooked. Isolated exercises focus on targeting specific muscle groups, allowing you to address weaknesses, improve muscle definition, and enhance muscular endurance.
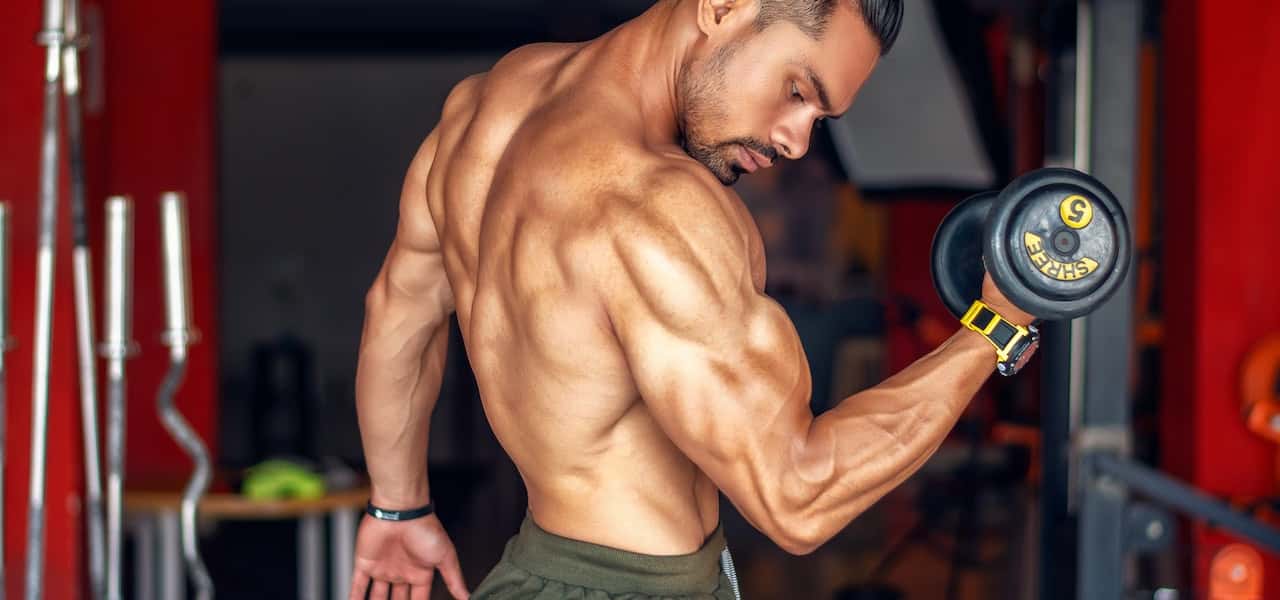
Isolated exercises involve single-joint movements and isolate a particular muscle or muscle group. They are beneficial for individuals looking to strengthen specific areas or achieve more balanced muscle development. For instance, bicep curls, tricep extensions, and calf raises are common examples of isolated exercises.
Advantages of Isolated Exercises
Target Specific Muscle Groups
Isolated exercises enable you to target specific muscles or muscle groups that may require additional attention. This specificity allows you to address muscular imbalances or weaknesses and bring them up to par with the rest of your physique.
Improve Muscle Definition and Symmetry
By isolating specific muscles, you can focus on enhancing their definition and symmetry. This is particularly useful for bodybuilders and individuals aiming for aesthetic goals.
Enhance Muscular Endurance and Stabilization
Isolated exercises help improve muscle endurance and stabilization by isolating and fatiguing specific muscles. This can be beneficial for athletes or individuals involved in sports that require repetitive and specific muscle movements.
Assist in Injury Rehabilitation
Isolated exercises are often prescribed during injury rehabilitation to strengthen specific muscles or regain strength in a targeted area. They allow for controlled and gradual progression, aiding in the recovery process and minimizing the risk of reinjury.
Considerations for Exercise Selection
When deciding between compound and isolated exercises, it’s important to consider several factors that can help you make the most informed choices for your workout routine.
Fitness Goals and Priorities
Clearly define your fitness goals, whether it’s building overall strength, increasing muscle mass, improving athletic performance, or targeting specific areas for aesthetic purposes. This will guide your exercise selection process.
Training Experience and Skill Level
Beginners may benefit from starting with compound exercises to develop a strong foundation of overall strength and coordination. As you progress, you can gradually incorporate isolated exercises to address specific areas or weaknesses.
Time Constraints and Workout Preferences
Consider the time you have available for your workouts and your personal preferences. Compound exercises are time-efficient and suitable for those with limited time. However, if you enjoy the mind-muscle connection and focus of isolated exercises, you can allocate time accordingly.
Differences Between Compound and Isolated Exercises
| Compound Exercises | Isolated Exercises | |
|---|---|---|
| Definition | Multi-joint movements that engage multiple muscle groups | Single-joint movements that isolate specific muscles |
| Muscle Groups | Engages multiple muscle groups simultaneously | Targets specific muscles or muscle groups |
| Efficiency | Time-efficient, work on strength, endurance, coordination | Time-consuming, focus on specific muscle groups |
| Functional | Promote functional strength and coordination | Enhance muscle definition and symmetry |
| Calorie Burn | Boost metabolic rate, burn more calories | Moderate calorie burn |
| Strength | Build overall strength and power | Target specific muscle strength and endurance |
| Coordination | Improve overall coordination and balance | Less emphasis on coordination |
| Muscle Growth | Stimulate muscle growth in multiple areas | Target specific muscles for hypertrophy |
| Fat Loss | High calorie expenditure, promote fat burning | Moderate calorie burn |
| Injury Rehab | Assist in injury rehabilitation | May be beneficial for targeted rehab exercises |
| Workout Order | Often performed at the beginning of the workout | Often performed after compound exercises |
This table provides a quick overview of the differences between compound exercises and isolated exercises. It highlights their definitions, muscle groups targeted, efficiency, functional benefits, calorie burn, strength development, coordination enhancement, muscle growth stimulation, fat loss potential, injury rehabilitation benefits, and suggested workout order. Remember that the effectiveness of exercises may vary based on individual goals and preferences.
Balancing Compound and Isolated Exercises
The key to an effective workout routine is striking a balance between compound and isolated exercises. Incorporating both types of exercises can provide a comprehensive approach to fitness and yield optimal results.
Begin your workout with compound exercises that engage multiple muscle groups and promote overall strength and coordination. This helps maximize calorie burn and build a solid foundation. As you progress, add isolated exercises to target specific muscles or areas that require extra attention.
Here’s an example of a well-rounded workout routine that combines compound and isolated exercises:
- Squats (Compound)
- Sets: 3
- Reps: 8-10
- Rest: 60 seconds
- Bench Press (Compound)
- Sets: 3
- Reps: 8-10
- Rest: 60 seconds
- Lat Pulldowns (Compound)
- Sets: 3
- Reps: 8-10
- Rest: 60 seconds
- Bicep Curls (Isolated)
- Sets: 3
- Reps: 10-12
- Rest: 45 seconds
- Tricep Extensions (Isolated)
- Sets: 3
- Reps: 10-12
- Rest: 45 seconds
- Lunges (Compound)
- Sets: 3
- Reps: 10-12
- Rest: 60 seconds
Remember, this is just a sample routine, and you should tailor your workout to your specific goals and preferences. Consult with a fitness professional to create a personalized program.
Read More About Healthy Recipes with Eggs.
Frequently Asked Questions (FAQs) About Compound vs Isolated Exercise
Is it better to do compound exercises or isolation?
Both compound exercises and isolation exercises have their own benefits, and the choice between the two depends on your specific goals and preferences. Compound exercises are excellent for overall strength, coordination, and efficiency, as they engage multiple muscle groups simultaneously. They are especially beneficial for beginners or individuals with limited time for workouts. On the other hand, isolation exercises allow you to target specific muscles or areas that require extra attention, helping to enhance muscle definition, address weaknesses, and improve symmetry. For a well-rounded workout routine, it’s recommended to incorporate a combination of compound and isolation exercises.
Read More About Chia Seed is Good for What?
Is compound or isolation better for muscle growth?
When it comes to muscle growth, both compound and isolation exercises play important roles. Compound exercises are highly effective for building overall muscle mass and strength because they engage multiple muscle groups, allowing you to lift heavier weights and stimulate a greater hormonal response. They create a strong foundation for muscle growth. Isolation exercises, on the other hand, are valuable for targeting specific muscles and achieving more refined muscle definition. By isolating and fatiguing individual muscles, you can focus on hypertrophy (muscle growth) in those specific areas. To maximize muscle growth, it’s recommended to incorporate compound exercises for overall strength and mass, while using isolation exercises to target specific muscle groups and achieve balanced development.
Read More About What is The Benefit of Papaya.
Are compound or isolation exercises better for fat loss?
Both compound and isolation exercises can contribute to fat loss, but compound exercises tend to be more effective in this regard. Compound exercises engage multiple muscle groups and require more energy expenditure, leading to a higher calorie burn during and after the workout. They also stimulate the release of growth hormone and testosterone, which can enhance fat loss. Additionally, compound exercises help improve overall strength and increase muscle mass, which raises your metabolic rate and promotes fat burning even at rest. However, it’s important to note that fat loss ultimately depends on creating a calorie deficit through a combination of exercise and a balanced diet. Incorporating both compound and isolation exercises into your workout routine can provide a well-rounded approach to fat loss.
Read More About Do Saunas Help to Lose Weight?
Should I do compound or isolation exercises first?
The order in which you perform compound and isolation exercises can vary based on your goals and preferences. However, it’s generally recommended to prioritize compound exercises at the beginning of your workout. Compound exercises require more energy, recruit multiple muscle groups, and often involve lifting heavier weights. By performing them first, when your energy levels are highest, you can give them the focus and effort they require. Additionally, compound exercises activate the central nervous system, priming your body for the workout ahead. After completing compound exercises, you can move on to isolation exercises, targeting specific muscles or areas to further enhance muscle development and definition. Remember to always warm up properly before any workout, regardless of the exercise order.
Here is your complete guide to does creatine help grow glutes.
Introduction to Does Creatine Help Grow Glutes
Does creatine help grow glutes? Creatine is a well-known supplement in the fitness community, celebrated for its ability to enhance muscle growth and improve athletic performance. However, with the rising interest in developing a stronger and more defined posterior, many individuals are asking: does creatine help grow glutes? In this article, we will explore the science behind creatine, its effects on muscle growth, and specifically its role in glute development.
What is Creatine?
Creatine is a naturally occurring compound found in small amounts in certain foods and synthesized in the body from amino acids. It is primarily stored in skeletal muscle and plays a vital role in energy production, particularly during high-intensity exercise.
Key Facts About Creatine
| Fact | Details |
|---|---|
| Chemical Structure | A compound made from three amino acids: arginine, glycine, and methionine. |
| Sources | Found in red meat, fish, and dairy products. |
| Forms | Available as creatine monohydrate, ethyl ester, and buffered creatine. |
| Function | Increases ATP production, enhancing energy availability during workouts. |
Creatine and Muscle Growth
One of the primary benefits of creatine supplementation is its ability to increase the availability of adenosine triphosphate (ATP), the energy currency of the cell. During high-intensity workouts, ATP is rapidly consumed, and creatine helps replenish it, allowing for sustained performance.
- Increased ATP Availability: Creatine enhances the regeneration of ATP, enabling you to perform more repetitions or lift heavier weights.
- Improved Performance: Enhanced energy production can lead to better workout performance, which is crucial for muscle growth.
Creatine and Protein Synthesis
Creatine not only improves energy production but also plays a role in protein synthesis, a critical process for muscle repair and growth. Research indicates that creatine supplementation can stimulate pathways involved in muscle protein synthesis, leading to greater muscle hypertrophy.
- Muscle Recovery: By promoting protein synthesis, creatine aids in muscle recovery after intense workouts.
- Enhanced Muscle Growth: Increased protein synthesis contributes to greater muscle mass over time.
Creatine and Cell Hydration
Creatine has a unique property of drawing water into muscle cells, a phenomenon known as cell volumization. This increased hydration can lead to:
- Fuller Muscles: Hydrated muscle cells appear larger and more defined.
- Improved Muscle Function: Hydration is essential for optimal muscle function and performance.
Creatine and Glute Growth
While creatine can benefit all muscle groups, it is particularly effective for glute growth when combined with targeted exercises. Some of the most effective glute exercises include:
- Squats: Engages the entire lower body, particularly the glutes.
- Lunges: Targets the gluteus maximus and medius.
- Hip Thrusts: Specifically isolates the glutes for maximum activation.
- Deadlifts: Engages the posterior chain, including the glutes.
| Exercise | Muscle Groups Targeted | Benefits |
|---|---|---|
| Squats | Quadriceps, Hamstrings, Glutes | Builds overall lower body strength |
| Lunges | Glutes, Quadriceps, Hamstrings | Improves balance and coordination |
| Hip Thrusts | Glutes, Hamstrings | Maximizes glute activation |
| Deadlifts | Glutes, Hamstrings, Lower Back | Strengthens posterior chain |
Creatine and Glute Muscle Fiber Composition
The glute muscles consist of both fast-twitch and slow-twitch muscle fibers. Creatine supplementation is particularly effective for enhancing the size and strength of fast-twitch fibers, which are responsible for generating power and explosiveness.
- Fast-Twitch Fibers: These fibers are more responsive to creatine, leading to greater strength gains.
- Muscle Definition: Increased fast-twitch fiber size contributes to a more muscular and defined appearance.
Creatine and Gender Differences
Research suggests that there may be differences in how men and women respond to creatine supplementation. Some studies indicate that women may experience greater relative gains in lean muscle mass compared to men when taking creatine.
- Hormonal Factors: Hormonal differences may influence how each gender responds to creatine.
- Muscle Composition: Women generally have a higher percentage of slow-twitch fibers, which may affect the overall response to creatine.
How Much Creatine to Take to Help Grow Glutes
When considering supplements for muscle growth, particularly for enhancing the glutes, creatine is a popular choice. Understanding the appropriate dosage and method of supplementation is crucial for maximizing its benefits. This guide explores how much creatine to take to help grow glutes effectively.
Recommended Dosage of Creatine
There are two primary methods for taking creatine: the loading phase and the non-loading phase. Each method has its benefits, and the choice depends on your personal goals and timeline.
Loading Phase
The loading phase involves a higher initial intake of creatine to saturate the muscles quickly. Here’s how it works:
- Dosage: 20 grams of creatine per day.
- Duration: 5-7 days.
- Administration: Split into four doses of 5 grams throughout the day to minimize potential stomach discomfort.
This method allows for rapid saturation of creatine stores in the muscles, which can lead to quicker results in terms of strength and muscle growth.
Non-Loading Phase
The non-loading phase is a more gradual approach that some individuals prefer. Here’s how it functions:
- Dosage: 3-5 grams of creatine per day.
- Duration: Continuous, until optimal muscle saturation is achieved (approximately 28 days).
This method avoids the initial high dosage and is often easier on the stomach. It still effectively increases muscle creatine levels over time.
Summary of Dosage Methods
| Method | Daily Dosage | Duration | Notes |
|---|---|---|---|
| Loading Phase | 20 grams | 5-7 days | Split into four doses to reduce discomfort. |
| Non-Loading Phase | 3-5 grams | Ongoing | Takes longer to saturate muscles but is gentler. |
Timing of Creatine Intake
While the exact timing of creatine supplementation may not significantly impact its effectiveness, some users prefer to take it around their workouts. Here are some considerations:
- Post-Workout: Taking creatine after training may enhance recovery and muscle repair.
- Convenience: Choose a time that fits your routine best. Consistency is more important than timing.
Additional Tips for Maximizing Glute Growth with Creatine
To enhance the effectiveness of creatine for glute growth, consider the following strategies:
- Combine with Resistance Training: Focus on glute-targeted exercises such as squats, lunges, and hip thrusts. Creatine can help you lift heavier and perform more repetitions, promoting greater muscle stress and growth.
- Stay Hydrated: Creatine draws water into muscle cells, so it’s essential to drink plenty of fluids to avoid dehydration and ensure optimal muscle function.
- Nutrition Matters: Ensure a balanced diet rich in protein, carbohydrates, and healthy fats to support muscle growth and recovery.
Realistic Expectations and Considerations
It’s essential to understand that no supplement, including creatine, can specifically target fat loss or muscle growth in a particular area of the body. The body operates as a whole, and achieving significant glute growth requires a comprehensive approach.
- Holistic Approach: Focus on overall body composition and strength training.
- Fat Loss: Reducing body fat through diet and exercise will enhance glute definition.
Patience and Consistency
Building significant muscle, including in the glutes, takes time and consistent effort. Creatine can be a valuable addition to a muscle-building routine, but it is not a magic solution.
- Gradual Improvements: Expect to see changes over several weeks or months.
- Consistency is Key: Regular training and supplementation are crucial for success.
Proper Dosage and Hydration
To maximize the benefits of creatine, it’s vital to follow proper dosage guidelines and maintain adequate hydration.
- Loading Phase: Many experts recommend starting with a loading phase of 20-25 grams per day for 5-7 days.
- Maintenance Phase: Follow with a maintenance dose of 2-5 grams per day.
| Phase | Dosage | Duration |
|---|---|---|
| Loading Phase | 20-25 grams per day | 5-7 days |
| Maintenance Phase | 2-5 grams per day | Ongoing |
Incorporating Creatine into Your Fitness Plan
For optimal results, consider the timing of your creatine supplementation. Taking creatine around your workout can help maximize its benefits.
- Pre-Workout: Taking creatine 30-60 minutes before your workout can enhance performance.
- Post-Workout: Consuming creatine after your workout can aid in recovery.
Creatine and Nutrition
Creatine supplementation is most effective when combined with a balanced diet that supports muscle growth. Here are some nutritional tips:
- Protein Intake: Ensure adequate protein consumption to support muscle repair and growth.
- Carbohydrates: Include complex carbohydrates to provide energy for workouts.
- Healthy Fats: Incorporate healthy fats to support overall health and hormone production.
| Nutrient | Recommended Intake | Sources |
|---|---|---|
| Protein | 1.6-2.2 grams per kg body weight | Chicken, fish, eggs, legumes |
| Carbohydrates | 3-7 grams per kg body weight | Whole grains, fruits, vegetables |
| Healthy Fats | 20-35% of total calories | Avocados, nuts, olive oil |
Read Also: Quad Exercises Dumbbells.
FAQs About Does Creatine Help Grow Glutes
Can creatine help build bigger glutes?
Yes, creatine can help build bigger glutes when combined with targeted glute exercises and proper nutrition. Creatine enhances energy production, protein synthesis, and muscle hydration, contributing to overall muscle growth, including in the glutes.
Read Also: Quad Machine.
How long does it take to see glute growth with creatine?
Building significant muscle, including in the glutes, takes time and consistent effort. Expect to see gradual improvements over several weeks or months of consistent supplementation and training.
Read Also: Free Weight Exercises for Quadriceps.
Is creatine safe for women?
Yes, creatine is generally considered safe for women when taken at the recommended dosage. Some studies suggest that women may experience greater relative gains in lean muscle mass compared to men when supplementing with creatine.
Read Also: Overhead Squat WOD.
Can creatine cause weight gain?
Creatine can cause a temporary increase in weight due to water retention in the muscles. This is a normal and expected response to creatine supplementation and does not necessarily indicate fat gain.
Read Also: Front Squat Program.
What are the best exercises to do with creatine for glute growth?
Exercises like squats, lunges, hip thrusts, and deadlifts are particularly effective for glute growth when combined with creatine supplementation. These exercises place significant stress on the glute muscles, and creatine can enhance performance and recovery during these workouts.
Read Also: 31 Day Squat Challenge.
Conclusion
In conclusion, creatine can be a valuable addition to a glute-focused training program. It enhances energy production, protein synthesis, and muscle hydration, all of which contribute to muscle growth. However, it is crucial to understand that creatine alone cannot specifically target or “spot grow” the glutes. Achieving significant glute growth requires a comprehensive approach that includes targeted exercises, proper nutrition, and consistent training over time.
Read Also: The Surprising Health Benefit of Celery Tea.
By incorporating creatine into your fitness plan, following proper dosage guidelines, and maintaining a balanced diet, you can optimize your glute growth potential. Remember to be patient and consistent in your efforts, as building muscle takes time and dedication.
Read Also: Does Creatine Cause Gyno?

Here is your complete guide to 31 day squat challenge.
Introduction to 31 Day Squat Challenge
Are you ready to take your fitness to the next level? The 31 day squat challenge is an exciting and effective way to improve your strength, endurance, and overall fitness. This challenge is not just about squats; it’s about building a healthier lifestyle and achieving your personal fitness goals.In this article, we will explore the 31 day squat challenge in detail, including its benefits, how to prepare, a day-by-day breakdown, proper techniques, variations, nutrition, and recovery tips. By the end, you’ll be equipped with everything you need to embark on this journey and achieve remarkable results.
What is a 31 Day Squat Challenge?
The 31 day squat challenge is a structured program designed to gradually increase the number of squats you perform each day over the course of a month. This challenge is suitable for individuals of all fitness levels, from beginners to advanced athletes.
Benefits of Doing a 31 Day Squat Challenge
- Increased Strength: Squats target multiple muscle groups, including the quadriceps, hamstrings, glutes, and core.
- Improved Endurance: Regular squatting enhances stamina and overall fitness.
- Enhanced Flexibility: Squats promote better flexibility in the hips, knees, and ankles.
- Boosted Metabolism: Engaging large muscle groups helps increase calorie burn.
- Better Posture: Strengthening the core and lower body can lead to improved posture.
How to Get Started with a 31 Day Squat Challenge
To successfully complete the 31 day squat challenge, follow these steps:
- Assess Your Fitness Level: Determine how many squats you can comfortably perform.
- Set Realistic Goals: Aim for achievable milestones throughout the challenge.
- Create a Plan of Action: Schedule your workouts and stick to them.
- Gather Necessary Equipment: While bodyweight squats are effective, consider using weights for added resistance.
- Schedule Your Workouts: Consistency is key. Choose a time that works best for you.
Preparing for the Challenge
Before diving into the 31 day squat challenge, it’s essential to prepare adequately. Here are some tips:
Assessing Your Current Fitness Level
- Test Your Squats: Perform as many squats as you can in one minute. This will help gauge your starting point.
- Identify Strengths and Weaknesses: Recognize areas where you excel and those that need improvement.
Setting Realistic Goals
- Short-Term Goals: Aim to increase your squat count weekly.
- Long-Term Goals: Consider how you want to feel at the end of the challenge.
Creating a Plan of Action
- Daily Schedule: Decide when you’ll perform your squats each day.
- Incorporate Rest Days: Allow your muscles to recover.
Gathering Necessary Equipment
| Equipment | Purpose |
|---|---|
| Yoga Mat | Provides comfort during floor exercises |
| Dumbbells | Adds resistance for advanced squats |
| Resistance Bands | Enhances strength training |
| Foam Roller | Aids in recovery and muscle relaxation |
Scheduling Your Workouts
- Morning vs. Evening: Choose a time that fits your lifestyle.
- Consistency: Stick to your schedule for the best results.
The 31 Day Squat Challenge
The heart of the 31 day squat challenge is the daily progression of squat repetitions. Below is a detailed breakdown of what to expect each week.
Day 1-7: Beginner Level (25 Squats Per Day)
- Day 1: 25 bodyweight squats
- Day 2: 25 bodyweight squats
- Day 3: 25 bodyweight squats
- Day 4: 25 bodyweight squats
- Day 5: 25 bodyweight squats
- Day 6: 25 bodyweight squats
- Day 7: 25 bodyweight squats
Day 8-14: Intermediate Level (50 Squats Per Day)
- Day 8: 50 bodyweight squats
- Day 9: 50 bodyweight squats
- Day 10: 50 bodyweight squats
- Day 11: 50 bodyweight squats
- Day 12: 50 bodyweight squats
- Day 13: 50 bodyweight squats
- Day 14: 50 bodyweight squats
Day 15-21: Advanced Level (75 Squats Per Day)
- Day 15: 75 bodyweight squats
- Day 16: 75 bodyweight squats
- Day 17: 75 bodyweight squats
- Day 18: 75 bodyweight squats
- Day 19: 75 bodyweight squats
- Day 20: 75 bodyweight squats
- Day 21: 75 bodyweight squats
Day 22-28: Expert Level (100 Squats Per Day)
- Day 22: 100 bodyweight squats
- Day 23: 100 bodyweight squats
- Day 24: 100 bodyweight squats
- Day 25: 100 bodyweight squats
- Day 26: 100 bodyweight squats
- Day 27: 100 bodyweight squats
- Day 28: 100 bodyweight squats
Day 29-31: Maintenance Level (75 Squats Per Day)
- Day 29: 75 bodyweight squats
- Day 30: 75 bodyweight squats
- Day 31: 75 bodyweight squats
Proper Squat Technique
To maximize the benefits of the 31 day squat challenge, it’s crucial to perform squats with proper form. Here’s how:
- Feet Shoulder-Width Apart: Position your feet so they are aligned with your shoulders.
- Toes Slightly Turned Out: This helps with balance and stability.
- Chest Up, Shoulders Back: Maintain an upright posture to protect your back.
- Engage Core: Tighten your abdominal muscles to support your spine.
- Sit Back and Down: Imagine sitting in a chair, pushing your hips back.
- Knees Tracking Over Toes: Ensure your knees don’t extend past your toes.
- Depth of Squat: Aim to lower your hips below your knees for maximum effectiveness.
- Breathing Pattern: Inhale as you lower down, exhale as you push back up.
Proper Squat Form
| Component | Description |
|---|---|
| Feet Position | Shoulder-width apart, toes slightly out |
| Back Position | Straight, chest up |
| Core Engagement | Tighten abdominal muscles |
| Knee Alignment | Knees should not pass toes |
| Depth | Lower hips below knees |
| Breathing | Inhale down, exhale up |
Squat Variations
To keep your workouts interesting and challenging, consider incorporating different squat variations. Here are some effective options:
- Bodyweight Squats: The basic squat, great for beginners.
- Goblet Squats: Hold a dumbbell or kettlebell at chest level to add resistance.
- Sumo Squats: Wider stance to target inner thighs.
- Pistol Squats: A challenging single-leg squat for advanced athletes.
- Overhead Squats: Hold a weight overhead to engage the core and improve stability.
- Jump Squats: Add a jump at the top of the squat for a cardio boost.
Squat Variations
| Variation | Benefits |
|---|---|
| Bodyweight Squats | Great for beginners |
| Goblet Squats | Adds resistance, engages core |
| Sumo Squats | Targets inner thighs |
| Pistol Squats | Improves balance and strength |
| Overhead Squats | Enhances core stability |
| Jump Squats | Boosts cardio and explosiveness |
Nutrition and Recovery
Proper nutrition and recovery are essential components of the 31 day squat challenge. Here’s how to optimize both:
Importance of Proper Nutrition
- Balanced Diet: Focus on whole foods, including lean proteins, healthy fats, and complex carbohydrates.
- Pre-Workout Fuel: Consume a light snack rich in carbohydrates and protein before workouts.
- Post-Workout Recovery: Eat a meal high in protein and carbohydrates to aid muscle recovery.
Protein Intake for Muscle Recovery
- Aim for 1.2 to 2.0 grams of protein per kilogram of body weight, depending on your activity level.
- Include sources like chicken, fish, beans, and legumes.
Hydration and Its Benefits
- Drink plenty of water before, during, and after workouts.
- Consider electrolyte drinks for intense sessions.
Stretching and Mobility Exercises
- Incorporate stretching routines to improve flexibility and prevent injuries.
- Focus on hip flexors, quadriceps, hamstrings, and calves.
Rest and Recovery Days
- Schedule at least one rest day per week.
- Listen to your body; if you feel fatigued, take additional rest.
Nutrition and Recovery
| Aspect | Recommendations |
|---|---|
| Balanced Diet | Whole foods, lean proteins, healthy fats |
| Pre-Workout Fuel | Light snack with carbs and protein |
| Post-Workout Meal | High in protein and carbohydrates |
| Protein Intake | 1.2 to 2.0 g/kg of body weight |
| Hydration | Plenty of water, consider electrolytes |
| Stretching | Focus on major muscle groups |
| Rest Days | At least one per week |
Frequently Asked Questions About 31 Day Squat Challenge
Can I do the challenge every day?
Yes, the 31 day squat challenge is designed for daily practice, but it’s essential to listen to your body and take rest days as needed.
Read Also: Quad Exercises Dumbbells.
What if I miss a day?
If you miss a day, don’t be discouraged. Simply continue from where you left off. Consistency is key.
Read Also: Quad Machine.
Can I modify the challenge?
Absolutely! Adjust the number of squats based on your fitness level and comfort.
Read Also: Free Weight Exercises for Quadriceps.
How long should I rest between sets?
Rest for 30-60 seconds between sets, depending on your fitness level and how you feel.
Read Also: CrossFit Back Exercises.
Can I combine the challenge with other workouts?
Yes, you can integrate the 31 day squat challenge with other strength or cardio workouts, but ensure you allow for adequate recovery.
Read Also: Overhead Squat WOD.
Conclusion
The 31 day squat challenge is more than just a fitness program; it’s a commitment to improving your strength, endurance, and overall well-being. By following the guidelines outlined in this article, you can embark on a transformative journey that not only enhances your physical fitness but also boosts your confidence and motivation.
Read Also: The Surprising Health Benefit of Celery Tea.
Celebrate your progress, stay consistent, and encourage others to join you in this challenge. Remember, every squat brings you one step closer to your goals. Let’s get started on this exciting journey together! This comprehensive guide to the 31 day squat challenge is designed to inspire and equip you with the knowledge you need to succeed. Whether you’re a beginner or an experienced athlete, this challenge can be tailored to your fitness level, helping you achieve remarkable results. Happy squatting!
Read Also: Front Squat Program.
Here is your complete guide to front squat program.
Introduction to Front Squat Program
Let’s explore the best front squat program. Front squats are a powerhouse exercise that can significantly enhance your strength training routine. Whether you’re a seasoned athlete or a beginner looking to improve your fitness, incorporating a front squat program into your regimen can yield impressive results. This exercise not only targets major muscle groups but also promotes better posture, core stability, and overall athletic performance.
In this article, we will explore the intricacies of a front squat program, including its benefits, proper technique, and how to create an effective training plan. By the end, you’ll have all the tools necessary to elevate your front squat game and achieve your fitness goals.
Understanding the Front Squat
The front squat is a variation of the traditional squat where the barbell is positioned on the front of your shoulders, rather than across your back. This unique positioning shifts the center of gravity, requiring greater core engagement and balance.
Muscles Targeted
The front squat primarily targets the following muscle groups:
- Quadriceps: The main muscles responsible for extending your knees.
- Hamstrings: Assist in stabilizing the movement and flexing the knees.
- Glutes: Critical for hip extension and overall power.
- Core: Engaged throughout the lift to maintain stability and posture.
Comparison with Other Squats
| Aspect | Front Squat | Back Squat |
|---|---|---|
| Bar Position | Front of shoulders | Across upper back |
| Muscle Emphasis | Quadriceps and core | Hamstrings and glutes |
| Posture Requirement | Upright torso | More forward lean |
| Load Capacity | Generally lower than back squat | Higher load capacity |
| Core Engagement | Higher due to upright position | Moderate |
Understanding these differences can help you choose the right squat variation for your training goals.
Creating a Front Squat Program
Before diving into a front squat program, it’s crucial to assess your current fitness level. Here are some steps to help you gauge your readiness:
- Mobility Assessment: Check your ankle, hip, and thoracic spine mobility. Poor mobility can hinder your squat depth and form.
- Strength Assessment: Perform a bodyweight squat to evaluate your technique and strength. If you struggle with form, consider focusing on bodyweight squats or lighter weights before progressing.
Program Structure
A well-structured front squat program should include the following components:
- Frequency: Aim to train front squats 2-3 times per week, allowing sufficient recovery between sessions.
- Volume: Start with 3-4 sets of 6-8 reps, adjusting based on your experience and goals.
- Progression: Gradually increase the weight as you become more comfortable with the movement. Aim for a 5-10% increase in weight every 2-3 weeks.
Sample 4-Week Front Squat Program
Here’s a sample program to get you started:
| Week | Day 1 (Heavy) | Day 2 (Volume) | Day 3 (Technique) |
|---|---|---|---|
| 1 | 4×6 @ 70% 1RM | 4×8 @ 65% 1RM | 4×5 @ 60% 1RM |
| 2 | 4×5 @ 75% 1RM | 4×7 @ 70% 1RM | 4×4 @ 65% 1RM |
| 3 | 4×4 @ 80% 1RM | 4×6 @ 75% 1RM | 4×3 @ 70% 1RM |
| 4 | 4×3 @ 85% 1RM | 4×5 @ 80% 1RM | 4×2 @ 75% 1RM |
Key Points for Each Training Day
- Day 1 (Heavy): Focus on lifting heavier weights with fewer reps. This day is about building strength.
- Day 2 (Volume): Increase the number of reps with moderate weights. This helps build endurance and muscle hypertrophy.
- Day 3 (Technique): Concentrate on form and technique with lighter weights. This is crucial for preventing injuries and improving overall performance.
Technique and Form
Executing a front squat with proper form is essential for maximizing benefits and minimizing injury risk. Follow these steps:
- Setup: Stand with your feet shoulder-width apart. Position the barbell across the front of your shoulders, using a clean grip or crossed-arm grip.
- Brace Your Core: Engage your core muscles to maintain stability throughout the lift.
- Squat Down: Initiate the squat by bending at the hips and knees, keeping your torso upright and chest lifted.
- Depth: Aim to squat down until your thighs are at least parallel to the ground. Deeper squats can be beneficial if your mobility allows.
- Ascent: Push through your heels to return to the starting position, ensuring your knees track over your toes.
Common Mistakes to Avoid
- Leaning Forward: Keep your torso upright to avoid excessive strain on your back.
- Knees Caving In: Ensure your knees track in line with your toes to prevent injury.
- Not Engaging the Core: A strong core is vital for maintaining proper posture and balance.
Tips for Improving Form
- Mobility Exercises: Incorporate stretches and mobility drills for your hips, ankles, and thoracic spine.
- Video Analysis: Record your squats to identify areas for improvement.
- Practice with Lighter Weights: Focus on form before increasing the load.
Accessory Exercises
Incorporating accessory exercises into your training can help improve your front squat performance. Here are some effective options:
- Lunges: Target the quads and glutes while enhancing balance and stability.
- Deadlifts: Strengthen the posterior chain, which is crucial for overall squat performance.
- Core Exercises: Planks, Russian twists, and hanging leg raises can help build core strength, supporting your front squat technique.
Sample Accessory Exercise Routine
| Exercise | Sets | Reps |
|---|---|---|
| Lunges | 3 | 10-12 |
| Deadlifts | 3 | 6-8 |
| Planks | 3 | 30-60 seconds |
| Russian Twists | 3 | 15-20 per side |
Nutrition for Optimal Performance
Nutrition plays a crucial role in your strength training journey. Here are some tips to optimize your diet for a front squat program:
- Macronutrient Ratios: Aim for a balanced intake of carbohydrates, proteins, and fats. A common ratio is 40% carbs, 30% protein, and 30% fats.
- Protein Sources: Include lean meats, fish, eggs, dairy, legumes, and plant-based proteins to support muscle recovery and growth.
- Carbohydrate Timing: Consume complex carbohydrates before and after workouts to fuel your performance and aid recovery.
Hydration Tips
- Stay Hydrated: Drink plenty of water throughout the day, especially before and after workouts.
- Electrolyte Balance: Consider electrolyte drinks during intense training sessions to maintain hydration levels.
Should You Contact a Coach for a Front Squat Program or Can You Do It Yourself?
When it comes to strength training, particularly with complex movements like the front squat, many individuals find themselves at a crossroads: Should they seek the guidance of a coach or attempt to develop their own program? This article explores both options, weighing the benefits of professional coaching against the possibility of self-directed training.
Benefits of Working with a Coach
One of the primary advantages of hiring a coach is their expertise in strength training and biomechanics. A qualified coach can provide:
- Personalized Programming: Coaches can tailor a front squat program to your specific needs, goals, and fitness level. They can adjust the volume, intensity, and frequency based on your progress and any limitations you may have.
- Technique Correction: Proper form is crucial for maximizing gains and preventing injuries. A coach can observe your technique in real-time and provide immediate feedback, helping you avoid common mistakes such as caving elbows or improper squat depth.
Accountability and Motivation
Having a coach can significantly enhance your motivation and accountability. With a coach, you are more likely to:
- Stay Committed: Scheduled sessions create a sense of responsibility, encouraging you to stick to your training plan.
- Push Your Limits: Coaches can challenge you to lift heavier weights or try new techniques that you might shy away from when training alone.
When You Might Consider Training Yourself
If you have a solid understanding of strength training principles and access to reliable resources, you may feel confident in developing your own front squat program. Here are some reasons why self-training could be a viable option:
- Cost-Effective: Training on your own eliminates the financial burden of hiring a coach, allowing you to allocate those funds toward gym memberships or equipment.
- Flexibility: You can design your training schedule around your lifestyle, making it easier to fit workouts into your day without the constraints of a coach’s availability.
Learning Through Experience
Training yourself can also provide valuable learning experiences:
- Self-Discovery: You will learn to listen to your body and understand what works best for you, which can enhance your overall training experience.
- Adaptability: You can experiment with different techniques, rep ranges, and accessory exercises without the need for approval or guidance, allowing for a more personalized approach.
Key Considerations for Self-Training
If you decide to go the self-training route, keep these considerations in mind to ensure a successful front squat program:
Assess Your Current Level
Before starting, evaluate your current strength and mobility. This assessment will help you determine the appropriate starting weight and volume for your front squat program.
Prioritize Technique
Focus on mastering the proper technique before increasing weights. Resources such as instructional videos, articles, and online forums can provide valuable insights into correct form and common pitfalls.
Incorporate Progress Tracking
Keep a training log to track your progress. Documenting your lifts, sets, and reps can help you identify patterns and make necessary adjustments to your program.
Ultimately, the decision to work with a coach or train yourself for a front squat program depends on your individual circumstances, goals, and preferences. If you’re new to strength training or struggle with technique, seeking a coach’s guidance can be invaluable. On the other hand, if you have experience and feel confident in your ability to self-manage your training, you can successfully develop a program on your own.
Common Challenges and Solutions
While training for front squats, you may encounter some challenges. Here are common issues and their solutions:
- Lack of Mobility: If you struggle with depth, incorporate mobility exercises such as hip openers and ankle stretches into your routine.
- Discomfort During the Lift: Experiment with different grip styles (clean grip vs. crossed-arm grip) to find what feels most comfortable.
- Mental Barriers: Fear of heavy lifting can be daunting. Start with lighter weights and gradually increase as your confidence builds.
Solutions and Tips
- Stretching Routines: Dedicate time to stretching before and after workouts to improve flexibility and reduce soreness.
- Mental Strategies: Visualization techniques can help you mentally prepare for lifting heavier weights.
Read Also: Keto Vegetarian Breakfast.
FAQs About Front Squat Program
What is the best way to start a front squat program?
Begin by assessing your fitness level, focusing on mobility and form. Start with bodyweight squats and gradually introduce weights as you become more comfortable.
Read Also: Salmon Breakfast Recipes.
How often should I do front squats?
Aim for 2-3 times per week, allowing for recovery days in between sessions to prevent overtraining.
Read Also: Quad Exercises Dumbbells.
Can beginners perform front squats?
Yes! Beginners can start with bodyweight squats or light weights to master the technique before progressing to heavier loads.
Read Also: Quad Machine.
What are the benefits of front squats compared to back squats?
Front squats emphasize the quadriceps and core, promote better posture, and reduce strain on the lower back compared to back squats.
Read Also: Free Weight Exercises for Quadriceps.
How can I prevent injuries while doing front squats?
Focus on proper form, gradually increase weights, and incorporate mobility work to enhance flexibility and prevent injuries.
Read Also: CrossFit Back Exercises.
Conclusion
Incorporating a front squat program into your training can lead to significant improvements in strength, power, and overall fitness. By understanding the mechanics, following a structured program, and maintaining proper nutrition, you can maximize your results and enjoy the numerous benefits of this essential exercise.
Read Also: The Surprising Health Benefit of Celery Tea.
Now that you have the knowledge and tools to embark on your front squat journey, it’s time to hit the gym and start squatting! Remember, consistency and dedication are key to achieving your fitness goals. Happy squatting!
Read Also: Overhead Squat WOD.

Does Creatine Help Grow Glutes? Proven Methods Inside

Does Creatine Cause Gyno? Clarify the Confusion

31 Day Squat Challenge to Build Strength

Dates Eating Benefits: Here Is Your Complete Guide
Abs Workout for Beginner: Your Ultimate Guide!
Best Exercises For Bicep: Your Complete Guide
-

 Nutrition1 year ago
Dates Eating Benefits: Here Is Your Complete Guide
-
 Fitness1 year ago
Abs Workout for Beginner: Your Ultimate Guide!
-
 Exercise1 year ago
Best Exercises For Bicep: Your Complete Guide
-
 Fitness1 year ago
How Many Calories in a Potato? Nutrition Facts
-
Exercise1 year ago
Warmup for Back Workout: Your Complete Guide
-
fitness diet1 year ago
Fast Food That’s Gluten Free: Your Complete Guide
-
Nutrition1 year ago
Nutrition Facts Of Strawberries: Your Ultimate Guide
-
fitness diet1 year ago
Effects of Sugar in the Body? Your Complete Guide