Connect with us

Exercise

Front Squat Workout Program: Weekly Plan

Published

on

front squat workout program
Spread the love

Here is your complete guide to front squat workout program

Introduction to Front Squat Workout Program

The front squat is a fundamental exercise that should be a staple in any well-rounded strength training program. Not only does it target the quadriceps, glutes, and core, but it also carries over to improve performance in other compound lifts like the clean and jerk. Whether you’re an Olympic weightlifter, powerlifter, or just looking to build lower body strength, a dedicated front squat workout program can be incredibly beneficial.

In this comprehensive guide, we’ll dive deep into the ins and outs of designing an effective front squat workout program. We’ll cover proper form, programming considerations, variations, and more to help you maximize your front squat strength and development. By the end, you’ll have all the tools necessary to create a customized front squat program that fits your specific goals and needs. Let’s get started!

What is the Front Squat?

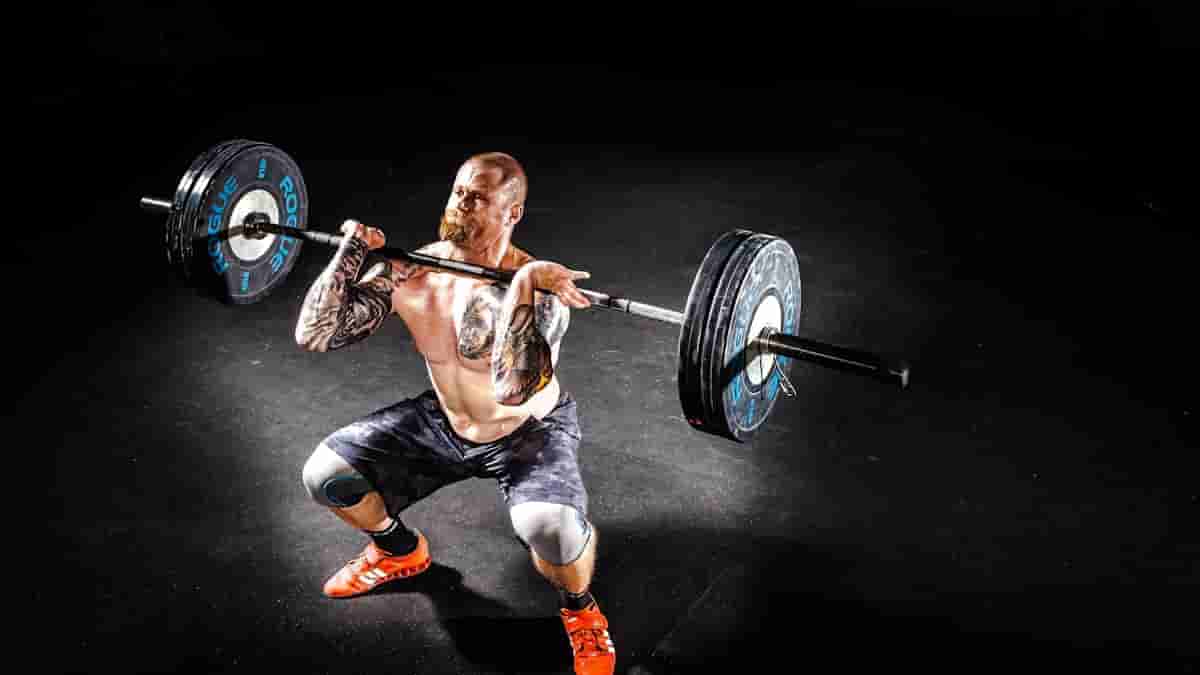
The front squat is a variation of the traditional back squat where the barbell is held in the front rack position across the front of the shoulders, rather than resting on the upper back. This subtle change in bar position shifts the load and emphasis to the quadriceps, core, and upper back musculature.

Proper front squat form requires significant mobility in the wrists, shoulders, and thoracic spine to maintain an upright torso position throughout the lift. The front rack position also challenges grip strength as the lifter must keep the elbows high and the bar secured against the front of the body.

Compared to the back squat, the front squat generally allows for less weight to be lifted due to the increased demand on the upper body. However, this exercise can be an invaluable tool for building lower body strength, improving squat mechanics, and enhancing athletic performance.

Benefits of the Front Squat

The front squat offers a multitude of benefits that make it a must-have exercise in any well-rounded strength training program. Some of the key advantages include:

  1. Increased Quadriceps Development: The front squat places a greater emphasis on the quadriceps muscles compared to the back squat, leading to more targeted hypertrophy and strength gains in this key lower body muscle group.
  1. Improved Posture and Trunk Stability: Maintaining an upright torso position during the front squat requires significant core and upper back engagement, which can carry over to better posture and trunk stability in other exercises and daily activities.
  2. Enhanced Olympic Lifting Performance: The front squat is a fundamental movement in Olympic weightlifting, as it directly translates to improved clean and jerk technique and execution.
  1. Reduced Spinal Loading: By shifting the load to the front of the body, the front squat places less compressive force on the spine compared to the back squat, making it a safer option for those with back issues or mobility limitations.
  2. Carryover to Other Compound Lifts: Improving front squat strength can lead to gains in other lower body exercises like the deadlift, back squat, and leg press.

Front Squat Muscles Worked

The front squat primarily targets the following muscle groups:

  • Quadriceps (rectus femoris, vastus lateralis, vastus medialis, vastus intermedius)
  • Gluteus maximus
  • Core (transverse abdominis, rectus abdominis, obliques)
  • Erector spinae
  • Trapezius
  • Anterior deltoids

The front rack position also requires significant engagement from the wrist flexors, elbow flexors, and shoulder stabilizers to maintain proper bar positioning throughout the lift.

Compared to the back squat, the front squat places a greater emphasis on the quadriceps, as the lifter must maintain an upright torso position and shift the load to the front of the body. This makes the front squat an excellent exercise for building quad strength and size.

Proper Front Squat Technique

Executing the front squat with proper form is crucial to maximizing the benefits of the exercise and avoiding injury. Here are the key steps to performing the front squat correctly:

  1. Grip and Rack Position: Grip the barbell with your hands slightly wider than shoulder-width apart, with your palms facing up. Lift the elbows high to create a “shelf” for the bar to rest on the front of the shoulders.
  2. Stance and Foot Positioning: Stand with your feet hip-width apart, toes slightly turned out. Keep your weight evenly distributed through the middle of your feet.
  1. Initiate the Descent: Maintain an upright torso position and send your hips back while bending at the knees to lower into the squat. Keep your elbows high and the bar secured against your body.
  2. Depth and Knee Tracking: Descend until your thighs are at least parallel to the ground, or as deep as your mobility allows. Ensure your knees track in line with your toes throughout the movement.
  3. Drive Through the Heels: Engage your quadriceps and glutes to drive through your heels and return to the starting position.
  1. Lockout: Finish the rep by fully extending your hips and knees, keeping your chest up and core braced.

Common technique errors to avoid include:

  • Losing the front rack position and allowing the elbows to drop
  • Excessive forward lean of the torso
  • Knees caving inward or outward
  • Rounding of the lower back

Mastering front squat technique takes time and practice, but the benefits are well worth the effort.

Front Squat Programming Considerations

When designing a front squat workout program, there are several key factors to consider:

Rep Ranges and Intensity:

Rep RangeIntensity (% 1RM)Training Focus
3-5 reps80-90%Maximal Strength
6-12 reps70-80%Hypertrophy and Muscle Growth
1-3 reps90-95%Power and Explosiveness

Frequency and Volume:

  • Beginners may benefit from front squatting 2-3 times per week, with 12-20 total reps per session.
  • Intermediate to advanced lifters can front squat 3-4 times per week, with 15-30 total reps per session.
  • Allow for adequate recovery between front squat sessions, especially when training at high intensities.

Variation and Accessory Exercises:

  • Incorporate front squat variations like pause front squats, front squats with chains, and front squats with a safety squat bar.
  • Pair front squats with complementary exercises like back squats, deadlifts, and overhead presses.
  • Include accessory movements to target weak points, such as core work, upper back strengthening, and grip training.

Periodization and Progression:

  • Utilize a periodized approach, cycling between phases of higher volume and lower intensity, and vice versa.
  • Gradually increase the load, reps, or volume over time to drive continued progress.
  • Monitor fatigue levels and adjust the program as needed to avoid overtraining.

By considering these key programming factors, you can create a front squat workout program that is tailored to your specific goals and training experience.

Front Squat Variations

To add variety to your front squat training and target different muscle groups, consider incorporating these front squat variations:

  1. Pause Front Squat: Perform the front squat with a 2-3 second pause at the bottom of the movement to improve strength and control.
  2. Front Squat with Chains: Attach chains to the barbell to increase resistance at the top of the lift and challenge your strength through the entire range of motion.
  1. Front Squat with Safety Squat Bar: Using a safety squat bar shifts the load to the front of the body and can help lifters with shoulder mobility limitations.
  2. Tempo Front Squat: Slow down the eccentric (lowering) phase of the lift to 4-6 seconds, focusing on control and tension throughout the movement.
  3. Front Rack Carry: Hold a heavy front rack position and walk for distance or time to build grip strength and core stability.
  1. Zercher Front Squat: Cradle the barbell in the crook of your elbows, which places more emphasis on the core and upper back.
  2. Single-Leg Front Squat: Perform the front squat on a single leg to improve balance, stability, and unilateral strength.
  3. Front Squat with Overhead Reach: As you descend into the front squat, reach your arms overhead to further challenge your thoracic mobility and core engagement.
  1. Goblet Front Squat: Hold a dumbbell or kettlebell in the front rack position to reduce the load on the upper body and focus on lower body strength.
  2. Front Squat with Bands or Chains: Attach bands or chains to the barbell to accommodate strength curves and provide variable resistance throughout the lift.

Incorporating these front squat variations can help you address weaknesses, improve technique, and add some much-needed variety to your training program.

Sample Front Squat Workout Programs

To give you a better idea of how to structure an effective front squat workout program, here are two sample templates you can use as a starting point:

Beginner Front Squat Program (3 days per week):

Day 1Day 2Day 3
– Front Squat: 3 sets of 5 reps
– Goblet Squat: 3 sets of 8-10 reps
– Leg Press: 3 sets of 10-12 reps
– Calf Raises: 3 sets of 12-15 reps
– Pause Front Squat: 3 sets of 3 reps
– Romanian Deadlift: 3 sets of 8 reps
– Leg Extensions: 3 sets of 12-15 reps
– Glute Bridges: 3 sets of 10-12 reps
– Front Squat: 4 sets of 3 reps
– Split Squats: 3 sets of 8-10 reps per leg
– Hamstring Curls: 3 sets of 10-12 reps
– Plank: 3 sets of 30-60 seconds

Intermediate Front Squat Program (4 days per week):

Day 1Day 2Day 3Day 4
– Front Squat: 5 sets of 3 reps
– Paused Front Squat: 3 sets of 2 reps
– Deadlift: 3 sets of 5 reps
– Hanging Leg Raises: 3 sets of 10-12 reps
– Back Squat: 4 sets of 5 reps
– Front Rack Carry: 2 sets of 30-60 seconds
– Leg Extensions: 3 sets of 12-15 reps
– Seated Calf Raises: 3 sets of 12-15 reps
– Front Squat with Chains: 4 sets of 3 reps
– Zercher Squat: 3 sets of 6-8 reps
– Romanian Deadlift: 3 sets of 8 reps
– Pallof Press: 3 sets of 10-12 reps per side
– Power Clean + Front Squat: 5 sets of 2+2 reps
– Single-Leg Front Squat: 3 sets of 6-8 reps per leg
– Pull-ups: 3 sets to failure
– Ab Wheel Rollouts: 3 sets of 8-10 reps

Remember, these are just sample programs to give you an idea of how to structure your front squat training. You’ll want to adjust the volume, intensity, and exercise selection based on your individual goals, training experience, and recovery capacity.

FAQs

How much should I be able to front squat?

The amount you should be able to front squat depends on several factors, including your sex, bodyweight, and training experience. According to data collected from over 623,000 lifts, a beginner male weighing 180 pounds should be able to front squat around 130 pounds, while an advanced lifter of the same weight could front squat around 363 pounds.

How often should I train the front squat?

Beginner lifters may benefit from front squatting 2-3 times per week, with 12-20 total reps per session. Intermediate to advanced lifters can front squat 3-4 times per week, with 15-30 total reps per session. Allow for adequate recovery between front squat sessions, especially when training at high intensities.

What are the best front squat variations to include in my program?

Some of the best front squat variations to consider include pause front squatsfront squats with chains or bands, Zercher front squats, and single-leg front squats. These variations can help address weaknesses, improve technique, and add variety to your training.

Read Also: Hack Squat Alternative.

How can I improve my front rack position?

To improve your front rack position, focus on mobility work for your wrists, shoulders, and thoracic spine. Exercises like wrist and shoulder circles, overhead reaches, and thoracic spine extensions can all help enhance the flexibility and stability required for a solid front rack.

Read Also: Belt Squat.

Should I use a squat rack or safety pins for front squats?

Both options have their advantages. Using a squat rack allows you to safely rerack the bar if you fail a rep, while safety pins can provide an added layer of security and allow you to focus on technique without worrying about bailing out of the lift. Ultimately, it comes down to personal preference and the equipment available in your gym.

Read Also: Best Exercises for Arm Pump.

Conclusion

The front squat is a fundamental exercise that should be a staple in any well-designed strength training program. By incorporating a dedicated front squat workout program, you can target the quadriceps, improve overall lower body strength, and enhance performance in other compound lifts.

Read Also: 12 Week Deadlift Program.

When designing your front squat program, be sure to consider factors like rep ranges, intensity, frequency, variation, and progression to ensure continued progress and adaptation. Don’t be afraid to experiment with different front squat variations to address weaknesses and keep your training fresh and challenging.

Read Also: The Surprising Health Benefit of Celery Tea.

Remember, mastering the front squat takes time and consistent practice. Stay patient, focus on proper technique, and trust the process. With a well-structured front squat program, you’ll be on your way to building a stronger, more powerful lower body in no time.

Read Also: Squat Deadlift Same Day.

Continue Reading
Click to comment

Leave a Reply

Your email address will not be published. Required fields are marked *

Exercise

Neck Pad for Squatting: Boost Performance Safely

Published

on

neck pad for squatting
Spread the love

Here is your complete guide to neck pad for squatting

Introduction to Neck Pad for Squatting

Squatting is a fundamental exercise that targets multiple muscle groups and is essential for building lower body strength and power. However, performing heavy squats can put significant strain on the neck and upper back, leading to discomfort and even injury if proper form and safety measures are not followed. One solution to this problem is the use of a neck pad for squatting.

neck pad is a simple yet effective accessory that can provide comfort, support, and safety during heavy lifts. By cushioning the bar and distributing the weight more evenly across the upper back, a neck pad can help reduce strain on the neck and shoulders, allowing you to focus on maintaining proper form and depth throughout the lift.

In this comprehensive guide, we’ll explore the importance of using a neck pad for squatting, how to choose the right one for your needs, and the proper techniques for using it to maximize your safety and performance.

What is a Neck Pad for Squatting?

neck pad for squatting is a padded accessory designed to be placed on the upper back, between the shoulders, during a squat. It serves as a cushion between the barbell and your body, providing comfort and support while reducing the pressure and strain on the neck and upper back.

Neck pads come in various materials, such as foam, gel, and leather, each offering its own unique benefits in terms of comfort, durability, and sweat absorption. The thickness of the pad can also vary, with thicker pads providing more cushioning but potentially limiting mobility and range of motion.

Importance of Proper Form and Safety During Squats

Proper form and safety are critical when performing squats, as poor technique can lead to a variety of issues, including:

  • Increased risk of injury to the knees, hips, and lower back
  • Muscle imbalances and asymmetries
  • Reduced effectiveness of the exercise in targeting the intended muscle groups

Using a neck pad for squatting can help maintain proper form and reduce strain on the neck and upper back, allowing you to focus on executing the lift safely and effectively. By distributing the weight more evenly across the upper back, a neck pad can help you maintain a neutral spine position and avoid excessive forward lean or rounding of the upper back.

Choosing the Right Neck Pad for Your Needs

When selecting a neck pad for squatting, there are several factors to consider to ensure you choose the right one for your needs:

  1. Material: Choose a material that provides the right balance of comfort, durability, and sweat absorption for your preferences and training environment.
  2. Thickness: Thicker pads offer more cushioning but may limit mobility, while thinner pads provide less cushioning but allow for greater range of motion.
  1. Size: Make sure the neck pad fits comfortably on your upper back without being too bulky or restrictive.
  2. Comfort: The neck pad should feel secure and stable on your back without causing any discomfort or irritation.

To help you compare different neck pad options, here is a table outlining the key features of some popular models:

BrandMaterialThicknessSizePrice
Rogue Foam RollerHigh-density foam3 inches6 x 36 inches$45
Spud Inc Squat PadNeoprene-covered foam2.5 inches12 x 6 inches$39.95
Harbinger Padded Leather Lifting BeltLeather with foam padding1.5 inchesAdjustable$34.99
Inzer Gripper PadNeoprene with rubber grip1 inch12 x 6 inches$29.95
Titan Support Systems Squat PadHigh-density foam with vinyl cover2 inches12 x 6 inches$24.95

When choosing a neck pad, it’s important to consider your individual preferences, training goals, and budget to find the best fit for your needs.

How to Use a Neck Pad Correctly During Squats

Using a neck pad for squatting correctly is essential to ensure proper form and safety. Here’s a step-by-step guide on how to properly position and use a neck pad during your squats:

  1. Place the neck pad on your upper back, between your shoulder blades.
  2. Position the barbell on top of the neck pad, ensuring that it is centered and secure.
  3. Take a deep breath and brace your core.
  4. Maintain a neutral spine position throughout the lift, avoiding excessive forward lean or rounding of the upper back.
  1. Descend into the squat, keeping your chest up and your knees tracking over your toes.
  2. Drive through your heels to return to the starting position, maintaining control and tension throughout the movement.

It’s important to note that while a neck pad can provide comfort and support, it should not be used as a crutch to compensate for poor form or technique. Always prioritize proper form and safety when performing squats, and use a neck pad as an accessory to enhance your performance and reduce strain on your body.

Benefits of Using a Neck Pad for Squatting

Using a neck pad for squatting can provide numerous benefits, including:

  • Improved comfort: The cushioning of the neck pad can significantly reduce discomfort and pain in the neck and upper back during heavy lifts.
  • Enhanced safety: By distributing the weight more evenly across the upper back, a neck pad can help maintain proper form and reduce the risk of injury.
  • Increased confidence: Knowing that you have an extra layer of support and cushioning can boost your confidence and allow you to focus on executing the lift safely and effectively.
  • Longer training sessions: With reduced strain on the neck and upper back, you may be able to train for longer periods without experiencing fatigue or discomfort.

Alternatives to Using a Neck Pad

While a neck pad for squatting can be a valuable accessory, there are other methods for reducing strain on the neck and upper back during squats:

  1. Using a squat pad: Similar to a neck pad, a squat pad is a cushioned accessory that can be placed directly on the barbell to provide comfort and support.
  2. Adjusting bar placement: Experimenting with different bar positions, such as high-bar or low-bar squats, can help distribute the weight differently and reduce strain on specific areas of the upper back and neck.
  1. Strengthening the upper back: Incorporating exercises that target the upper back muscles, such as rows and pull-ups, can help improve stability and reduce strain during squats.

Each of these alternatives has its own advantages and disadvantages, so it’s important to experiment and find the method that works best for your individual needs and preferences.

FAQs

Is a neck pad necessary for all squat variations?

No, a neck pad is not necessary for all squat variations. It is most commonly used for high-bar back squats, where the barbell rests higher on the upper back.

Read Also: Best Exercises for Arm Pump.

Can a neck pad be used for other exercises besides squats?

Yes, a neck pad can be used for other exercises that involve placing a barbell on the upper back, such as overhead presses or lunges. However, it is most commonly used for squats.

Read Also: 12 Week Deadlift Program.

How do I clean and maintain my neck pad?

The cleaning and maintenance process will vary depending on the material of your neck pad. In general, you should wipe it down with a damp cloth after each use and allow it to air dry. Avoid submerging foam pads in water, as this can damage the material.

Read Also: Squat Deadlift Same Day.

Can a neck pad cause any negative effects if used incorrectly?

Yes, using a neck pad incorrectly can potentially cause issues. If the pad is too thick or positioned improperly, it can limit mobility and range of motion, leading to poor form and increased risk of injury.

Read Also: Front Squat Workout Program.

What is the best material for a neck pad?

There is no single “best” material for a neck pad. The ideal material will depend on your individual preferences and training needs. Foam pads offer good cushioning and are generally more affordable, while leather pads are more durable and easy to clean.

Read Also: Row and Kettlebell Workout.

Conclusion

Using a neck pad for squatting can be a valuable accessory for improving comfort, safety, and performance during heavy lifts. By choosing the right neck pad and using it correctly, you can reduce strain on the neck and upper back while maintaining proper form and depth throughout the lift.

Read Also: Body Beast Build Legs.

Remember, a neck pad should not be used as a crutch to compensate for poor technique. Always prioritize proper form and safety when performing squats, and use a neck pad as an accessory to enhance your performance and reduce strain on your body.

Read Also: The Surprising Health Benefit of Celery Tea.

By incorporating a neck pad into your training routine and following the tips and techniques outlined in this guide, you can unlock the benefits of a safer, more comfortable, and more effective squat.

ReadAlso: Front Squat Machine.

Continue Reading

Exercise

Front Squat Machine: Perfect Your Technique

Published

on

Spread the love

Here is your complete guide to front squat machine

Introduction to Front Squat Machine

Are you looking to take your strength training to the next level? Look no further than the front squat machine! This versatile piece of equipment allows you to perform the front squat exercise with greater stability and control, targeting your quadriceps, glutes, and core muscles like never before. In this comprehensive guide, we’ll explore the benefits of using a front squat machine, proper form and technique, and how to incorporate it into your workout routine to achieve your fitness goals. We’ll also discuss the different types of front squat machine available and provide tips for choosing the right one for your needs. Whether you’re a beginner or an experienced weightlifter, this guide will help you maximize your strength and muscle growth with the front squat machine.

What is a Front Squat Machine?

front squat machine is a piece of equipment designed to assist you in performing the front squat exercise. It typically consists of a platform where you stand, a weight stack or resistance system, and a barbell-like attachment that rests on your front delts and upper chest. The machine allows you to perform the front squat movement with greater stability and control, as it supports the weight and helps you maintain proper form throughout the exercise.

Benefits of Using a Front Squat Machine

  1. Improved Stability and Control
    Using a front squat machine can significantly improve your stability and control during the squat exercise. The machine provides a stable platform and support system, allowing you to focus on proper form and technique without worrying about balancing the weight.
  1. Targeted Muscle Activation
    By isolating the front squat movement, a squat machine helps you target your quadriceps, glutes, and core muscles more effectively. This targeted muscle activation can lead to greater strength gains and muscle growth in these key areas.
  2. Reduced Risk of Injury
    Proper form is crucial when performing any squat variation, and the squat machine can help reduce the risk of injury by providing stability and support. This can be especially beneficial for individuals with mobility limitations or those recovering from injuries.
  1. Versatility in Workout Routines
    The squat machine can be easily incorporated into a variety of workout routines, making it a valuable addition to any gym or home workout space. Whether you’re focusing on strength training, muscle building, or overall fitness, the squat machine can be a valuable tool in your arsenal.

Proper Form and Technique

  1. Foot Placement and Stance
    • Stand with your feet shoulder-width apart, toes slightly turned out
    • Ensure your feet are firmly planted on the platform, with even weight distribution
  2. Barbell Positioning
    • Rest the barbell-like attachment on the front of your shoulders, just below your chin
    • Keep your elbows high and your chest up to maintain a strong, upright torso position
  1. Elbow Placement and Grip
    • Grip the handles with your palms facing up and your elbows pointing forward
    • Keep your elbows high throughout the movement to maintain proper form
  2. Descent and Ascent
    • Initiate the descent by sitting back and down, keeping your chest up and your knees in line with your toes
  1. Descend until your thighs are at least parallel to the floor, or as far as your mobility allows
  2. Drive through your heels to return to the starting position, squeezing your glutes at the top of the movement

Types of Front Squat Machine

  1. Plate-Loaded Front Squat
    • Uses standard weight plates for resistance
    • Allows for a wider range of weight options
    • Requires manual loading and unloading of plates
  1. Selectorized Front Squat
    • Features a weight stack with a pin selector
    • Offers a more convenient and user-friendly experience
    • Provides a fixed range of weight options

Comparison of Front Squat Machine Types

FeaturePlate-LoadedSelectorized
Weight OptionsWide RangeFixed Range
ConvenienceManualUser-Friendly
CostLowerHigher

Incorporating Front Squat Machine into Your Workout Routine

  1. Beginner Workout Routine
    • Perform 2-3 sets of 8-12 repetitions, 2-3 times per week
    • Focus on proper form and technique
    • Gradually increase weight as you become more comfortable with the movement
  1. Intermediate Workout Routine
    • Perform 3-4 sets of 6-10 repetitions, 2-3 times per week
    • Incorporate heavier weights and lower repetitions to build strength
    • Mix in different front squat variations, such as front squat with chains or front squat with pause reps

Common Mistakes to Avoid

Improper Foot Placement and Stance

Ensure your feet are shoulder-width apart, with toes slightly turned out. Avoid a stance that is too narrow or too wide, as this can compromise stability and force you to compensate with poor form.

Incorrect Barbell Positioning

The barbell-like attachment should rest on the front of your shoulders, just below your chin. Avoid letting the bar slide down your chest or resting it too high on your neck, as this can put unnecessary strain on your shoulders and upper back.

Lack of Elbow Positioning Awareness

Keep your elbows high and pointing forward throughout the movement. Allowing your elbows to drop can cause the bar to shift forward, leading to a loss of control and potential injury.

Rushing the Descent and Ascent

Take your time during the eccentric (lowering) and concentric (lifting) phases of the movement. Rushing through the exercise can compromise form and reduce the effectiveness of the exercise.

Excessive Weight Load

Start with a weight that allows you to maintain proper form and technique. Gradually increase the load as you become more comfortable and confident with the movement.

Choosing the Right Machine

  1. Adjustability
    • Look for a machine that allows you to adjust the seat height and barbell positioning to accommodate your height and arm length
  2. Weight Stack or Resistance System
    • Consider the weight range and increments offered by the machine to ensure it meets your strength level and progression needs
  1. Footplate Size and Traction
    • Ensure the footplate is large enough to accommodate your stance and provides sufficient traction to maintain stability during the exercise
  2. Overall Build Quality
    • Choose a machine with a sturdy, well-constructed frame that can withstand heavy use and provide a stable platform for your workouts

Front Squat Machine vs. Free Weights vs. Dumbbells

When it comes to choosing between a squat machine, free weights, or dumbbells for your squat variations, there are several factors to consider:

Stability and Control

  • Front Squat Machine: Provides the most stability and control due to the fixed movement pattern and support system.
  • Free Weights: Requires more stability and control from the user, as the weight is not fixed in place.
  • Dumbbells: Allows for the most instability, as each arm must work independently to control the weight.

Muscle Activation

  • Front Squat Machine: Targets the quadriceps, glutes, and core muscles effectively due to the isolated movement.
  • Free Weights: Allows for a more natural movement pattern, engaging stabilizer muscles in addition to the primary movers.
  • Dumbbells: Requires more stabilization, potentially leading to increased muscle activation in the core and stabilizer muscles.

Convenience and Safety

  • Front Squat Machine: Offers the most convenience and safety, as the weight is supported and the movement is fixed.
  • Free Weights: Requires more setup and spotting, but allows for a more natural movement pattern.
  • Dumbbells: Offers the most flexibility in terms of movement patterns, but requires more coordination and balance.

Progression and Customization

  • Front Squat Machine: Typically offers a fixed range of weight options, making progression more challenging.
  • Free Weights: Allows for more precise weight increments and customization, making progression easier.
  • Dumbbells: Offers the most flexibility in terms of weight increments and customization.

Versatility

  • Front Squat Machine: Is primarily designed for front squat variations, limiting its versatility.
  • Free Weights: Can be used for a wide range of squat variations and other exercises.
  • Dumbbells: Offer the most versatility, as they can be used for a variety of squat variations and other exercises.

Comparison Table

FactorFront Squat MachineFree WeightsDumbbells
Stability and ControlHighModerateLow
Muscle ActivationHighModerateModerate
Convenience and SafetyHighModerateLow
Progression and CustomizationModerateHighHigh
VersatilityLowHighHigh

When choosing between a front squat machine, free weights, or dumbbells, consider your goals, experience level, and available equipment. Each option has its own advantages and disadvantages, so it’s important to find the one that best suits your needs and preferences.

Read Also: Best Exercises for Arm Pump.

FAQs

How often should I use a front squat machine in my workouts?

Aim to incorporate the squat machine into your routine 2-3 times per week, allowing for adequate rest and recovery between sessions.

Read Also: 12 Week Deadlift Program.

Can I use a front squat machine if I have shoulder mobility issues?

Yes, the squat machine can be a good option for individuals with shoulder mobility limitations, as it provides support and reduces the range of motion required compared to a traditional barbell front squat.

Read Also: Squat Deadlift Same Day.

How do I adjust the weight on a front squat machine?

For plate-loaded machines, simply add or remove weight plates as needed. For selectorized machines, use the pin selector to choose the desired weight from the weight stack.

Read Also: Front Squat Workout Program.

Can I perform other squat variations on a front squat machine?

While the machine is primarily designed for the front squat exercise, you may be able to perform other squat variations, such as goblet squats or zercher squats, depending on the specific design of the machine.

Read Also: Row and Kettlebell Workout.

Is it necessary to use a front squat machine to build strong quadriceps?

No, it is not necessary to use a squat machine to build strong quadriceps. Traditional barbell squats, leg presses, and other compound exercises can also effectively target and strengthen the quadriceps. However, the squat machine can be a valuable tool in your training arsenal to help you achieve your specific fitness goals.

Read Also: The Surprising Health Benefit of Celery Tea.

Conclusion

The front squat machine is a valuable tool for anyone looking to improve their strength, muscle growth, and overall fitness. By providing stability and control, the machine allows you to focus on proper form and target your quadriceps, glutes, and core muscles more effectively. Whether you’re a beginner or an experienced weightlifter, incorporating the squat machine into your workout routine can help you achieve your fitness goals and take your strength to the next level. Remember to always prioritize proper form, gradually increase the weight, and listen to your body to avoid injury. With dedication and consistency, the squat machine can be a game-changer in your fitness journey.

Read Also: Body Beast Build Legs.

Continue Reading

Exercise

Body Beast Build Legs: Workout Tips

Published

on

body beast build legs
Spread the love

Here is your complete guide to body beast build legs

Introduction to Body Beast Build Legs

The pursuit of sculpted, powerful legs is a goal shared by many fitness enthusiasts. The Body Beast Build Legs program promises to be the key to unlocking this transformation. As an expert-crafted workout regimen, it offers a structured approach to building leg strength, size, and definition. In this comprehensive guide, we’ll delve into the intricacies of the Body Beast Build Legs program, equipping you with the knowledge and tools needed to maximize your results.

Body Beast Build Legs is a meticulously designed workout program that targets the key muscle groups of the lower body, including the quadriceps, hamstrings, glutes, and calves. Whether you’re a seasoned gym-goer or just starting your fitness journey, this program provides a proven path to achieving your leg-building goals. By understanding the principles, exercises, and nutritional strategies behind Body Beast Build Legs, you’ll be well on your way to developing the strong, muscular legs you’ve always desired.

Understanding the “Body Beast Build Legs” Program

The “Body Beast Build Legs” program is a comprehensive approach to leg development, rooted in the principles of progressive overload, muscle hypertrophy, and functional strength. The primary objectives of the program are to:

  1. Increase Leg Strength: Through a strategic combination of compound exercises and targeted isolation movements, the program aims to build raw strength in the lower body, enabling you to lift heavier weights and push past plateaus.
  1. Promote Muscle Growth: By focusing on progressive resistance training and optimal nutrition, the program stimulates muscle hypertrophy, leading to a more sculpted, defined appearance in the legs.
  2. Enhance Functional Fitness: The exercises included in the “Body Beast Build Legs” program are designed to improve overall lower-body performance, translating to better athletic ability and everyday movement.

The program targets the major muscle groups of the legs, including the:

  • Quadriceps (front of the thighs)
  • Hamstrings (back of the thighs)
  • Glutes (buttocks)
  • Calves (lower legs)

By focusing on these key muscle groups, the “Body Beast Build Legs” program aims to create a balanced, proportionate, and aesthetically pleasing lower body.

Leg Workout Routines

The Body Beast Build Legs program consists of a series of structured workout routines that progressively challenge and stimulate the leg muscles. Each routine is designed to target specific aspects of leg development, ensuring a comprehensive approach to building strength and size.

Workout 1: Leg Hypertrophy

This workout focuses on high-volume, moderate-intensity exercises to maximize muscle growth in the legs. The key exercises include:

  1. Barbell Squats
  2. Dumbbell Lunges
  3. Romanian Deadlifts
  4. Leg Extensions
  5. Seated Calf Raises

Workout 2: Leg Strength

Emphasizing heavier weights and lower repetitions, this workout aims to build raw strength in the lower body. The exercises include:

  1. Barbell Back Squats
  2. Barbell Step-ups
  3. Deadlifts
  4. Leg Presses
  5. Standing Calf Raises

Workout 3: Leg Power

Focusing on explosive movements, this workout targets the development of leg power and athleticism. The exercises include:

  1. Barbell Jump Squats
  2. Dumbbell Step-ups with Knee Drives
  3. Trap Bar Deadlifts
  4. Box Jumps
  5. Calf Raises with Jumps

Each workout routine is designed to be performed once per week, allowing for adequate rest and recovery between sessions. It’s important to follow the prescribed exercises, sets, and repetitions to ensure optimal results.

To further enhance the effectiveness of the “Body Build Legs” program, it’s crucial to maintain proper form and technique during each exercise. Proper form not only maximizes the targeted muscle activation but also helps prevent injury. Consult with a qualified fitness professional or refer to instructional videos to ensure you’re executing the exercises correctly.

Nutrition and Supplementation

Achieving the desired results from the “Body Beast Build Legs” program requires a comprehensive approach that combines effective training with optimal nutrition and supplementation. Proper nutrition plays a vital role in supporting muscle growth, recovery, and overall health.

Macronutrient Recommendations

To support the demands of the “Body Beast Build Legs” program, the following macronutrient guidelines are recommended:

MacronutrientRecommended Daily Intake
Protein1.6-2.2 grams per kilogram of body weight
Carbohydrates4-7 grams per kilogram of body weight
Fats0.8-1.2 grams per kilogram of body weight

These macronutrient ratios are designed to provide the necessary building blocks for muscle growth, fuel energy demands, and support overall health and recovery.

Recommended Supplements

In addition to a well-balanced diet, the following supplements can be beneficial in supporting the goals of the “Body Beast Build Legs” program:

  1. Protein Powder: Whey, casein, or plant-based protein supplements can help meet the increased protein requirements for muscle growth and recovery.
  2. Creatine: This supplement has been shown to enhance muscle strength, power, and endurance, making it a valuable addition to the “Body Beast Build Legs” program.
  3. BCAAs (Branched-Chain Amino Acids): BCAAs, such as leucine, isoleucine, and valine, can help reduce muscle soreness and support muscle protein synthesis.
  1. Beta-Alanine: This amino acid can improve exercise capacity and delay the onset of muscle fatigue, potentially enhancing your leg workouts.
  2. Omega-3 Fish Oils: Omega-3 fatty acids can help reduce inflammation and support overall joint health, which is crucial for maintaining optimal leg performance.

It’s important to consult with a qualified healthcare professional or registered dietitian to determine the appropriate supplementation plan for your individual needs and goals.

Recovery and Rest

Proper recovery and rest are essential components of the “Body Beast Build Legs” program. Muscle growth and strength development occur during the recovery phase, making it crucial to prioritize rest and relaxation.

Importance of Rest and Recovery

  • Allows for muscle repair and adaptation
  • Reduces the risk of overtraining and injury
  • Supports the body’s natural hormone production, which is crucial for muscle growth
  • Enhances overall energy levels and well-being

Body Beast Build Legs Tips

Effective Workout Routines

The Body Beast Build Legs program offers a comprehensive set of leg workout routines designed to target and develop the key muscle groups of the lower body. These routines focus on progressive overload, muscle hypertrophy, and functional strength to help you achieve your leg-building goals.

Leg Hypertrophy Workout

This workout emphasizes high-volume, moderate-intensity exercises to maximize muscle growth in the legs. The key exercises include:

  • Barbell Squats
  • Dumbbell Lunges
  • Romanian Deadlifts
  • Leg Extensions
  • Seated Calf Raises

Leg Strength Workout

Focusing on heavier weights and lower repetitions, this workout aims to build raw strength in the lower body. The exercises include:

  • Barbell Back Squats
  • Barbell Step-ups
  • Deadlifts
  • Leg Presses
  • Standing Calf Raises

Leg Power Workout

Emphasizing explosive movements, this workout targets the development of leg power and athleticism. The exercises include:

  • Barbell Jump Squats
  • Dumbbell Step-ups with Knee Drives
  • Trap Bar Deadlifts
  • Box Jumps
  • Calf Raises with Jumps

Proper Form and Technique

Maintaining proper form and technique during the “Body Beast Build Legs” exercises is crucial for maximizing the targeted muscle activation and preventing injury. Consult with a qualified fitness professional or refer to instructional videos to ensure you’re executing the exercises correctly.

Progression and Intensity Management

As you progress through the “Body Beast Build Legs” program, it’s important to gradually increase the intensity and challenge yourself. This can be achieved by:

  • Incrementally increasing the weight lifted
  • Focusing on proper form and technique
  • Pushing yourself to complete more repetitions
  • Incorporating more challenging variations of the exercises

By carefully managing the progression and intensity of your workouts, you’ll be able to continually challenge your muscles and drive ongoing improvements in leg strength, size, and power.

Tips for Managing Muscle Soreness and Fatigue

  1. Engage in Active Recovery: Incorporate light cardio, stretching, and mobility exercises to promote blood flow and facilitate the removal of lactic acid and other metabolic byproducts.
  2. Apply Cold Therapy: Using ice packs or taking a cold-water immersion can help reduce inflammation and alleviate muscle soreness.
  3. Utilize Foam Rolling and Massage: Self-myofascial release techniques, such as foam rolling and massage, can help relieve muscle tension and improve flexibility.
  1. Prioritize Sleep: Aim for 7-9 hours of quality sleep each night to support muscle recovery and overall well-being.
  2. Stay Hydrated: Drinking plenty of water throughout the day can help replenish fluids and support the body’s natural recovery processes.

By incorporating these recovery strategies into your routine, you’ll be able to maximize the benefits of the “Body Build Legs” program and minimize the risk of overtraining or injury.

Read Also: Belt Squat.

FAQs

How long does the “Body Beast Build Legs” program take to see results?

The timeline for seeing results can vary depending on factors such as your starting fitness level, consistency with the program, and overall lifestyle factors. However, most individuals can expect to see noticeable improvements in leg strength and muscle definition within 8-12 weeks of consistently following the “Body Beast Build Legs” program.

Read Also: Best Exercises for Arm Pump.

Can I modify the program to fit my fitness level?

Yes, the “Body Beast Build Legs” program can be modified to accommodate different fitness levels. If you’re a beginner, you may need to start with lighter weights and focus on proper form before gradually increasing the intensity. Conversely, if you’re an experienced lifter, you can challenge yourself by adding more weight, increasing the number of sets, or incorporating additional exercises.

Read Also: 12 Week Deadlift Program.

What should I do if I experience an injury during the program?

If you experience an injury during the “Body Beast Build Legs” program, it’s important to address it promptly. Stop the affected exercise, apply RICE (rest, ice, compression, elevation) therapy, and consult with a healthcare professional, such as a physical therapist or sports medicine specialist. They can help diagnose the injury, provide appropriate treatment, and guide you on a safe and effective rehabilitation plan.

Read Also: Squat Deadlift Same Day.

How can I track my progress and measure my success?

Tracking your progress is essential for measuring the effectiveness of the “Body Beast Build Legs” program. Some key metrics to monitor include:

  • Increases in weight lifted for compound exercises (e.g., squats, deadlifts)
  • Improvements in the number of repetitions performed
  • Changes in muscle size (e.g., thigh, calf circumference)
  • Enhancements in overall leg strength and power
  • Improvements in functional movements (e.g., sprinting, jumping)

By regularly recording and analyzing these metrics, you can identify areas of progress and make any necessary adjustments to your program to continue driving results.

Read Also: Front Squat Workout Program.

Conclusion

The “Body Beast Build Legs” program offers a comprehensive and structured approach to developing stronger, more muscular legs. By understanding the principles, exercises, and nutritional strategies behind this program, you’ll be well-equipped to embark on your leg-building journey and achieve the results you’ve been seeking.

Read Also: The Surprising Health Benefit of Celery Tea.

Remember, consistency, proper form, and a holistic approach to recovery and nutrition are key to maximizing the benefits of the “Body Build Legs” program. Embrace the challenge, stay dedicated, and watch as your lower body transforms into a powerful, sculpted foundation that supports your overall fitness goals.

Read Also: Row and Kettlebell Workout.

Continue Reading

Trending