Connect with us

Exercise

Foot Positions for Leg Press Mastery: Unlock Optimal Results

Published

on

foot positions for leg press
Spread the love

Here is your complete guide to foot positions for leg press

Introduction to Foot Positions for Leg Press

Leg press is a powerhouse exercise known for its ability to target multiple lower body muscles simultaneously. However, to truly maximize its benefits, one must pay close attention to the often-overlooked detail of foot positions for leg press. Let’s embark on a journey to unravel the secrets behind the perfect foot placement.

Understanding the Leg Press Machine

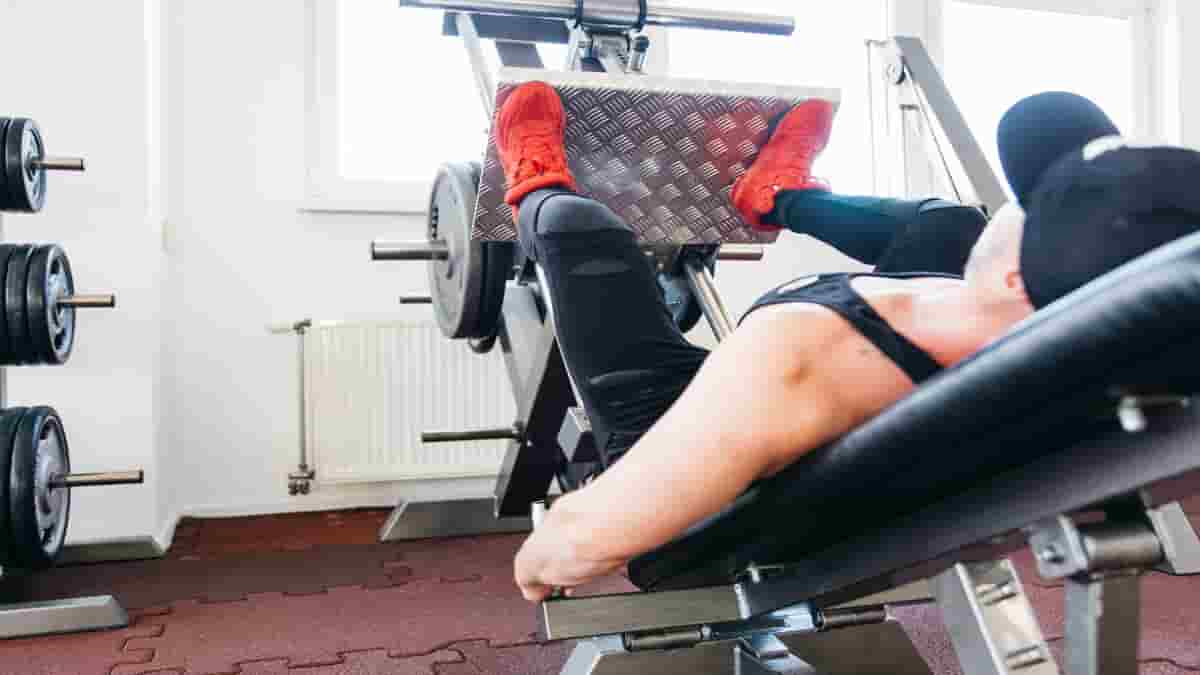
The leg press machine is a weight-bearing exercise machine that simulates the movement of squatting. It is designed to target the lower body muscles, particularly the quadriceps, hamstrings, glutes, and calves. The machine consists of a platform with adjustable footrests, a weight stack, and a safety mechanism to prevent injury.

Foot Position Basics

The foot position is crucial for achieving the desired results from leg press exercises. Different foot positions target different muscle groups, and choosing the right foot position depends on your fitness goals and preferences. Here are some basic guidelines for foot position:

  • Keep your feet shoulder-width apart and flat on the footrest.
  • Adjust the footrest to the desired position based on your fitness goals.
  • Maintain a neutral spine and avoid arching your back.

Foot Position for Quadriceps

The quadriceps are the muscles at the front of the thigh, and they are responsible for extending the leg. To target the quadriceps, follow these steps:

  1. Adjust the footrest to a narrow position, with your feet closer together.
  2. Keep your feet flat on the footrest and your toes pointing forward.
  3. Push the platform away from you, focusing on extending your legs.

Foot Position for Hamstrings

The hamstrings are the muscles at the back of the thigh, and they are responsible for bending the leg. To target the hamstrings, follow these steps:

  1. Adjust the footrest to a wide position, with your feet further apart.
  2. Keep your feet flat on the footrest and your toes pointing forward.
  3. Push the platform away from you, focusing on bending your legs.

Foot Position for Glutes

The glutes are the muscles in the buttocks, and they are responsible for extending the hip. To target the glutes, follow these steps:

  1. Adjust the footrest to a medium position, with your feet shoulder-width apart.
  2. Keep your feet flat on the footrest and your toes pointing forward.
  3. Push the platform away from you, focusing on extending your hips.

Foot Position for Calves

The calves are the muscles at the back of the lower leg, and they are responsible for plantar flexion (pointing the foot downward). To target the calves, follow these steps:

  1. Adjust the footrest to a narrow position, with your feet closer together.
  2. Keep your feet flat on the footrest and your toes pointing forward.
  3. Push the platform away from you, focusing on pointing your feet downward.

Key Foot Positions for Leg Press

1. Standard Foot Placement

  • Description and Benefits
    • Placing your feet shoulder-width apart on the footplate ensures a balanced engagement of all major leg muscles.
    • This standard position provides a stable foundation for beginners and allows for better control during the exercise.
  • Ideal Positioning on the Footplate
    • Ensure that your feet are centered on the footplate.
    • Maintain a neutral foot position with toes pointing straight ahead.
  • Muscle Emphasis
    • Even distribution of force engages all leg muscles, promoting overall strength development.

2. Wide Stance

  • Benefits for Targeting Specific Muscles
    • A wider stance emphasizes the inner thighs and adds intensity to the glutes and hamstrings.
    • Ideal for those looking to sculpt and strengthen the inner leg area.
  • Proper Execution and Variations
    • Place feet wider than shoulder-width apart.
    • Experiment with different foot angles to find the most comfortable and effective position.
  • Cautionary Notes for Beginners
    • Gradually increase the width of your stance to avoid strain on the knees.
    • Start with lighter weights until you are comfortable with the wider stance.

3. Narrow Stance

  • Emphasis on Inner Thigh Muscles
    • Bringing your feet closer together targets the inner thighs and places more stress on the quadriceps.
    • This position is beneficial for refining the definition of the inner leg area.
  • Correct Foot Placement and Alignment
  • Position your feet close together, with toes pointing slightly outward.
  • Be mindful of maintaining balance and stability.
  • Potential Risks and Precautions
    • Those with knee issues should exercise caution and consult with a fitness professional.
    • Gradually increase the narrow stance to avoid unnecessary strain on the knee joints.

4. High Foot Placement

  • Targeting the Hamstrings and Glutes
    • Elevating your feet on the footplate shifts the focus to the hamstrings and glutes.
    • This position is effective for individuals aiming to develop strength and definition in the posterior chain.
  • Technique and Variations
    • Place your feet higher on the footplate without compromising stability.
    • Experiment with different heights to find the most challenging yet manageable position.
  • Adjusting the Machine for Optimal Results
  • Some leg press machines allow for adjustments in footplate height.
  • Utilize this feature to tailor the exercise to your specific goals.

5. Low Foot Placement

  • Focus on Quadriceps and Lower Muscles
    • Placing your feet lower on the footplate emphasizes the quadriceps and lower leg muscles.
    • Ideal for those aiming to enhance the definition of the front thigh area.
  • Executing the Low Foot Press Correctly
    • Position your feet at the bottom of the footplate without compromising form.
    • Maintain a slow and controlled range of motion for optimal results.
  • Avoiding Strain on the Knees
    • Individuals with knee sensitivities should use caution and consult with a fitness professional.
    • Gradually increase the depth of the low foot press to avoid unnecessary stress on the knees.

Comparing Foot Positions – Pros and Cons

Now, let’s delve into a comprehensive comparison of the various foot positions using the following table:

Foot PositionEmphasized MusclesProsCons
Standard PlacementQuadriceps, Hamstrings, Glutes, CalvesBalanced engagement of all major leg musclesMay not provide targeted emphasis on specific muscle groups
Wide StanceInner Thighs, Glutes, HamstringsTargets specific muscle groups for more defined resultsRequires adjustment for individual comfort and biomechanics
Narrow StanceInner Thighs, QuadricepsFocuses on inner thigh musclesMay increase strain on knee joints for some individuals
High Foot PlacementHamstrings, GlutesEmphasizes posterior chain strengthRequires careful adjustment to maintain stability
Low Foot PlacementQuadriceps, Lower Leg MusclesTargets the front thigh areaMay strain the knees if not executed with proper form

Tips for Proper Foot Position

  1. Always warm up before starting your leg press workout.
  2. Use a mirror to check your form and ensure proper foot position.
  3. Start with a lighter weight and gradually increase as you become more comfortable.
  4. Avoid locking your knees or arching your back during the exercise.
  5. Maintain a steady pace and control throughout the movement.

FAQs

What is the leg press machine?

The leg press machine is a weight-bearing exercise machine that targets the lower body muscles, particularly the quadriceps, hamstrings, glutes, and calves.

What are the benefits of using the leg press machine?

The leg press machine provides a full-body workout, targeting multiple muscle groups simultaneously. It also reduces the risk of injury compared to other exercises like squats and lunges.

How do I choose the right foot position for leg press?

Choose the right foot position based on your fitness goals and preferences. Narrow foot positions target the quadriceps, wide foot positions target the hamstrings, and medium foot positions target the glutes.

What is the proper foot position for targeting quadriceps?

Adjust the footrest to a narrow position, with your feet closer together. Keep your feet flat on the footrest and your toes pointing forward. Push the platform away from you, focusing on extending your legs.

Read Also: Protein Shake with Egg White.

What is the proper foot position for targeting hamstrings?

Adjust the footrest to a wide position, with your feet further apart. Keep your feet flat on the footrest and your toes pointing forward. Push the platform away from you, focusing on bending your legs.

Read Also: Long CrossFit Workouts.

What is the proper foot position for targeting glutes?

Adjust the footrest to a medium position, with your feet shoulder-width apart. Keep your feet flat on the footrest and your toes pointing forward. Push the platform away from you, focusing on extending your hips.

Read Also: Shoulder Press vs Overhead Press.

What is the proper foot position for targeting calves?

Adjust the footrest to a narrow position, with your feet closer together. Keep your feet flat on the footrest and your toes pointing forward. Push the platform away from you, focusing on pointing your feet downward.

Read Also: Narrow Shoulder Press.

How do I avoid common mistakes in leg press?

Avoid locking your knees or arching your back during the exercise. Maintain a steady pace and control throughout the movement.

Read Also: Apple Cinnamon Protein Bars.

Can I target multiple muscle groups with leg press?

Yes, you can target multiple muscle groups with leg press by choosing the appropriate foot position and adjusting the weight stack.

How often should I perform leg press?

Perform leg press exercises 2-3 times per week, with at least one rest day in between.

Read Also: The Surprising Health Benefit of Celery Tea.

Conclusion

The foot position is a crucial aspect of leg press exercises, as it determines which muscle groups are targeted and how effectively they are worked. By following the guidelines and tips provided in this article, you can ensure proper foot position and achieve the desired results from your leg press workout. Remember to choose the right foot position based on your fitness goals and preferences, and always maintain proper form to avoid injury.

Read Also: Kettlebells vs Barbells.

Continue Reading
Click to comment

Leave a Reply

Your email address will not be published. Required fields are marked *

Exercise

Does Creatine Help Grow Glutes? Proven Methods Inside

Published

on

does creatine help grow glutes
Spread the love

Here is your complete guide to does creatine help grow glutes.

Introduction to Does Creatine Help Grow Glutes

Does creatine help grow glutes? Creatine is a well-known supplement in the fitness community, celebrated for its ability to enhance muscle growth and improve athletic performance. However, with the rising interest in developing a stronger and more defined posterior, many individuals are asking: does creatine help grow glutes? In this article, we will explore the science behind creatine, its effects on muscle growth, and specifically its role in glute development.

What is Creatine?

Creatine is a naturally occurring compound found in small amounts in certain foods and synthesized in the body from amino acids. It is primarily stored in skeletal muscle and plays a vital role in energy production, particularly during high-intensity exercise.

Key Facts About Creatine

FactDetails
Chemical StructureA compound made from three amino acids: arginine, glycine, and methionine.
SourcesFound in red meat, fish, and dairy products.
FormsAvailable as creatine monohydrate, ethyl ester, and buffered creatine.
FunctionIncreases ATP production, enhancing energy availability during workouts.

Creatine and Muscle Growth

One of the primary benefits of creatine supplementation is its ability to increase the availability of adenosine triphosphate (ATP), the energy currency of the cell. During high-intensity workouts, ATP is rapidly consumed, and creatine helps replenish it, allowing for sustained performance.

  • Increased ATP Availability: Creatine enhances the regeneration of ATP, enabling you to perform more repetitions or lift heavier weights.
  • Improved Performance: Enhanced energy production can lead to better workout performance, which is crucial for muscle growth.

Creatine and Protein Synthesis

Creatine not only improves energy production but also plays a role in protein synthesis, a critical process for muscle repair and growth. Research indicates that creatine supplementation can stimulate pathways involved in muscle protein synthesis, leading to greater muscle hypertrophy.

  • Muscle Recovery: By promoting protein synthesis, creatine aids in muscle recovery after intense workouts.
  • Enhanced Muscle Growth: Increased protein synthesis contributes to greater muscle mass over time.

Creatine and Cell Hydration

Creatine has a unique property of drawing water into muscle cells, a phenomenon known as cell volumization. This increased hydration can lead to:

  • Fuller Muscles: Hydrated muscle cells appear larger and more defined.
  • Improved Muscle Function: Hydration is essential for optimal muscle function and performance.

Creatine and Glute Growth

While creatine can benefit all muscle groups, it is particularly effective for glute growth when combined with targeted exercises. Some of the most effective glute exercises include:

  • Squats: Engages the entire lower body, particularly the glutes.
  • Lunges: Targets the gluteus maximus and medius.
  • Hip Thrusts: Specifically isolates the glutes for maximum activation.
  • Deadlifts: Engages the posterior chain, including the glutes.
ExerciseMuscle Groups TargetedBenefits
SquatsQuadriceps, Hamstrings, GlutesBuilds overall lower body strength
LungesGlutes, Quadriceps, HamstringsImproves balance and coordination
Hip ThrustsGlutes, HamstringsMaximizes glute activation
DeadliftsGlutes, Hamstrings, Lower BackStrengthens posterior chain

Creatine and Glute Muscle Fiber Composition

The glute muscles consist of both fast-twitch and slow-twitch muscle fibers. Creatine supplementation is particularly effective for enhancing the size and strength of fast-twitch fibers, which are responsible for generating power and explosiveness.

  • Fast-Twitch Fibers: These fibers are more responsive to creatine, leading to greater strength gains.
  • Muscle Definition: Increased fast-twitch fiber size contributes to a more muscular and defined appearance.

Creatine and Gender Differences

Research suggests that there may be differences in how men and women respond to creatine supplementation. Some studies indicate that women may experience greater relative gains in lean muscle mass compared to men when taking creatine.

  • Hormonal Factors: Hormonal differences may influence how each gender responds to creatine.
  • Muscle Composition: Women generally have a higher percentage of slow-twitch fibers, which may affect the overall response to creatine.

How Much Creatine to Take to Help Grow Glutes

When considering supplements for muscle growth, particularly for enhancing the glutes, creatine is a popular choice. Understanding the appropriate dosage and method of supplementation is crucial for maximizing its benefits. This guide explores how much creatine to take to help grow glutes effectively.

Recommended Dosage of Creatine

There are two primary methods for taking creatine: the loading phase and the non-loading phase. Each method has its benefits, and the choice depends on your personal goals and timeline.

Loading Phase

The loading phase involves a higher initial intake of creatine to saturate the muscles quickly. Here’s how it works:

  • Dosage: 20 grams of creatine per day.
  • Duration: 5-7 days.
  • Administration: Split into four doses of 5 grams throughout the day to minimize potential stomach discomfort.

This method allows for rapid saturation of creatine stores in the muscles, which can lead to quicker results in terms of strength and muscle growth.

Non-Loading Phase

The non-loading phase is a more gradual approach that some individuals prefer. Here’s how it functions:

  • Dosage: 3-5 grams of creatine per day.
  • Duration: Continuous, until optimal muscle saturation is achieved (approximately 28 days).

This method avoids the initial high dosage and is often easier on the stomach. It still effectively increases muscle creatine levels over time.

Summary of Dosage Methods

MethodDaily DosageDurationNotes
Loading Phase20 grams5-7 daysSplit into four doses to reduce discomfort.
Non-Loading Phase3-5 gramsOngoingTakes longer to saturate muscles but is gentler.

Timing of Creatine Intake

While the exact timing of creatine supplementation may not significantly impact its effectiveness, some users prefer to take it around their workouts. Here are some considerations:

  • Post-Workout: Taking creatine after training may enhance recovery and muscle repair.
  • Convenience: Choose a time that fits your routine best. Consistency is more important than timing.

Additional Tips for Maximizing Glute Growth with Creatine

To enhance the effectiveness of creatine for glute growth, consider the following strategies:

  • Combine with Resistance Training: Focus on glute-targeted exercises such as squats, lunges, and hip thrusts. Creatine can help you lift heavier and perform more repetitions, promoting greater muscle stress and growth.
  • Stay Hydrated: Creatine draws water into muscle cells, so it’s essential to drink plenty of fluids to avoid dehydration and ensure optimal muscle function.
  • Nutrition Matters: Ensure a balanced diet rich in protein, carbohydrates, and healthy fats to support muscle growth and recovery.

Realistic Expectations and Considerations

It’s essential to understand that no supplement, including creatine, can specifically target fat loss or muscle growth in a particular area of the body. The body operates as a whole, and achieving significant glute growth requires a comprehensive approach.

  • Holistic Approach: Focus on overall body composition and strength training.
  • Fat Loss: Reducing body fat through diet and exercise will enhance glute definition.

Patience and Consistency

Building significant muscle, including in the glutes, takes time and consistent effort. Creatine can be a valuable addition to a muscle-building routine, but it is not a magic solution.

  • Gradual Improvements: Expect to see changes over several weeks or months.
  • Consistency is Key: Regular training and supplementation are crucial for success.

Proper Dosage and Hydration

To maximize the benefits of creatine, it’s vital to follow proper dosage guidelines and maintain adequate hydration.

  • Loading Phase: Many experts recommend starting with a loading phase of 20-25 grams per day for 5-7 days.
  • Maintenance Phase: Follow with a maintenance dose of 2-5 grams per day.
PhaseDosageDuration
Loading Phase20-25 grams per day5-7 days
Maintenance Phase2-5 grams per dayOngoing

Incorporating Creatine into Your Fitness Plan

For optimal results, consider the timing of your creatine supplementation. Taking creatine around your workout can help maximize its benefits.

  • Pre-Workout: Taking creatine 30-60 minutes before your workout can enhance performance.
  • Post-Workout: Consuming creatine after your workout can aid in recovery.

Creatine and Nutrition

Creatine supplementation is most effective when combined with a balanced diet that supports muscle growth. Here are some nutritional tips:

  • Protein Intake: Ensure adequate protein consumption to support muscle repair and growth.
  • Carbohydrates: Include complex carbohydrates to provide energy for workouts.
  • Healthy Fats: Incorporate healthy fats to support overall health and hormone production.
NutrientRecommended IntakeSources
Protein1.6-2.2 grams per kg body weightChicken, fish, eggs, legumes
Carbohydrates3-7 grams per kg body weightWhole grains, fruits, vegetables
Healthy Fats20-35% of total caloriesAvocados, nuts, olive oil

Read Also: Quad Exercises Dumbbells.

FAQs About Does Creatine Help Grow Glutes

Can creatine help build bigger glutes?

Yes, creatine can help build bigger glutes when combined with targeted glute exercises and proper nutrition. Creatine enhances energy production, protein synthesis, and muscle hydration, contributing to overall muscle growth, including in the glutes.

Read Also: Quad Machine.

How long does it take to see glute growth with creatine?

Building significant muscle, including in the glutes, takes time and consistent effort. Expect to see gradual improvements over several weeks or months of consistent supplementation and training.

Read Also: Free Weight Exercises for Quadriceps.

Is creatine safe for women?

Yes, creatine is generally considered safe for women when taken at the recommended dosage. Some studies suggest that women may experience greater relative gains in lean muscle mass compared to men when supplementing with creatine.

Read Also: Overhead Squat WOD.

Can creatine cause weight gain?

Creatine can cause a temporary increase in weight due to water retention in the muscles. This is a normal and expected response to creatine supplementation and does not necessarily indicate fat gain.

Read Also: Front Squat Program.

What are the best exercises to do with creatine for glute growth?

Exercises like squats, lunges, hip thrusts, and deadlifts are particularly effective for glute growth when combined with creatine supplementation. These exercises place significant stress on the glute muscles, and creatine can enhance performance and recovery during these workouts.

Read Also: 31 Day Squat Challenge.

Conclusion

In conclusion, creatine can be a valuable addition to a glute-focused training program. It enhances energy production, protein synthesis, and muscle hydration, all of which contribute to muscle growth. However, it is crucial to understand that creatine alone cannot specifically target or “spot grow” the glutes. Achieving significant glute growth requires a comprehensive approach that includes targeted exercises, proper nutrition, and consistent training over time.

Read Also: The Surprising Health Benefit of Celery Tea.

By incorporating creatine into your fitness plan, following proper dosage guidelines, and maintaining a balanced diet, you can optimize your glute growth potential. Remember to be patient and consistent in your efforts, as building muscle takes time and dedication.

Read Also: Does Creatine Cause Gyno?

Continue Reading

Exercise

31 Day Squat Challenge to Build Strength

Published

on

31 day squat challenge
Spread the love

Here is your complete guide to 31 day squat challenge.

Introduction to 31 Day Squat Challenge

Are you ready to take your fitness to the next level? The 31 day squat challenge is an exciting and effective way to improve your strength, endurance, and overall fitness. This challenge is not just about squats; it’s about building a healthier lifestyle and achieving your personal fitness goals.In this article, we will explore the 31 day squat challenge in detail, including its benefits, how to prepare, a day-by-day breakdown, proper techniques, variations, nutrition, and recovery tips. By the end, you’ll be equipped with everything you need to embark on this journey and achieve remarkable results.

What is a 31 Day Squat Challenge?

The 31 day squat challenge is a structured program designed to gradually increase the number of squats you perform each day over the course of a month. This challenge is suitable for individuals of all fitness levels, from beginners to advanced athletes.

Benefits of Doing a 31 Day Squat Challenge

  • Increased Strength: Squats target multiple muscle groups, including the quadriceps, hamstrings, glutes, and core.
  • Improved Endurance: Regular squatting enhances stamina and overall fitness.
  • Enhanced Flexibility: Squats promote better flexibility in the hips, knees, and ankles.
  • Boosted Metabolism: Engaging large muscle groups helps increase calorie burn.
  • Better Posture: Strengthening the core and lower body can lead to improved posture.

How to Get Started with a 31 Day Squat Challenge

To successfully complete the 31 day squat challenge, follow these steps:

  1. Assess Your Fitness Level: Determine how many squats you can comfortably perform.
  2. Set Realistic Goals: Aim for achievable milestones throughout the challenge.
  3. Create a Plan of Action: Schedule your workouts and stick to them.
  4. Gather Necessary Equipment: While bodyweight squats are effective, consider using weights for added resistance.
  5. Schedule Your Workouts: Consistency is key. Choose a time that works best for you.

Preparing for the Challenge

Before diving into the 31 day squat challenge, it’s essential to prepare adequately. Here are some tips:

Assessing Your Current Fitness Level

  • Test Your Squats: Perform as many squats as you can in one minute. This will help gauge your starting point.
  • Identify Strengths and Weaknesses: Recognize areas where you excel and those that need improvement.

Setting Realistic Goals

  • Short-Term Goals: Aim to increase your squat count weekly.
  • Long-Term Goals: Consider how you want to feel at the end of the challenge.

Creating a Plan of Action

  • Daily Schedule: Decide when you’ll perform your squats each day.
  • Incorporate Rest Days: Allow your muscles to recover.

Gathering Necessary Equipment

EquipmentPurpose
Yoga MatProvides comfort during floor exercises
DumbbellsAdds resistance for advanced squats
Resistance BandsEnhances strength training
Foam RollerAids in recovery and muscle relaxation

Scheduling Your Workouts

  • Morning vs. Evening: Choose a time that fits your lifestyle.
  • Consistency: Stick to your schedule for the best results.

The 31 Day Squat Challenge

The heart of the 31 day squat challenge is the daily progression of squat repetitions. Below is a detailed breakdown of what to expect each week.

Day 1-7: Beginner Level (25 Squats Per Day)

  • Day 1: 25 bodyweight squats
  • Day 2: 25 bodyweight squats
  • Day 3: 25 bodyweight squats
  • Day 4: 25 bodyweight squats
  • Day 5: 25 bodyweight squats
  • Day 6: 25 bodyweight squats
  • Day 7: 25 bodyweight squats

Day 8-14: Intermediate Level (50 Squats Per Day)

  • Day 8: 50 bodyweight squats
  • Day 9: 50 bodyweight squats
  • Day 10: 50 bodyweight squats
  • Day 11: 50 bodyweight squats
  • Day 12: 50 bodyweight squats
  • Day 13: 50 bodyweight squats
  • Day 14: 50 bodyweight squats

Day 15-21: Advanced Level (75 Squats Per Day)

  • Day 15: 75 bodyweight squats
  • Day 16: 75 bodyweight squats
  • Day 17: 75 bodyweight squats
  • Day 18: 75 bodyweight squats
  • Day 19: 75 bodyweight squats
  • Day 20: 75 bodyweight squats
  • Day 21: 75 bodyweight squats

Day 22-28: Expert Level (100 Squats Per Day)

  • Day 22: 100 bodyweight squats
  • Day 23: 100 bodyweight squats
  • Day 24: 100 bodyweight squats
  • Day 25: 100 bodyweight squats
  • Day 26: 100 bodyweight squats
  • Day 27: 100 bodyweight squats
  • Day 28: 100 bodyweight squats

Day 29-31: Maintenance Level (75 Squats Per Day)

  • Day 29: 75 bodyweight squats
  • Day 30: 75 bodyweight squats
  • Day 31: 75 bodyweight squats

Proper Squat Technique

To maximize the benefits of the 31 day squat challenge, it’s crucial to perform squats with proper form. Here’s how:

  1. Feet Shoulder-Width Apart: Position your feet so they are aligned with your shoulders.
  2. Toes Slightly Turned Out: This helps with balance and stability.
  3. Chest Up, Shoulders Back: Maintain an upright posture to protect your back.
  4. Engage Core: Tighten your abdominal muscles to support your spine.
  5. Sit Back and Down: Imagine sitting in a chair, pushing your hips back.
  6. Knees Tracking Over Toes: Ensure your knees don’t extend past your toes.
  7. Depth of Squat: Aim to lower your hips below your knees for maximum effectiveness.
  8. Breathing Pattern: Inhale as you lower down, exhale as you push back up.

Proper Squat Form

ComponentDescription
Feet PositionShoulder-width apart, toes slightly out
Back PositionStraight, chest up
Core EngagementTighten abdominal muscles
Knee AlignmentKnees should not pass toes
DepthLower hips below knees
BreathingInhale down, exhale up

Squat Variations

To keep your workouts interesting and challenging, consider incorporating different squat variations. Here are some effective options:

  • Bodyweight Squats: The basic squat, great for beginners.
  • Goblet Squats: Hold a dumbbell or kettlebell at chest level to add resistance.
  • Sumo Squats: Wider stance to target inner thighs.
  • Pistol Squats: A challenging single-leg squat for advanced athletes.
  • Overhead Squats: Hold a weight overhead to engage the core and improve stability.
  • Jump Squats: Add a jump at the top of the squat for a cardio boost.

Squat Variations

VariationBenefits
Bodyweight SquatsGreat for beginners
Goblet SquatsAdds resistance, engages core
Sumo SquatsTargets inner thighs
Pistol SquatsImproves balance and strength
Overhead SquatsEnhances core stability
Jump SquatsBoosts cardio and explosiveness

Nutrition and Recovery

Proper nutrition and recovery are essential components of the 31 day squat challenge. Here’s how to optimize both:

Importance of Proper Nutrition

  • Balanced Diet: Focus on whole foods, including lean proteins, healthy fats, and complex carbohydrates.
  • Pre-Workout Fuel: Consume a light snack rich in carbohydrates and protein before workouts.
  • Post-Workout Recovery: Eat a meal high in protein and carbohydrates to aid muscle recovery.

Protein Intake for Muscle Recovery

  • Aim for 1.2 to 2.0 grams of protein per kilogram of body weight, depending on your activity level.
  • Include sources like chicken, fish, beans, and legumes.

Hydration and Its Benefits

  • Drink plenty of water before, during, and after workouts.
  • Consider electrolyte drinks for intense sessions.

Stretching and Mobility Exercises

  • Incorporate stretching routines to improve flexibility and prevent injuries.
  • Focus on hip flexors, quadriceps, hamstrings, and calves.

Rest and Recovery Days

  • Schedule at least one rest day per week.
  • Listen to your body; if you feel fatigued, take additional rest.

Nutrition and Recovery

AspectRecommendations
Balanced DietWhole foods, lean proteins, healthy fats
Pre-Workout FuelLight snack with carbs and protein
Post-Workout MealHigh in protein and carbohydrates
Protein Intake1.2 to 2.0 g/kg of body weight
HydrationPlenty of water, consider electrolytes
StretchingFocus on major muscle groups
Rest DaysAt least one per week

Frequently Asked Questions About 31 Day Squat Challenge

Can I do the challenge every day?

Yes, the 31 day squat challenge is designed for daily practice, but it’s essential to listen to your body and take rest days as needed.

Read Also: Quad Exercises Dumbbells.

What if I miss a day?

If you miss a day, don’t be discouraged. Simply continue from where you left off. Consistency is key.

Read Also: Quad Machine.

Can I modify the challenge?

Absolutely! Adjust the number of squats based on your fitness level and comfort.

Read Also: Free Weight Exercises for Quadriceps.

How long should I rest between sets?

Rest for 30-60 seconds between sets, depending on your fitness level and how you feel.

Read Also: CrossFit Back Exercises.

Can I combine the challenge with other workouts?

Yes, you can integrate the 31 day squat challenge with other strength or cardio workouts, but ensure you allow for adequate recovery.

Read Also: Overhead Squat WOD.

Conclusion

The 31 day squat challenge is more than just a fitness program; it’s a commitment to improving your strength, endurance, and overall well-being. By following the guidelines outlined in this article, you can embark on a transformative journey that not only enhances your physical fitness but also boosts your confidence and motivation.

Read Also: The Surprising Health Benefit of Celery Tea.

Celebrate your progress, stay consistent, and encourage others to join you in this challenge. Remember, every squat brings you one step closer to your goals. Let’s get started on this exciting journey together! This comprehensive guide to the 31 day squat challenge is designed to inspire and equip you with the knowledge you need to succeed. Whether you’re a beginner or an experienced athlete, this challenge can be tailored to your fitness level, helping you achieve remarkable results. Happy squatting!

Read Also: Front Squat Program.

Continue Reading

Exercise

Front Squat Program for Strength

Published

on

front squat program
Spread the love

Here is your complete guide to front squat program.

Introduction to Front Squat Program

Let’s explore the best front squat program. Front squats are a powerhouse exercise that can significantly enhance your strength training routine. Whether you’re a seasoned athlete or a beginner looking to improve your fitness, incorporating a front squat program into your regimen can yield impressive results. This exercise not only targets major muscle groups but also promotes better posture, core stability, and overall athletic performance.

In this article, we will explore the intricacies of a front squat program, including its benefits, proper technique, and how to create an effective training plan. By the end, you’ll have all the tools necessary to elevate your front squat game and achieve your fitness goals.

Understanding the Front Squat

The front squat is a variation of the traditional squat where the barbell is positioned on the front of your shoulders, rather than across your back. This unique positioning shifts the center of gravity, requiring greater core engagement and balance.

Muscles Targeted

The front squat primarily targets the following muscle groups:

  • Quadriceps: The main muscles responsible for extending your knees.
  • Hamstrings: Assist in stabilizing the movement and flexing the knees.
  • Glutes: Critical for hip extension and overall power.
  • Core: Engaged throughout the lift to maintain stability and posture.

Comparison with Other Squats

AspectFront SquatBack Squat
Bar PositionFront of shouldersAcross upper back
Muscle EmphasisQuadriceps and coreHamstrings and glutes
Posture RequirementUpright torsoMore forward lean
Load CapacityGenerally lower than back squatHigher load capacity
Core EngagementHigher due to upright positionModerate

Understanding these differences can help you choose the right squat variation for your training goals.

Creating a Front Squat Program

Before diving into a front squat program, it’s crucial to assess your current fitness level. Here are some steps to help you gauge your readiness:

  • Mobility Assessment: Check your ankle, hip, and thoracic spine mobility. Poor mobility can hinder your squat depth and form.
  • Strength Assessment: Perform a bodyweight squat to evaluate your technique and strength. If you struggle with form, consider focusing on bodyweight squats or lighter weights before progressing.

Program Structure

A well-structured front squat program should include the following components:

  • Frequency: Aim to train front squats 2-3 times per week, allowing sufficient recovery between sessions.
  • Volume: Start with 3-4 sets of 6-8 reps, adjusting based on your experience and goals.
  • Progression: Gradually increase the weight as you become more comfortable with the movement. Aim for a 5-10% increase in weight every 2-3 weeks.

Sample 4-Week Front Squat Program

Here’s a sample program to get you started:

WeekDay 1 (Heavy)Day 2 (Volume)Day 3 (Technique)
14×6 @ 70% 1RM4×8 @ 65% 1RM4×5 @ 60% 1RM
24×5 @ 75% 1RM4×7 @ 70% 1RM4×4 @ 65% 1RM
34×4 @ 80% 1RM4×6 @ 75% 1RM4×3 @ 70% 1RM
44×3 @ 85% 1RM4×5 @ 80% 1RM4×2 @ 75% 1RM

Key Points for Each Training Day

  • Day 1 (Heavy): Focus on lifting heavier weights with fewer reps. This day is about building strength.
  • Day 2 (Volume): Increase the number of reps with moderate weights. This helps build endurance and muscle hypertrophy.
  • Day 3 (Technique): Concentrate on form and technique with lighter weights. This is crucial for preventing injuries and improving overall performance.

Technique and Form

Executing a front squat with proper form is essential for maximizing benefits and minimizing injury risk. Follow these steps:

  1. Setup: Stand with your feet shoulder-width apart. Position the barbell across the front of your shoulders, using a clean grip or crossed-arm grip.
  2. Brace Your Core: Engage your core muscles to maintain stability throughout the lift.
  3. Squat Down: Initiate the squat by bending at the hips and knees, keeping your torso upright and chest lifted.
  4. Depth: Aim to squat down until your thighs are at least parallel to the ground. Deeper squats can be beneficial if your mobility allows.
  5. Ascent: Push through your heels to return to the starting position, ensuring your knees track over your toes.

Common Mistakes to Avoid

  • Leaning Forward: Keep your torso upright to avoid excessive strain on your back.
  • Knees Caving In: Ensure your knees track in line with your toes to prevent injury.
  • Not Engaging the Core: A strong core is vital for maintaining proper posture and balance.

Tips for Improving Form

  • Mobility Exercises: Incorporate stretches and mobility drills for your hips, ankles, and thoracic spine.
  • Video Analysis: Record your squats to identify areas for improvement.
  • Practice with Lighter Weights: Focus on form before increasing the load.

Accessory Exercises

Incorporating accessory exercises into your training can help improve your front squat performance. Here are some effective options:

  • Lunges: Target the quads and glutes while enhancing balance and stability.
  • Deadlifts: Strengthen the posterior chain, which is crucial for overall squat performance.
  • Core Exercises: Planks, Russian twists, and hanging leg raises can help build core strength, supporting your front squat technique.

Sample Accessory Exercise Routine

ExerciseSetsReps
Lunges310-12
Deadlifts36-8
Planks330-60 seconds
Russian Twists315-20 per side

Nutrition for Optimal Performance

Nutrition plays a crucial role in your strength training journey. Here are some tips to optimize your diet for a front squat program:

  • Macronutrient Ratios: Aim for a balanced intake of carbohydrates, proteins, and fats. A common ratio is 40% carbs, 30% protein, and 30% fats.
  • Protein Sources: Include lean meats, fish, eggs, dairy, legumes, and plant-based proteins to support muscle recovery and growth.
  • Carbohydrate Timing: Consume complex carbohydrates before and after workouts to fuel your performance and aid recovery.

Hydration Tips

  • Stay Hydrated: Drink plenty of water throughout the day, especially before and after workouts.
  • Electrolyte Balance: Consider electrolyte drinks during intense training sessions to maintain hydration levels.

Should You Contact a Coach for a Front Squat Program or Can You Do It Yourself?

When it comes to strength training, particularly with complex movements like the front squat, many individuals find themselves at a crossroads: Should they seek the guidance of a coach or attempt to develop their own program? This article explores both options, weighing the benefits of professional coaching against the possibility of self-directed training.

Benefits of Working with a Coach

One of the primary advantages of hiring a coach is their expertise in strength training and biomechanics. A qualified coach can provide:

  • Personalized Programming: Coaches can tailor a front squat program to your specific needs, goals, and fitness level. They can adjust the volume, intensity, and frequency based on your progress and any limitations you may have.
  • Technique Correction: Proper form is crucial for maximizing gains and preventing injuries. A coach can observe your technique in real-time and provide immediate feedback, helping you avoid common mistakes such as caving elbows or improper squat depth.

Accountability and Motivation

Having a coach can significantly enhance your motivation and accountability. With a coach, you are more likely to:

  • Stay Committed: Scheduled sessions create a sense of responsibility, encouraging you to stick to your training plan.
  • Push Your Limits: Coaches can challenge you to lift heavier weights or try new techniques that you might shy away from when training alone.

When You Might Consider Training Yourself

If you have a solid understanding of strength training principles and access to reliable resources, you may feel confident in developing your own front squat program. Here are some reasons why self-training could be a viable option:

  • Cost-Effective: Training on your own eliminates the financial burden of hiring a coach, allowing you to allocate those funds toward gym memberships or equipment.
  • Flexibility: You can design your training schedule around your lifestyle, making it easier to fit workouts into your day without the constraints of a coach’s availability.

Learning Through Experience

Training yourself can also provide valuable learning experiences:

  • Self-Discovery: You will learn to listen to your body and understand what works best for you, which can enhance your overall training experience.
  • Adaptability: You can experiment with different techniques, rep ranges, and accessory exercises without the need for approval or guidance, allowing for a more personalized approach.

Key Considerations for Self-Training

If you decide to go the self-training route, keep these considerations in mind to ensure a successful front squat program:

Assess Your Current Level

Before starting, evaluate your current strength and mobility. This assessment will help you determine the appropriate starting weight and volume for your front squat program.

Prioritize Technique

Focus on mastering the proper technique before increasing weights. Resources such as instructional videos, articles, and online forums can provide valuable insights into correct form and common pitfalls.

Incorporate Progress Tracking

Keep a training log to track your progress. Documenting your lifts, sets, and reps can help you identify patterns and make necessary adjustments to your program.

Ultimately, the decision to work with a coach or train yourself for a front squat program depends on your individual circumstances, goals, and preferences. If you’re new to strength training or struggle with technique, seeking a coach’s guidance can be invaluable. On the other hand, if you have experience and feel confident in your ability to self-manage your training, you can successfully develop a program on your own.

Common Challenges and Solutions

While training for front squats, you may encounter some challenges. Here are common issues and their solutions:

  • Lack of Mobility: If you struggle with depth, incorporate mobility exercises such as hip openers and ankle stretches into your routine.
  • Discomfort During the Lift: Experiment with different grip styles (clean grip vs. crossed-arm grip) to find what feels most comfortable.
  • Mental Barriers: Fear of heavy lifting can be daunting. Start with lighter weights and gradually increase as your confidence builds.

Solutions and Tips

  • Stretching Routines: Dedicate time to stretching before and after workouts to improve flexibility and reduce soreness.
  • Mental Strategies: Visualization techniques can help you mentally prepare for lifting heavier weights.

Read Also: Keto Vegetarian Breakfast.

FAQs About Front Squat Program

What is the best way to start a front squat program?

Begin by assessing your fitness level, focusing on mobility and form. Start with bodyweight squats and gradually introduce weights as you become more comfortable.

Read Also: Salmon Breakfast Recipes.

How often should I do front squats?

Aim for 2-3 times per week, allowing for recovery days in between sessions to prevent overtraining.

Read Also: Quad Exercises Dumbbells.

Can beginners perform front squats?

Yes! Beginners can start with bodyweight squats or light weights to master the technique before progressing to heavier loads.

Read Also: Quad Machine.

What are the benefits of front squats compared to back squats?

Front squats emphasize the quadriceps and core, promote better posture, and reduce strain on the lower back compared to back squats.

Read Also: Free Weight Exercises for Quadriceps.

How can I prevent injuries while doing front squats?

Focus on proper form, gradually increase weights, and incorporate mobility work to enhance flexibility and prevent injuries.

Read Also: CrossFit Back Exercises.

Conclusion

Incorporating a front squat program into your training can lead to significant improvements in strength, power, and overall fitness. By understanding the mechanics, following a structured program, and maintaining proper nutrition, you can maximize your results and enjoy the numerous benefits of this essential exercise.

Read Also: The Surprising Health Benefit of Celery Tea.

Now that you have the knowledge and tools to embark on your front squat journey, it’s time to hit the gym and start squatting! Remember, consistency and dedication are key to achieving your fitness goals. Happy squatting!

Read Also: Overhead Squat WOD.

Continue Reading

Trending