Here is your complete guide to lat pulldown machine.
Introduction to Lat Pulldown Machine
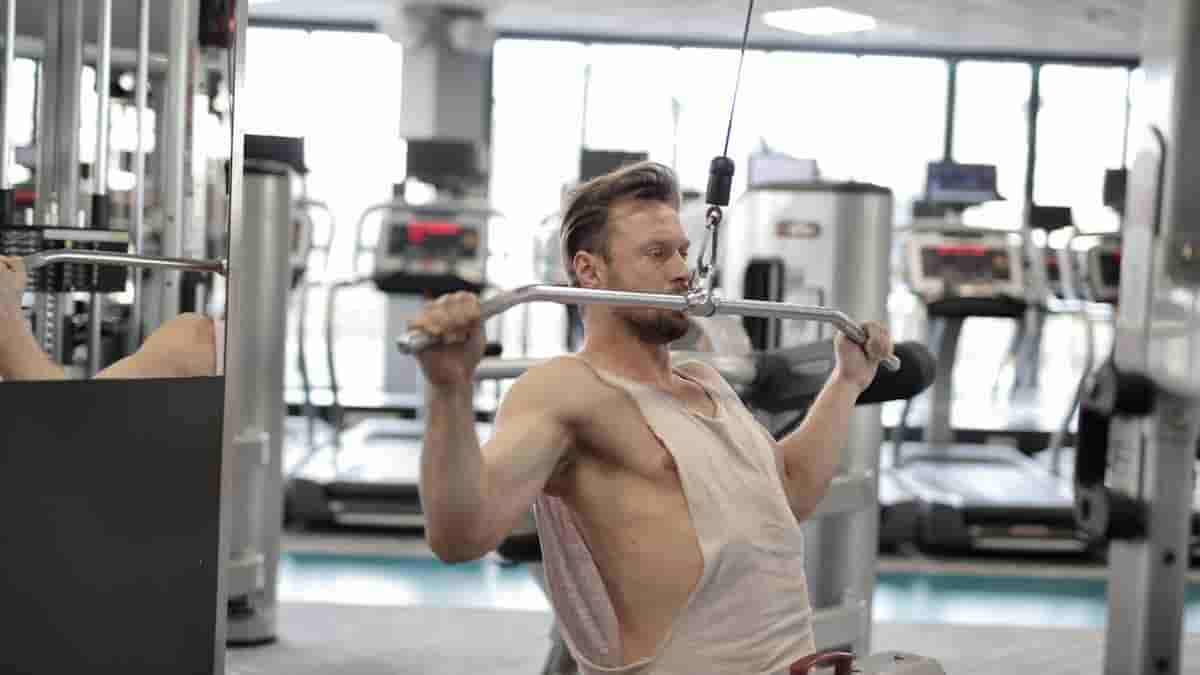
The lat pulldown is a popular exercise that targets the muscles of the back, particularly the latissimus dorsi or the “lats.” It is a compound exercise that involves pulling a weight from above your head to your chest. The lat pulldown machine is an effective exercise for strengthening many muscles of the back, improving upper body strength, and aiding in pull-up progression. In this article, we will provide an overview of the lat pulldown machine, including movement requirements, joint actions, and involved musculature. We will also discuss various grip positions and how they impact the muscle engagement during lat pulldown exercises.
Understanding the Lat Pulldown Machine
Anatomy and Muscles Targeted
Before diving into the mechanics of the exercise, it’s essential to understand the anatomy of the lat pulldown machine and the muscles it primarily targets. The machine typically consists of a padded seat, thigh pads, a vertical bar, and a cable pulley system. The primary muscles engaged during a lat pulldown include:
- Latissimus dorsi: The largest muscle in the back, responsible for adduction, extension, and medial rotation of the shoulder.
- Trapezius: Located in the upper back and neck, aiding in shoulder elevation, retraction, and depression.
- Rhomboids: Situated between the shoulder blades, assisting in scapular retraction and stabilization.
- Biceps brachii: The primary muscle of the upper arm, contributing to elbow flexion during the exercise.
Lat Pulldown Targeted Muscles
The primary muscle targeted during a lat pulldown is the latissimus dorsi, which is the largest muscle in the back. The latissimus dorsi is responsible for adduction, extension, and internal rotation of the shoulder joint. Other muscles that are activated during a lat pulldown include:
- Biceps brachii
- Teres major
- Rhomboids
- Brachioradialis
- Infraspinatus
- Flexors of the wrist and hand
- Abdominals
Technique
To perform a lat pulldown, follow these steps:
- Sit at a lat pulldown machine, facing the bar.
- Adjust the knee pad so your knees are bent at 90 degrees and firmly under the pad, and your feet are flat on the floor.
- Reach up and grasp the bar a little wider than shoulder width.
- Pull the bar down towards your chest, keeping your elbows close to your body.
- Pause for a moment when the bar is at chest level.
- Slowly return to the starting position by extending the elbows and abducting the shoulders.
During the concentric phase (pulling the bar towards the chest), the shoulder adducts, horizontally abducts, and internally rotates. The elbow flexes, and the scapulae downwardly rotate and retract. During the eccentric phase (returning to the starting position), the shoulder abducts, horizontally adducts, and externally rotates. The elbow extends, and the scapulae upwardly rotate and protract.
Grip Positions for the Lat Pulldown
There are variations in grip positions that a person can use when performing the lat pulldown exercise. Grip positions include:
- Pronated narrow-grip (hands closer than shoulder-width)
- Pronated wide-grip (hands greater than shoulder-width)
- Narrow neutral-grip
- Wide neutral-grip
Using different grip positions can emphasize different muscle groups. For example, a wide-grip lat pulldown targets the lats more, while a close-grip lat pulldown targets the biceps more. A neutral-grip lat pulldown targets the middle back muscles.
Lat Pulldown Variations
There are several variations of the lat pulldown exercise that can be performed to target different muscle groups and add variety to your workout routine. Some of the most common variations include:
- Behind-the-neck lat pulldown: This variation involves pulling the bar down behind your neck instead of in front of your chest. However, this variation is controversial and should be avoided as it can cause shoulder injuries.
- Straight-arm lat pulldown: This variation isolates the lats much more than the other versions. It also changes the movement from a multi-joint exercise to a single-joint movement at the shoulders.
- Close-grip lat pulldown: This variation targets the biceps more than the lats.
- Wide-grip lat pulldown: This variation targets the lats more than the biceps.
- Reverse-grip lat pulldown: This variation targets the biceps and forearms more than the lats.
Common Mistakes and How to Correct Them
The lat pulldown is one of the most popular exercises used to strengthen the muscles of the back. However, it is also one of the most commonly performed exercises with poor form. Here are some common mistakes and how to correct them:
- Allowing the bar to rise too quickly: Maintain full control of the weight to enable an ideal eccentric muscle contraction.
- Leaning back too far while pulling down: Keep your back straight and lower the weight if you cannot maintain proper form.
- Pulling the bar too far down: Pull the bar down to your chest, not your stomach or hips.
- Using momentum to pull the bar down: Use a slow and controlled movement to engage the targeted muscles.
Lat Pulldown Machine Workouts
Now that you understand the fundamentals of the lat pulldown machine and the various grip options available, let’s explore some sample workout routines designed to maximize your back development and upper body strength. Whether you’re a beginner looking to build a foundation of strength or an experienced lifter seeking to add mass and definition to your back muscles, these workouts can be tailored to suit your individual needs and preferences.
Beginner Workout Routine
If you’re new to strength training or unfamiliar with the lat pulldown machine, it’s essential to start with lighter weights and focus on mastering proper form and technique. The following workout routine is designed for beginners and can be performed 2-3 times per week on non-consecutive days:
Exercise 1: Lat Pulldown
- Sets: 3
- Reps: 10-12
- Rest: 60-90 seconds between sets
- Tips: Focus on slow and controlled movements, emphasizing the stretch and contraction of the back muscles with each repetition.
The exercise 2: Seated Cable Row
- Sets: 3
- Reps: 10-12
- Rest: 60-90 seconds between sets
- Tips: Keep your back straight, chest up, and shoulders back throughout the movement to maximize back engagement.
Exercise 3: Dumbbell Row
- Sets: 3
- Reps: 10-12 per arm
- Rest: 60-90 seconds between sets
- Tips: Maintain a neutral spine and avoid excessive swinging or momentum by using controlled movements.
Intermediate Workout Routine
Once you’ve built a foundation of strength and mastered the basic exercises, you can progress to more advanced workout routines to challenge your muscles and stimulate further growth. The following intermediate-level workout routine incorporates a combination of compound and isolation exercises to target the back muscles from various angles:
Exercise 1: Wide-Grip Lat Pulldown
- Sets: 4
- Reps: 8-10
- Rest: 60-90 seconds between sets
- Tips: Use a wide grip to target the outer portion of the latissimus dorsi, focusing on maximizing the range of motion and achieving a full stretch and contraction with each repetition.
The exercise 2: T-Bar Row
- Sets: 4
- Reps: 8-10
- Rest: 60-90 seconds between sets
- Tips: Keep your torso parallel to the ground and pull the weight towards your abdomen, squeezing your shoulder blades together at the top of the movement.
Exercise 3: Close-Grip Pulldown
- Sets: 4
- Reps: 8-10
- Rest: 60-90 seconds between sets
- Tips: Use a narrow grip to target the inner portion of the latissimus dorsi and emphasize thickness, focusing on pulling the bar down towards your lower chest.
Advanced Workout Routine
For experienced lifters seeking to take their back training to the next level, the following advanced workout routine incorporates advanced techniques such as drop sets, supersets, and rest-pause sets to maximize muscle stimulation and promote hypertrophy:
Exercise 1: Pull-Up (Weighted)
- Sets: 5
- Reps: 6-8
- Rest: 60-90 seconds between sets
- Tips: Use a weight belt or dip belt to add resistance to your pull-ups, focusing on maintaining strict form and achieving a full range of motion with each repetition.
The exercise 2: Single-Arm Dumbbell Row (Drop Set)
- Sets: 4
- Reps: 8-10 (each arm)
- Rest: 60-90 seconds between sets
- Tips: Perform each set to failure, then immediately reduce the weight and continue the set until failure again, maximizing muscle fatigue and promoting muscular endurance.
Exercise 3: Cable Pullover (Superset with Straight-Arm Pulldown)
- Sets: 3
- Reps: 10-12 (each exercise)
- Rest: 60-90 seconds between supersets
- Tips: Perform a cable pullover followed immediately by a straight-arm pulldown without resting between exercises, focusing on maintaining constant tension on the back muscles throughout the superset.
Incorporating Progressive Overload
Regardless of your training experience level, it’s essential to incorporate progressive overload into your lat pulldown workouts to stimulate muscle growth and continue making progress over time. Progressive overload involves gradually increasing the intensity, volume, or resistance of your workouts to continually challenge your muscles and force them to adapt and grow. Here are some strategies for incorporating progressive overload into your lat pulldown routine:
- Increase Weight: As you become stronger, gradually increase the weight you’re lifting to ensure that your muscles are being sufficiently challenged.
- Add Reps or Sets: Once you can perform the prescribed number of reps and sets with good form, increase either the number of reps or sets to further stimulate muscle growth.
- Decrease Rest Periods: Shorten the rest periods between sets to increase the intensity of your workouts and keep your muscles under tension for longer periods.
- Use Advanced Techniques: Incorporate advanced training techniques such as drop sets, supersets, and rest-pause sets to shock your muscles and break through plateaus.
By incorporating progressive overload into your lat pulldown routine, you can ensure that your workouts remain challenging and continue to produce results over time.
Benefits of the Lat Pulldown
The lat pulldown is an effective exercise for strengthening many muscles of the back, improving upper body strength, and aiding in pull-up progression. Some of the benefits of the lat pulldown include:
- Targets the latissimus dorsi, which is the largest muscle in the back
- Improves upper body strength
- Aids in pull-up progression
- Provides an alternative to the pullup when you’re not yet strong enough to perform one without assistance
- Works a variety of other muscles that work together to extend and adduct your arms
- Benefits athletes in many sports that require a similar pulling motion, such as swimming, gymnastics, wrestling, and cross-country skiing
Benefits for Different Fitness Goals
Whether your goal is to build a stronger back, improve your posture, or enhance overall upper body strength, the lat pulldown machine offers a multitude of benefits that can support your fitness journey. Let’s explore some of the key benefits for different fitness goals:
Building a Stronger Back for Improved Posture
One of the primary benefits of incorporating the lat pulldown machine into your workout routine is its ability to target the muscles of the upper back, including the latissimus dorsi, trapezius, and rhomboids. Strengthening these muscles can help improve posture by promoting proper alignment of the spine and reducing the risk of postural deviations such as rounded shoulders and forward head posture. By performing lat pulldowns regularly, you can develop a strong, resilient back that supports proper posture and reduces the likelihood of back pain and injury.
Enhancing Overall Upper Body Strength and Muscle Definition
In addition to targeting the muscles of the back, the lat pulldown machine also engages secondary muscles such as the biceps, forearms, and core stabilizers. By incorporating lat pulldowns into your upper body workouts, you can develop strength and muscle definition in these muscle groups, resulting in a more balanced and aesthetically pleasing physique. Whether your goal is to build a V-shaped back, sculpted arms, or a chiseled midsection, the lat pulldown machine can be a valuable tool for achieving your desired results.
Fat Loss and Calorie-Burning Potential
While the lat pulldown machine is primarily a strength-training exercise, it can also have significant calorie-burning potential when performed as part of a high-intensity interval training (HIIT) or circuit training workout. By incorporating lat pulldowns into a comprehensive fitness program that includes cardiovascular exercise and resistance training, you can maximize calorie expenditure, accelerate fat loss, and improve overall cardiovascular health. Additionally, the muscle-building effects of lat pulldowns can help boost your metabolism and increase your body’s calorie-burning capacity, both during and after your workout.
Maintenance and Care Tips
To ensure the longevity and optimal performance of your lat pulldown machine, it’s essential to follow proper maintenance and care protocols. Here are some tips to keep your machine in top condition:
- Regular Cleaning: Wipe down the seat, pads, and handles of the machine with a disinfectant wipe after each use to prevent the buildup of sweat and bacteria.
- Inspect Cables and Pulleys: Periodically inspect the cables and pulleys of the machine for signs of wear, fraying, or damage, and replace any worn or damaged parts as needed.
- Lubricate Moving Parts: Apply a silicone-based lubricant to the moving parts of the machine, such as the cable pulleys and guide rods, to ensure smooth and friction-free operation.
- Adjust and Tighten Bolts: Check the bolts and fasteners of the machine regularly to ensure they are securely tightened, and make any necessary adjustments to maintain stability and safety.
By incorporating these maintenance and care tips into your routine, you can prolong the lifespan of your lat pulldown machine and ensure that it continues to provide a safe and effective workout experience for years to come.
Frequently Asked Questions About Lat Pulldown Machine
How do I adjust the seat height on a lat pulldown machine?
To adjust the seat height on a lat pulldown machine, follow these steps:
- Locate the seat adjustment mechanism, typically located beneath the seat or on the side of the machine.
- Pull the adjustment lever or handle to release the seat lock.
- Raise or lower the seat to the desired height.
- Release the adjustment lever or handle to lock the seat in place.
- Test the seat height to ensure it is comfortable and properly aligned with the pulldown bar.
Can I use the lat pulldown machine if I have shoulder issues?
While the lat pulldown machine can be an effective exercise for building back strength, individuals with shoulder issues should exercise caution and consult with a healthcare professional before incorporating the exercise into their workout routine. Depending on the nature and severity of the shoulder issue, modifications may be necessary to avoid exacerbating pain or discomfort. Consider using a neutral grip or reducing the range of motion to alleviate stress on the shoulders and focus on strengthening the surrounding muscles through targeted rehabilitation exercises.
Read Also: Radish vs Potato.
Is it normal to feel soreness in my arms and back after using the lat pulldown machine?
Yes, it is normal to experience muscle soreness in the arms and back after using the lat pulldown machine, especially if you’re new to the exercise or have recently increased the intensity of your workouts. This soreness, known as delayed onset muscle soreness (DOMS), typically occurs 24-48 hours after exercise and is a sign that your muscles are adapting to the stress of the workout and rebuilding stronger and more resilient tissue. To alleviate soreness and promote recovery, consider incorporating gentle stretching, foam rolling, and active recovery techniques into your post-workout routine.
Read Also: Protein Bar Before Bed.
What weight should I start with as a beginner?
As a beginner, it’s important to start with a weight that allows you to perform the exercise with proper form and technique while still challenging your muscles. Begin with a light to moderate weight that allows you to complete 10-12 repetitions with good form. If you’re able to perform more than 12 repetitions with ease, consider increasing the weight gradually until you reach a challenging but manageable level. Remember, it’s better to start with lighter weights and focus on mastering the movement pattern before progressing to heavier loads to reduce the risk of injury and ensure long-term progress.
Read Also: Is Pizza Good for Bulking.
How often should I incorporate lat pulldowns into my workout routine?
The frequency at which you incorporate lat pulldowns into your workout routine will depend on your individual fitness goals, training experience, and overall workout schedule. As a general guideline, aim to perform lat pulldowns 1-3 times per week, with at least 48 hours of rest between sessions to allow for adequate recovery. Beginners may benefit from starting with 1-2 sessions per week to allow for proper adaptation to the exercise, while more advanced lifters may be able to handle higher frequencies of training. Listen to your body, adjust your training volume and intensity as needed, and prioritize recovery to maximize the effectiveness of your workouts.
Read Also: Cinnamon Toast Crunch Pancakes.
Conclusion
The lat pulldown is a popular exercise that targets the muscles of the back, particularly the latissimus dorsi or the “lats.” It is a compound exercise that involves pulling a weight from above your head to your chest. Using different grip positions and variations can emphasize different muscle groups and add variety to your workout routine.
Read Also: The Surprising Health Benefit of Celery Tea.
However, it is important to maintain proper form to avoid injury and maximize the effectiveness of the exercise. Incorporating the lat pulldown into your workout routine can improve upper body strength, aid in pull-up progression, and benefit athletes in many sports that require a similar pulling motion.
Read Also: Pull Ups While Pregnant.