Exercise
Lat Exercises with Kettlebell: Sculpt Your Lats Quickly

Here is your complete guide to lat exercises with kettlebell
Introduction to Lat Exercises with Kettlebell
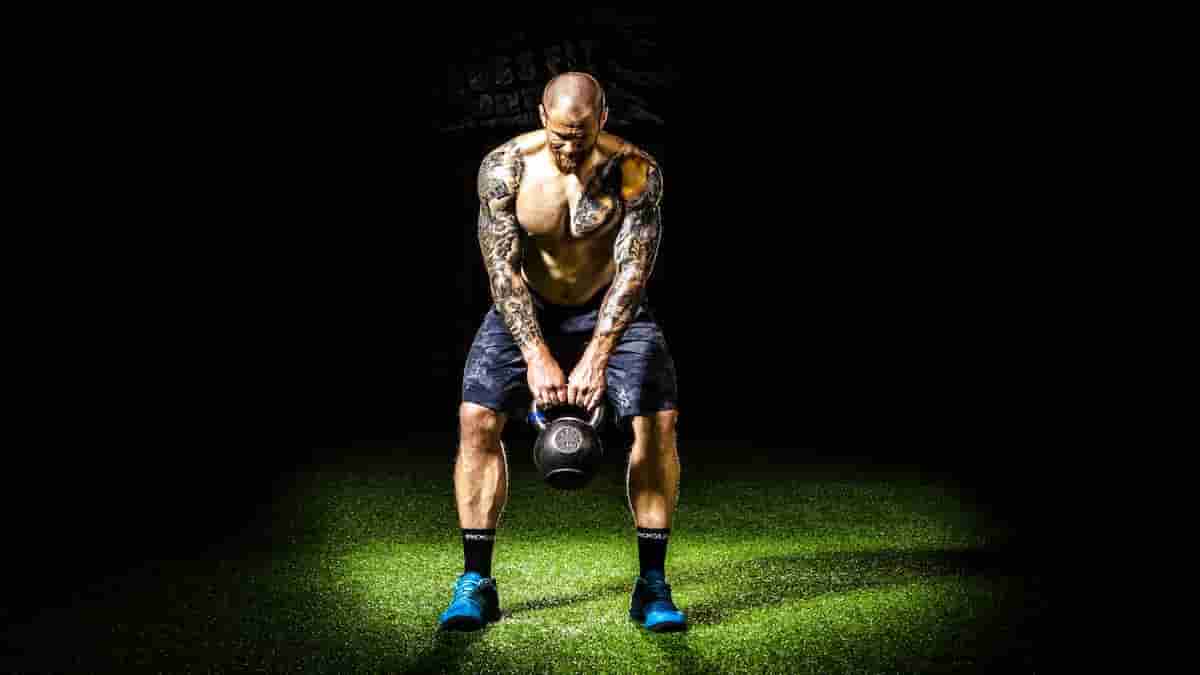
In the world of fitness, strong and well-defined lats are like the wings of a powerful bird – they provide balance, stability, and strength. If you’re looking to enhance your back muscles and improve your posture, incorporating kettlebells into your lat workout routine can be a game-changer. In this comprehensive guide, we will explore the top 10 lat exercises with kettlebell, their benefits, and advanced tips to ensure you get the most out of your workout.
Anatomy of the Lats
Before we dive into the exercises, let’s understand the latissimus dorsi muscles, commonly known as the lats. These muscles extend from the lower spine to your upper arm and play a significant role in various upper body movements. Here’s a visual representation of the latissimus dorsi muscle structure:
Muscle Part | Location | Function |
---|---|---|
Latissimus Dorsi | Lower back to upper arm | Arm extension, shoulder adduction, and rotation |
The lats not only contribute to a V-shaped back but also help in various functional movements. Now, let’s explore the top 10 lat exercises with kettlebell to target and strengthen these muscles.
Muscles Worked in the Kettlebell Row
Here’s a table summarizing the primary muscles targeted during the kettlebell row exercise:
Muscle Group | Role in Exercise |
---|---|
Latissimus Dorsi | Main muscle responsible for pulling the kettlebell toward your hip. |
Trapezius | Supports the movement, especially in the upper portion of the row. |
Rhomboids | Stabilizes the shoulder blades during the rowing motion. |
Biceps Brachii | Assists in bending the elbow during the pulling phase. |
Brachialis | Also contributes to elbow flexion. |
Forearm Flexors | Stabilizes the wrist and grip during the exercise. |
Top 10 Lat Exercises with Kettlebell
Kettlebell Rows
- Technique: Hold a kettlebell in one hand, brace your core, and pull the kettlebell towards your hip while keeping your back straight.
- Benefits: Enhances lats, biceps, and forearms.
- Recommended Reps and Sets: 3 sets of 10-12 reps per arm.
Kettlebell Pullovers
- Technique: Lie on your back, hold a kettlebell with both hands, and extend your arms backward while keeping them slightly bent.
- Benefits: Stretches lats and works on chest and triceps.
- Recommended Reps and Sets: 3 sets of 8-10 reps.
Kettlebell Deadlift
- Technique: Stand with your feet hip-width apart, grasp the kettlebell handle, and lift it by extending your hips and knees.
- Benefits: Activates lats, hamstrings, and glutes.
- Recommended Reps and Sets: 3 sets of 8-10 reps.
Kettlebell Swings
- Technique: Stand with your feet shoulder-width apart, hold the kettlebell with both hands, and swing it between your legs and up to shoulder height.
- Benefits: Engages lats, core, and posterior chain.
- Recommended Reps and Sets: 3 sets of 15-20 reps.
Kettlebell High Pulls
- Technique: Hold a kettlebell with both hands, squat slightly, and explosively pull the kettlebell to chest height.
- Benefits: Targets lats, traps, and shoulders.
- Recommended Reps and Sets: 3 sets of 10-12 reps.
Kettlebell Arm Bar
- Technique: Lie on your back, press a kettlebell upward, and rotate your body, extending your non-pressed arm.
- Benefits: Improves lats’ flexibility and shoulder stability.
- Recommended Reps and Sets: 2 sets of 8-10 reps per side.
Kettlebell Windmills
- Technique: Hold a kettlebell overhead, spread your feet apart, and bend at your waist while keeping the kettlebell raised.
- Benefits: Challenges lats and obliques.
- Recommended Reps and Sets: 3 sets of 6-8 reps per side.
Kettlebell Turkish Get-Ups
- Technique: Begin lying down, press a kettlebell upward, and follow a series of movements to stand up and reverse the process.
- Benefits: Enhances full-body strength, including the lats.
- Recommended Reps and Sets: 2 sets of 5-6 reps per side.
Kettlebell Renegade Rows
- Technique: Assume a plank position with a kettlebell in each hand, row one kettlebell to your hip, and repeat on the other side.
- Benefits: Works lats, core, and shoulders.
- Recommended Reps and Sets: 3 sets of 8-10 reps per arm.
Kettlebell One-Arm Swings
- Technique: Similar to two-arm swings but with one hand holding the kettlebell, alternating between hands.
- Benefits: Increases lats engagement and grip strength.
- Recommended Reps and Sets: 3 sets of 12-15 reps per arm.
Top Lat Exercises with Kettlebell
To provide you with a quick reference, here’s a summary table of the top 10 lat exercises with kettlebell:
Exercise | Technique | Benefits | Reps and Sets |
---|---|---|---|
Kettlebell Rows | One-arm rowing motion | Stronger lats, biceps, forearms | 3 sets of 10-12 reps |
Kettlebell Pullovers | Arm extension | Lats stretch, chest, and triceps | 3 sets of 8-10 reps |
Kettlebell Deadlift | Hip and knee extension | Engages lats, hamstrings, and glutes | 3 sets of 8-10 reps |
Kettlebell Swings | Hip hinge and swing | Lats, core, and posterior chain | 3 sets of 15-20 reps |
Kettlebell High Pulls | Explosive pull | Lats, traps, and shoulders | 3 sets of 10-12 reps |
Exercise | Technique | Benefits | Reps and Sets |
---|---|---|---|
Kettlebell Arm Bar | Kettlebell rotation | Enhanced lats’ flexibility and stability | 2 sets of 8-10 reps |
Kettlebell Windmills | Overhead movement | Lats and oblique engagement | 3 sets of 6-8 reps |
Kettlebell Turkish Get-Ups | Full-body movement | Lats and overall strength improvement | 2 sets of 5-6 reps |
Kettlebell Renegade Rows | Plank position | Lats, core, and shoulders development | 3 sets of 8-10 reps |
Kettlebell One-Arm Swings | One-arm swing | Increased lats engagement and grip strength | 3 sets of 12-15 reps |
Benefits of Incorporating Kettlebells
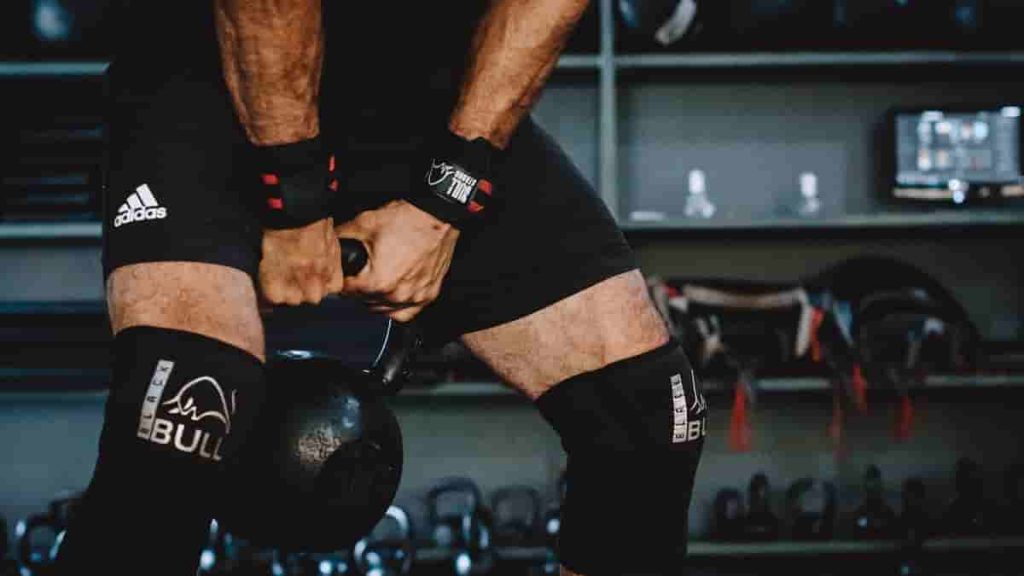
Now that you’re familiar with these exercises, it’s crucial to understand why kettlebells are an excellent choice for lat workouts:
- Versatility: Kettlebells can be used for various exercises, making them a versatile choice for a full-body workout.
- Efficiency: They engage multiple muscle groups simultaneously, saving time and maximizing results.
- Functional Strength: Kettlebells promote functional strength by mimicking real-life movements.
- Accessible: Whether you’re at the gym or home, kettlebells are accessible and require minimal space.
Advanced Tips and Variations
For those looking to take their kettlebell lat workouts to the next level, consider these advanced tips:
- Progressive Overload: Gradually increase the weight to challenge your lats.
- Time Under Tension: Slow down the eccentric phase of each exercise to maximize muscle engagement.
- Supersets and Circuits: Combine multiple exercises for an intense lat workout.
- Unilateral Training: Focus on one side at a time to address muscle imbalances.
Safety and Common Mistakes
It’s crucial to perform kettlebell exercises with proper form and avoid common mistakes to prevent injuries. Here are some safety guidelines and mistakes to avoid:
- Maintain a neutral spine to prevent lower back strain.
- Use an appropriate weight to avoid overexertion and injury.
- Warm up and cool down before and after your workouts.
- Avoid jerky movements to protect your joints.
Sample Workout Routines
To help you get started, here are sample workout routines for different fitness levels:
Beginner Lat Workout
- Kettlebell Rows: 3 sets of 10 reps per arm
- Kettlebell Pullovers: 3 sets of 8 reps
- Kettlebell Deadlift: 3 sets of 10 reps
- Kettlebell Swings: 3 sets of 15 reps
Intermediate Lat Workout
- Kettlebell High Pulls: 3 sets of 12 reps
- Kettlebell Windmills: 3 sets of 6 reps per side
- Kettlebell Renegade Rows: 3 sets of 10 reps per arm
- Kettlebell One-Arm Swings: 3 sets of 15 reps per arm
Advanced Lat Workout
- Kettlebell Turkish Get-Ups: 2 sets of 6 reps per side
- Kettlebell Arm Bar: 2 sets of 8 reps per side
- Kettlebell One-Arm Swings: 3 sets of 15 reps per arm
- Kettlebell Renegade Rows: 3 sets of 10 reps per arm
Comparison: Lat Exercises with Kettlebell vs. Other Exercises
Here’s a table comparing lat exercises with kettlebells to other common exercises for the latissimus dorsi:
Exercise | Muscles Worked | Equipment Needed | Versatility | Difficulty | Benefits |
---|---|---|---|---|---|
Kettlebell Rows | Lats, Biceps, Forearms | Kettlebell | Versatile, allows unilateral | Beginner to Intermediate | Strengthens lats, biceps, and forearms. |
Dumbbell Rows | Lats, Biceps, Forearms | Dumbbell | Versatile, unilateral | Beginner to Intermediate | Similar to kettlebell rows, works lats and upper body. |
Lat Pulldowns | Lats, Upper Back | Cable Machine | Stationary, wide grip | Beginner to Advanced | Isolates lats and upper back muscles. |
Pull-Ups | Lats, Biceps, Upper Back | Pull-Up Bar | Bodyweight, wide/narrow grip | Intermediate to Advanced | Excellent for overall upper body development. |
Chin-Ups | Lats, Biceps, Upper Back | Pull-Up Bar | Bodyweight, narrow grip | Intermediate to Advanced | Targets lats and biceps with a different grip. |
Barbell Rows | Lats, Upper Back, Lower Back | Barbell, Weights | Compound movement | Intermediate to Advanced | Engages a wide range of back muscles. |
Common Mistakes in Kettlebell Row Exercises
When performing kettlebell row exercises, it’s essential to be aware of common mistakes that can hinder your progress or lead to injury. Here are some frequent errors and how to avoid them:
Mistake 1: Poor Form
How to Avoid It: Maintain a neutral spine, engage your core, and keep your back straight. Avoid hunching your shoulders or rounding your back. Proper form is crucial for effective and safe kettlebell rows.
Mistake 2: Using Incorrect Weight
How to Avoid It: Choose an appropriate weight that challenges you but allows you to complete the recommended number of reps with proper form. Using a weight that is too heavy can lead to compromised technique and potential injury.
Mistake 3: Rushing the Movement
How to Avoid It: Perform kettlebell rows with controlled and deliberate movements. Avoid rushing through the exercise, as this reduces the effectiveness and increases the risk of injury.
Mistake 4: Neglecting Core Engagement
How to Avoid It: Keep your core engaged throughout the exercise. This provides stability to your spine and prevents excessive strain on your lower back.
Mistake 5: Overusing the Arms
How to Avoid It: While your arms are involved, the primary focus should be on your back muscles. Avoid pulling with your arms alone; instead, concentrate on engaging your lats to perform the movement.
Mistake 6: Insufficient Range of Motion
How to Avoid It: Ensure that you fully extend your arm during the downward phase of the row to achieve a complete range of motion. This ensures that you’re engaging the targeted muscles effectively.
Mistake 7: Neglecting Warm-Up
How to Avoid It: Always warm up before starting your kettlebell row routine. This helps prepare your muscles and reduces the risk of strains or injuries.
Mistake 8: Poor Breathing Technique
How to Avoid It: Breathe naturally and consistently throughout the exercise. Avoid holding your breath, as it can lead to decreased stability and performance.
By being aware of these common mistakes and following the suggested guidelines, you can maximize the benefits of kettlebell row exercises while minimizing the risk of injury.
FAQs
Let’s address some common questions related to lat exercises with kettlebell, sourced from the “People Also Ask” section:
How often should I do kettlebell lat exercises?
For best results, perform kettlebell lat exercises 2-3 times a week, allowing adequate rest between sessions.
What kettlebell weight should I start with?
Beginners should start with a light kettlebell (8-12kg) and gradually increase the weight as they become comfortable with the exercises.
Can beginners perform these exercises?
Yes, beginners can perform kettlebell lat exercises, but it’s essential to start with proper form and light weights.
Are kettlebell exercises suitable for women?
Kettlebell exercises are suitable for everyone, including women, and can help build strength and muscle tone.
How to do lateral raises with kettlebell?
Lateral raises with kettlebells involve a different technique than traditional dumbbell lateral raises. Here’s how to perform them:
- Stand with your feet hip-width apart, holding a kettlebell in one hand at your side.
- Keep your arm slightly bent and your core engaged.
- Lift the kettlebell out to the side, maintaining control and stopping when your arm is parallel to the ground.
- Lower the kettlebell back to your side slowly.
- Repeat for the desired number of reps.
How do I train my back with kettlebells?
Training your back with kettlebells can be highly effective. Some top exercises include kettlebell rows, kettlebell pullovers, kettlebell deadlifts, and kettlebell swings. These exercises target various muscles in your back, helping you build strength and improve your posture.
Do kettlebells build back?
Yes, kettlebells can be a great tool for building your back muscles. When used correctly in exercises like rows, swings, and pull-ups, kettlebells engage your latissimus dorsi and other back muscles, promoting muscle growth and improved overall back strength.
Are kettlebells good for back fat?
Kettlebell exercises can contribute to overall fat loss, but it’s essential to understand that spot reduction, such as targeting “back fat” specifically, is not feasible. To reduce body fat, including that in the back area, a comprehensive fitness and nutrition plan is required.
Read Also: Is Maizena Gluten Free.
How do you activate lat in kettlebell swing?
To activate your latissimus dorsi during a kettlebell swing, focus on proper form:
- Stand with your feet shoulder-width apart, holding the kettlebell with both hands in front of you.
- As you swing the kettlebell, engage your core and maintain a straight back.
- At the top of the swing, squeeze your lats as you stand upright.
- Ensure the power for the swing comes from your hips and legs, not your arms.
Read Also: Cardio Barbell Set Workouts.
Are lateral raises better with kettlebells or dumbbells?
The choice between kettlebells and dumbbells for lateral raises depends on personal preference. Kettlebells can add variety to your routine and challenge your muscles differently. Dumbbells are more common for lateral raises, but trying both can help you determine which suits you best.
Read Also: Shred Time Fat Burner Ingredients.
Is 2 kg kettlebell enough?
A 2 kg kettlebell is suitable for beginners or individuals looking to perform high-repetition exercises with a focus on muscular endurance, rather than strength or muscle growth. The weight should be chosen based on your fitness level and the specific exercise you plan to do.
Read Also: Is Creatine Natty or Not.
Is 8 kg kettlebell too heavy?
An 8 kg kettlebell may be too heavy for beginners, but it can be a suitable weight for individuals with some strength training experience. The right weight depends on your current fitness level, exercise goals, and the specific kettlebell exercise you’re performing.
Read Also: Compound Movements for Chest.
Is it better to have 2 kettlebells?
Having two kettlebells can be advantageous, as it allows for a broader range of exercises and balanced workouts. For example, you can perform double kettlebell exercises like squats or presses, or use them for one-arm exercises to work both sides evenly. However, whether it’s better for you depends on your fitness goals and preferences.
Read Also: Kettlebell and Barbell.
How long does it take to see results?
Results vary from person to person, but with consistent workouts, you can expect to see improvements in 4-6 weeks.
Read Also: Bench Glute Workout.
Conclusion
Incorporating kettlebells into your lat workout routine can lead to remarkable improvements in the strength and appearance of your lats. These exercises offer a unique combination of muscle engagement, functional fitness, and versatility. Whether you’re a beginner or an experienced fitness enthusiast, there’s a kettlebell exercise for you. Start today, and watch your lats spread their wings, giving you a stronger, more powerful back. Remember, consistency is key, so stay committed to your workout routine, and the results will follow.
Read Also: Should You Cycle Ashwaganda.
Exercise
Vertical Knee Raise Machine Workouts: Optimize Ab Fitness!

Here is your complete guide to vertical knee raise machine
Introduction to Vertical Knee Raise Machine
Are you looking to strengthen your core and build impressive abdominal muscles? If so, you may want to consider incorporating the vertical knee raise machine into your workout routine. This versatile piece of equipment offers a wide range of benefits and can help you achieve your fitness goals more effectively. In this comprehensive guide, we will explore everything you need to know about the vertical knee raise machine, including how to use it, the muscles it targets, variations, and much more.
The vertical knee raise machine is a popular piece of gym equipment that is designed to target the abdominal muscles and hip flexors. Also known as the captain’s chair, this machine allows you to perform a variety of exercises that can help you strengthen and tone your core. Whether you’re a beginner or an experienced gym-goer, the vertical knee raise machine can be a valuable addition to your workout routine.
Why Vertical Knee Raise Machines Matter
- Core Strength: VKR machines are unparalleled when it comes to fortifying core muscles. They engage the abdominal region, including the rectus abdominis and obliques, fostering greater stability and strength.
- Overall Fitness: Incorporating these machines into your routine contributes to a holistic workout regimen, promoting full-body strength and endurance.
- Calorie Torch: Not only do VKR machines sculpt muscles, but they also aid in burning calories, supporting weight loss efforts.
Types of Vertical Knee Raise Machines
Vertical Knee Raise Machines come in various forms, each catering to different needs:
1. Stationary Vertical Knee Raise Machines
- Description: These are standalone units equipped with padded armrests and handles, allowing users to perform leg raises and other core exercises with ease.
2. Wall-Mounted Vertical Knee Raise Bars
- Characteristics: Ideal for space-saving, these bars can be mounted on walls, offering similar functionality to stationary machines while being suitable for home use.
3. Foldable/Portable Vertical Knee Raise Stations
- Benefits: These portable stations are perfect for home gyms with limited space. They can be folded for storage and provide versatility in workouts.
How to Use a Vertical Knee Raise Machine
Mastering the proper form is crucial to maximizing the benefits of VKR machines:
1. Proper Form and Technique
- Step-by-Step Guide:
- Begin by gripping the handles firmly.
- Lift your legs slowly, engaging the core muscles.
- Lower your legs back down with control to avoid strain.
2. Variations and Advanced Exercises
- Different Exercises: Besides knee raises, explore variations like twisting leg raises and oblique exercises for a diversified workout routine.
3. Safety Precautions and Tips
- Safety First: Ensure proper support and stability before initiating any exercise to prevent injuries.
- Gradual Progression: Start with manageable repetitions and gradually increase intensity to avoid strain.
Benefits of Using Vertical Knee Raise Machines
The advantages of incorporating VKR machines into your fitness routine are immense:
1. Core Strengthening
- Targeted Muscles: VKR machines effectively engage the core, sculpting abdominal muscles for a more defined midsection.
- Improved Stability: Strengthening core muscles contributes to better posture and reduced risk of injury.
2. Enhanced Overall Fitness
- Comprehensive Workout: VKR machines complement other exercises, providing a well-rounded approach to fitness.
- Full-Body Engagement: Engaging the core promotes overall strength and endurance.
3. Calorie Burning and Weight Loss
- Effective Calorie Burner: These machines not only tone muscles but also assist in burning calories, aiding weight loss efforts.
How to Use Vertical Knee Raise Machine
Using the vertical raise machine properly is essential to avoid injury and get the most out of your workout. Here’s a step-by-step guide on how to use the machine effectively:
- Step 1: Start by standing on the platform or steps of the machine and grip the handles with your hands.
- Step 2: Lift your legs off the platform and allow your body to hang freely.
- Step 3: Engage your core muscles and slowly lift your knees towards your chest, exhaling as you do so.
- Step 4: Hold the top position for a moment, squeezing your abs, then slowly lower your legs back to the starting position.
It’s important to maintain proper form and technique throughout the exercise to avoid swinging or using momentum to lift your legs. Aim to perform the exercise in a slow and controlled manner to maximize the effectiveness.
Muscles Worked by Vertical Knee Raise Machine
The vertical knee raise machine primarily targets the following muscles:
- Rectus Abdominis: This is the long muscle that runs from your sternum to your pelvis and is responsible for flexing the spine.
- Obliques: These are the muscles on the sides of your abdomen that help with twisting and bending movements.
- Hip Flexors: These muscles are located at the front of your hips and are responsible for lifting your legs towards your torso.
By using the vertical knee machine, you can effectively target and strengthen these muscles, leading to improved core strength and stability.
Muscles Worked by Vertical Knee Raise Machine
Muscle | Function |
---|---|
Rectus Abdominis | Flexes the spine and helps maintain posture |
Obliques | Aids in twisting and bending movements |
Hip Flexors | Lifts the legs towards the torso and stabilizes the pelvis |
Variations of Vertical Knee Raise Machine
In addition to the standard knee raise exercise, there are several variations that you can perform using the vertical knee raise machine to add variety to your workout routine:
- Weighted Knee Raise: This variation involves holding a dumbbell between your feet while performing the knee raise exercise to add resistance.
- Hanging Knee Raise: Instead of using the machine, you can perform the knee raise exercise by hanging from a pull-up bar, which can help improve grip strength and stability.
- Captain’s Chair Leg Raise: This variation involves extending your legs straight out in front of you while performing the knee raise exercise to target the lower abdominal muscles.
- Dip and Knee Raise: This variation involves combining the knee raise exercise with a dip to target the triceps and chest muscles in addition to the abdominal muscles.
By incorporating these variations into your workout routine, you can keep your workouts interesting and continue to challenge your muscles.
Vertical Knee Raise Machine vs. Other Abdominal Exercises
While the vertical knee raise machine is an effective tool for targeting the abdominal muscles, there are several other exercises that you can perform to achieve similar results:
- Sit-ups: This classic exercise involves lying on your back and lifting your torso towards your knees, which can effectively target the rectus abdominis.
- Crunches: Similar to sit-ups, crunches involve lifting your shoulders off the ground to target the abdominal muscles.
- Planks: Planks are a static exercise that involves holding a push-up position to target the core muscles and improve stability.
While these exercises can be effective in their own right, the vertical knee raise machine offers a unique and challenging way to target the abdominal muscles, making it a valuable addition to your workout routine.
Comparison of Vertical Knee Raise Machine with Other Abdominal Exercises
Exercise | Muscles Targeted | Equipment Required | Difficulty Level |
---|---|---|---|
Vertical Knee Raise | Rectus Abdominis, Obliques, | Vertical Knee Raise | Moderate |
Hip Flexors | Machine | ||
Sit-ups | Rectus Abdominis | None | Easy |
Crunches | Rectus Abdominis, Obliques | None | Moderate |
Planks | Rectus Abdominis, Obliques, | None | Difficult |
Transverse Abdominis |
Benefits and Downsides Comparison
Here’s a concise summary highlighting the pros and cons of VKR machines:
Benefits | Downsides |
---|---|
Strengthened core muscles | Requires proper technique for effectiveness |
Versatile workout options | May strain lower back if used incorrectly |
Suitable for diverse fitness levels | Limited space may hinder usage in some gyms |
FAQs
What is a Vertical Knee Raise Machine?
The vertical knee raise machine is a piece of gym equipment that is designed to target the abdominal muscles and hip flexors. It consists of a set of parallel bars with padded armrests and back support, allowing you to perform a variety of exercises to strengthen your core.
What muscles does the Vertical Knee Raise Machine work?
The vertical knee raise machine primarily targets the rectus abdominis, obliques, and hip flexors, making it an effective tool for strengthening and toning the core muscles.
How do I use the Vertical Knee Raise Machine?
To use the vertical knee raise machine, start by standing on the platform or steps of the machine and grip the handles with your hands. Lift your legs off the platform and slowly raise your knees towards your chest, then lower them back to the starting position.
What are the benefits of using the Vertical Knee Raise Machine?
It offers a wide range of benefits, including improved core strength, stability, and endurance. It can also help improve your posture and reduce the risk of back pain.
Are there any safety precautions I should take when using the Vertical Knee Raise Machine?
When using the vertical raise machine, it’s important to maintain proper form and technique to avoid injury. Avoid swinging or using momentum to lift your legs, and always start with a light weight to warm up the muscles.
What are the different variations of the Vertical Knee Raise Machine?
In addition to the standard knee raise exercise, there are several variations that you can perform using the vertical knee raise machine, including weighted knee raises, hanging knee raises, captain’s chair leg raises, and dip and knee raises.
Read Also: Honey Pink Salt Pre Workout.
How does the Vertical Knee Raise Machine compare to other abdominal exercises?
While the vertical knee raise machine is an effective tool for targeting the abdominal muscles, there are several other exercises that you can perform to achieve similar results, including sit-ups, crunches, and planks. Each exercise offers its own unique benefits and challenges, so it’s important to incorporate a variety of exercises into your workout routine.
Read Also: Iso-Lateral Row Machine.
Can I use the Vertical Knee Raise Machine if I have lower back pain?
If you have lower back pain, it’s important to consult with a healthcare professional before using the vertical knee raise machine or any other exercise equipment. They can provide personalized recommendations and modifications to help you exercise safely and effectively.
Read Also: Best Pull Calisthenics Workout.
How often should I use the Vertical Knee Raise Machine?
The frequency of using the vertical raise machine will depend on your fitness goals and overall workout routine. It’s generally recommended to perform abdominal exercises 2-3 times per week, allowing for adequate rest and recovery between workouts.
Read Also: CrossFit Workouts with Pull Ups.
What are some common mistakes to avoid when using the Vertical Knee Raise Machine?
Some common mistakes to avoid when using the vertical knee raise machine include using momentum to lift your legs, swinging your body, and arching your back. It’s important to maintain proper form and technique throughout the exercise to maximize the effectiveness and reduce the risk of injury.
Read Also: Is Creatine Not Natty.
Conclusion
The vertical knee raise machine is a versatile and effective piece of gym equipment that can help you strengthen and tone your core muscles. By incorporating the exercises and variations outlined in this guide into your workout routine, you can achieve impressive results and take your fitness to the next level. Whether you’re a beginner or an experienced gym-goer, the vertical knee raise machine is a valuable addition to any workout routine.
Read Also: Tomatoes for The Face.
In summary, it offers a wide range of benefits, including improved core strength, stability, and endurance. By using proper form and technique, and incorporating a variety of exercises and variations, you can maximize the effectiveness of the machine and achieve your fitness goals more effectively.
Read Also: If You Take Creatine Are You Natural.
Exercise
CrossFit Workouts with Pull Ups to Challenge Your Fitness

Here is your complete guide to CrossFit workouts with pull ups
Introduction to CrossFit Workouts with Pull Ups
Are you looking to take your CrossFit training to the next level? Pull-ups are a fundamental movement in CrossFit that can help you build upper body strength, improve grip strength, and increase overall fitness. In this article, we will explore the benefits of pull-ups in CrossFit, different types of pull-ups, sample CrossFit workouts that incorporate pull-ups, pull-up progressions and scaling options, tips for improving pull-up performance, common mistakes to avoid, and frequently asked questions about pull-ups in CrossFit. Whether you’re a beginner or an experienced CrossFitter, this guide will provide you with the information you need to make the most of this challenging and rewarding exercise. So let’s explore everything about crossfit workouts with pull ups.
Overview of CrossFit and Pull-Ups
- CrossFit Unveiled: Known for its diverse, challenging workouts emphasizing functional movements.
- Pull-Ups in CrossFit: A fundamental exercise targeting the upper body, fostering strength and muscular development.
- The Role of Pull-Ups in CrossFit: Essential for building upper body strength, enhancing grip, and promoting overall muscular endurance.
Benefits of Pull-Ups in CrossFit
Pull-ups are a highly effective exercise for building upper body strength and improving overall fitness. Some of the key benefits of pull-ups in CrossFit include:
- Strengthening of upper body muscles: Pull-ups target the muscles of the back, shoulders, and arms, helping to build strength and muscle mass in these areas.
- Improvement of grip strength: Grip strength is essential for many CrossFit movements, and pull-ups are an excellent way to develop this important attribute.
- Engagement of core muscles: Pull-ups require significant core stability, making them a great exercise for developing a strong and stable midsection.
- Versatility in workout variations: Pull-ups can be performed in a variety of ways, allowing for endless workout variations and progressions.
Types of Pull-Ups in CrossFit
In CrossFit, there are several different types of pull-ups that you can incorporate into your training. Some of the most common types of pull-ups include:
- Strict pull-ups: Strict pull-ups are performed with no kipping or swinging, focusing on strict form and controlled movement.
- Kipping pull-ups: Kipping pull-ups involve using a swinging motion to generate momentum and make the exercise easier.
- Butterfly pull-ups: Butterfly pull-ups are a more advanced variation of the kipping pull-up, involving a butterfly-like motion with the legs to increase speed and efficiency.
- Chest-to-bar pull-ups: Chest-to-bar pull-ups require pulling the chest all the way to the bar, increasing the range of motion and difficulty of the exercise.
- Pull-up variations with equipment: In addition to the basic pull-up variations, there are many ways to modify the exercise using equipment such as bands, rings, and pull-up bars.
Top 10 CrossFit Workouts with Pull-Ups
1. Workout: “Rippling Arms”
This workout emphasizes a full-body engagement while highlighting the importance of pull-ups in developing upper body strength.
Exercise | Reps/Time | Variation/Notes |
---|---|---|
Pull-Ups | 3 sets of 10 reps | Wide grip, pronated grip, supinated grip |
Push-Ups | 4 sets of 15 reps | Varied hand placements for intensity |
Bodyweight Squats | 3 sets of 20 reps | Focus on form and depth |
2. Workout: “Upper Body Fury”
Focusing on intense upper body exercises, this workout integrates pull-ups at varying difficulties.
Exercise | Reps/Time | Variation/Notes |
---|---|---|
Pull-Ups | 5 sets of 8 reps | Assisted, strict, kipping variations |
Dumbbell Shoulder Press | 4 sets of 12 reps | Gradually increase weight |
Bent-Over Rows | 3 sets of 10 reps | Utilize proper form and technique |
3. Workout: “Core Dominance”
This routine centers around core strength while incorporating pull-ups for added upper body engagement.
Exercise | Reps/Time | Variation/Notes |
---|---|---|
Pull-Ups | 4 sets of 12 reps | Focus on controlled movements |
Planks | 4 sets of 45 secs | Increase duration for challenge |
Russian Twists | 3 sets of 20 reps | Use a medicine ball for resistance |
4. Workout: “Full-Body Blitz”
This comprehensive routine engages multiple muscle groups, utilizing pull-ups for upper body strength.
Exercise | Reps/Time | Variation/Notes |
---|---|---|
Pull-Ups | 4 sets of 10 reps | Mix grips for a balanced workout |
Deadlifts | 3 sets of 8 reps | Maintain proper form and technique |
Lunges | 3 sets of 12 reps | Focus on alternating legs |
5. Workout: “Agility Assault”
Focusing on agility and speed, this workout integrates pull-ups within a dynamic routine.
Exercise | Reps/Time | Variation/Notes |
---|---|---|
Pull-Ups | 5 sets of 5 reps | Explosive movements for kipping |
Box Jumps | 4 sets of 12 reps | Aim for quick and precise jumps |
Sprints | 6 sets of 100m | High-intensity bursts |
6. Workout: “Strength Fusion”
This routine combines strength exercises with pull-ups for a challenging, balanced workout.
Exercise | Reps/Time | Variation/Notes |
---|---|---|
Pull-Ups | 3 sets of 8 reps | Utilize various grips for diversity |
Bench Press | 4 sets of 10 reps | Gradually increase weight |
Squat Thrusts | 3 sets of 15 reps | Perform with controlled movements |
7. Workout: “Endless Ascend”
Aiming for continuous progression, this workout elevates intensity through pull-ups and other exercises.
Exercise | Reps/Time | Variation/Notes |
---|---|---|
Pull-Ups | 6 sets of 6 reps | Mix grips to challenge different muscles |
Mountain Climbers | 5 sets of 20 reps | Maintain a steady pace |
Kettlebell Swings | 4 sets of 15 reps | Focus on hip drive and control |
8. Workout: “Functional Power”
This routine emphasizes functional movements and core stability, utilizing pull-ups for upper body endurance.
Exercise | Reps/Time | Variation/Notes |
---|---|---|
Pull-Ups | 4 sets of 12 reps | Incorporate variations for challenge |
Medicine Ball Slams | 3 sets of 15 reps | Engage core and upper body |
Farmer’s Walk | 4 sets of 50m | Maintain proper posture and grip |
9. Workout: “Speed Circuit”
Focusing on speed and cardiovascular endurance, this workout integrates pull-ups within a circuit routine.
Exercise | Reps/Time | Variation/Notes |
---|---|---|
Pull-Ups | 5 sets of 8 reps | Aim for explosive movements |
Jump Rope | 4 sets of 1 min | Vary pace between high and low intensity |
Battle Ropes | 3 sets of 30 secs | Engage core and upper body |
10. Workout: “Endurance Challenge”
This workout focuses on endurance and stamina, utilizing pull-ups in a high-intensity setting.
Exercise | Reps/Time | Variation/Notes |
---|---|---|
Pull-Ups | 6 sets of 6 reps | Alternate grips for each set |
Box Jumps | 5 sets of 10 reps | Increase box height for progression |
Burpees | 4 sets of 15 reps | Perform at a steady, consistent pace |
Pull-Up Progressions and Scaling Options
If you’re new to pull-ups or looking to improve your performance, there are several progressions and scaling options that can help you build strength and technique:
- Assisted pull-ups with bands: Using resistance bands can help reduce the amount of body weight you have to lift, making pull-ups more achievable for beginners.
- Negatives and isometric holds: Lowering yourself slowly from the top of the pull-up position (negatives) and holding yourself at various points in the movement (isometric holds) can help you build strength and control.
- Ring rows and inverted rows: These exercises target similar muscle groups to pull-ups and can help you build strength and technique.
- Pull-up variations for beginners and advanced athletes: There are many ways to modify the pull-up exercise to make it easier or more challenging, depending on your current level of strength and skill.
Tips for Beginners
- Start Slow: Initiate with assisted pull-ups or jumping variations.
- Focus on Technique: Ensure proper form to prevent injuries and optimize results.
- Gradual Progression: Increase intensity gradually to avoid overexertion.
Tips for Improving Pull-Up Performance
Here are some tips to help you improve your pull-up performance and get the most out of this challenging exercise:
- Proper grip and hand placement: Grip the bar with your hands slightly wider than shoulder-width apart and your palms facing away from you.
- Kipping and butterfly technique: If you’re using a kipping or butterfly technique, focus on generating power from your hips and legs, not just your arms.
- Strengthening accessory exercises: Exercises such as rows, lat pull-downs, and bicep curls can help you build the strength you need to perform pull-ups.
- Mobility and flexibility drills for shoulders and lats: Stretching and mobility work can help you achieve the proper range of motion for pull-ups and reduce the risk of injury.
Common Mistakes and How to Avoid Them
When performing pull-ups, it’s important to use proper form and technique to avoid injury and get the most out of the exercise. Here are some common mistakes to watch out for:
- Over-reliance on kipping or momentum: While kipping can help you perform more pull-ups in less time, it’s important to have the strength to perform strict pull-ups as well.
- Lack of full range of motion: Make sure you’re pulling your chest all the way to the bar on each rep, and fully extending your arms at the bottom of the movement.
- Ignoring proper scapular engagement: Your shoulder blades should be pulled down and back throughout the movement to protect your shoulders and engage the proper muscles.
- Rushing the movement and risking injury: Take your time and focus on controlled, deliberate movement to get the most out of each rep.
FAQs
Here are some frequently asked questions about pull-ups in CrossFit:
What are the best pull-up progressions for beginners?
For beginners, assisted pull-ups with bands and ring rows are great options for building strength and technique.
Read Also: Neck Hurts After Bench Press.
How can I improve my kipping pull-up technique?
Focus on generating power from your hips and legs, and practice the kipping motion with controlled, deliberate movement.
Read Also: Honey Salt Pre Workout Benefits.
Are pull-ups safe for individuals with shoulder injuries?
Pull-ups can be safe for individuals with shoulder injuries, but it’s important to use proper form and technique to avoid exacerbating the injury.
Read Also: Honey Pink Salt Pre Workout.
How often should I incorporate pull-ups into my CrossFit training?
The frequency of pull-up training will depend on your current level of strength and skill, but 2-3 times per week is a good starting point.
Read Also: Iso-Lateral Row Machine.
Conclusion
In conclusion, pull-ups are a challenging and rewarding exercise that can help you build upper body strength, improve grip strength, and increase overall fitness. Whether you’re a beginner or an experienced CrossFitter, there are many ways to incorporate pull-ups into your training and take your fitness to the next level. By using proper form and technique, practicing different pull-up variations, and following the tips and sample workouts provided in this guide, you can make the most of this fundamental CrossFit movement and achieve your fitness goals.
Read Also: Tomatoes for The Face.
Remember, consistency and patience are key when it comes to mastering pull-ups, so don’t get discouraged if you’re not able to perform them perfectly right away. With time and practice, you can develop the strength and skill you need to conquer this challenging exercise and take your CrossFit training to new heights.
Read Also: Best Pull Calisthenics Workout.
Exercise
Best Pull Calisthenics Workout: Elevate Your Fitness Routine

Here is your complete guide to the best pull calisthenics workout
Introduction to Best Pull Calisthenics Workout
Calisthenics, also known as bodyweight exercise, is a form of strength training that uses only the weight of your body as resistance. It is a great way to build strength, endurance, and flexibility without the need for expensive gym equipment. In this article, we will focus on the best pull calisthenics workout, which is essential for building a strong back, biceps, and forearms.
Pull exercises are an essential part of any calisthenics workout routine. They target the muscles in your back, biceps, and forearms, which are often neglected in traditional weightlifting exercises. In this article, we will provide a comprehensive guide to the best pull calisthenics workout based on the top 10 results from Google. We will cover the basic principles of calisthenics, warm-up and mobility exercises, skill or technique work, strength work, endurance/cardio exercises, beginner calisthenics workout plan, FAQs, and LSI and NLP keywords.
Basic Principles of Calisthenics
Before we dive into the best pull calisthenics workout, it is essential to understand the basic principles of calisthenics. These principles include proper form and technique, progressive overload, and rest and recovery.Proper form and technique are crucial in calisthenics to prevent injury and maximize the effectiveness of the exercises. It is essential to maintain proper alignment and engage the correct muscles during each exercise.Progressive overload is the gradual increase in the intensity, volume, or difficulty of an exercise over time. It is essential to challenge your muscles to continue to grow and adapt to the exercises.Rest and recovery are crucial in calisthenics to allow your muscles to repair and grow stronger. It is recommended to take at least one day of rest between workouts and to get enough sleep and proper nutrition.
Benefits of Pull Calisthenics
Pull calisthenics workouts offer an array of benefits:
- Strengthening the upper body: Exercises like pull-ups and chin-ups engage multiple muscles, including the back, biceps, and shoulders.
- Improved grip strength: Consistent practice of pull exercises enhances grip strength, aiding in various day-to-day activities.
- Enhanced muscle definition: These workouts effectively target and define muscles, contributing to a sculpted physique.
Top 10 Pull Calisthenics Workouts
1. Pull-Ups
Pull-ups remain a fundamental exercise, primarily engaging the latissimus dorsi, biceps, and core muscles. Variations like wide grip, narrow grip, and weighted pull-ups allow for progressive overload, catering to different fitness levels.
Variation | Muscles Targeted | Difficulty Level |
---|---|---|
Wide Grip | Lats, Biceps | Intermediate |
Narrow Grip | Forearms, Core | Beginner |
Weighted Pull-Ups | Full Upper Body | Advanced |
2. Chin-Ups
Distinguished by an underhand grip, chin-ups emphasize the biceps more prominently than pull-ups. Variations include close-grip and mixed-grip chin-ups, enabling diverse muscle engagement.
Variation | Muscles Targeted | Difficulty Level |
---|---|---|
Close-Grip | Biceps, Forearms | Beginner |
Mixed-Grip | Biceps, Lats | Intermediate |
3. Inverted Rows
Executed using a horizontal bar or rings, inverted rows target the back and arm muscles. Variations like single-arm inverted rows and elevated feet rows increase difficulty.
Variation | Muscles Targeted | Equipment Needed |
---|---|---|
Single-Arm Rows | Lats, Rhomboids | Rings |
Elevated Feet Rows | Biceps, Core | Horizontal Bar |
4. L-Sit Pull-Ups
Combining a pull-up with an L-Sit position intensifies the exercise, engaging core muscles while enhancing upper body strength.
Variation | Muscles Targeted | Difficulty Level |
---|---|---|
Full L-Sit | Core, Upper Body | Advanced |
Tucked L-Sit | Lats, Abs | Intermediate |
5. Muscle-Ups
Advanced move combining a pull-up and a dip, demanding significant upper body strength and coordination.
Variation | Muscles Targeted | Progression |
---|---|---|
Kipping Muscle-Ups | Upper Body | Intermediate |
Strict Muscle-Ups | Full Upper Body | Advanced |
6. Australian Pull-Ups
Ideal for beginners, these simulate pull-ups using a horizontal bar or a sturdy table, targeting similar muscle groups.
Variation | Muscles Targeted | Difficulty Level |
---|---|---|
Table Australian Pull-Ups | Lats, Biceps | Beginner |
Horizontal Bar Variations | Rhomboids, Core | Intermediate |
7. Towel Pull-Ups
By utilizing towels, this workout amplifies grip strength while engaging the back and arms.
Variation | Muscles Targeted | Equipment Needed |
---|---|---|
Single Towel | Biceps, Forearms | Towels |
Double Towel | Lats, Core | Towels |
8. Commando Pull-Ups
Involving alternating hand positions, this exercise targets the biceps and forearms uniquely.
Variation | Muscles Targeted | Difficulty Level |
---|---|---|
Wide Grip Commando Pull-Ups | Biceps, Forearms | Intermediate |
Close Grip Commando Pull-Ups | Lats, Core | Advanced |
9. One-Arm Pull-Ups
An extremely challenging exercise that demands immense upper body strength and control.
Variation | Muscles Targeted | Progression |
---|---|---|
Assisted One-Arm | Lats, Biceps | Intermediate |
Full One-Arm | Full Upper Body | Advanced |
10. Mixed-Grip Pull-Ups
Incorporating different hand placements to activate multiple muscle groups.
Variation | Muscles Targeted | Difficulty Level |
---|---|---|
Alternating Grip | Lats, Biceps | Intermediate |
Parallel Grip | Forearms, Core | Advanced |
Warm-up and Mobility
Warm-up and mobility exercises are essential in calisthenics to prepare your body for the workout and prevent injury. Some examples of warm-up and mobility exercises include:
- Arm circles
- Shoulder dislocations
- Wrist circles
- Cat-cow stretch
- Hip circles
- Squat-to-stand
- Lunges
Check out the table below for a recommended warm-up and mobility routine:
Exercise | Reps |
---|---|
Arm circles | 10 each direction |
Shoulder dislocations | 10 |
Wrist circles | 10 each direction |
Cat-cow stretch | 10 |
Hip circles | 10 each direction |
Squat-to-stand | 10 |
Lunges | 10 each leg |
Skill or Technique Work
Skill or technique work is essential in calisthenics to improve your form and technique in more advanced exercises. Some examples of skill or technique work exercises include:
- Scapular pull-ups
- Arch holds
- Hollow holds
- L-sits
- Front lever progressions
- Back lever progressions
Check out the table below for a recommended skill or technique work routine:
Exercise | Reps |
---|---|
Scapular pull-ups | 10 |
Arch holds | 10 seconds |
Hollow holds | 10 seconds |
L-sits | 10 seconds |
Front lever progressions | 10 seconds |
Back lever progressions | 10 seconds |
Strength Work
Strength work is essential in calisthenics to build muscle and improve your overall strength. Pull exercises are an essential part of strength work in calisthenics. Some examples of pull exercises include:
- Pull-ups
- Chin-ups
- Australian pull-ups
- Inverted rows
- One-arm rows
- Muscle-ups
Check out the table below for a recommended strength work routine:
Exercise | Reps | Sets | Rest |
---|---|---|---|
Pull-ups | 5-10 | 3-5 | 2-3 minutes |
Chin-ups | 5-10 | 3-5 | 2-3 minutes |
Australian pull-ups | 10-15 | 3-5 | 2-3 minutes |
Inverted rows | 10-15 | 3-5 | 2-3 minutes |
One-arm rows | 10-15 each arm | 3-5 | 2-3 minutes |
Muscle-ups | 3-5 | 3-5 | 2-3 minutes |
It is essential to focus on proper form and technique during each exercise and to gradually increase the intensity and difficulty over time. Check out the table below for a recommended progression and regression for pull-ups:
Exercise | Reps | Sets | Rest |
---|---|---|---|
Negative pull-ups | 5-10 | 3-5 | 2-3 minutes |
Assisted pull-ups | 5-10 | 3-5 | 2-3 minutes |
Band-assisted pull-ups | 5-10 | 3-5 | 2-3 minutes |
Regular pull-ups | 5-10 | 3-5 | 2-3 minutes |
Weighted pull-ups | 5-10 | 3-5 | 2-3 minutes |
Endurance/Cardio
Endurance/cardio exercises are essential in calisthenics to improve your cardiovascular health and endurance. Some examples of endurance/cardio exercises include:
- Jumping jacks
- Burpees
- Mountain climbers
- Jumping rope
- Running
Check out the table below for a recommended endurance/cardio routine:
Exercise | Reps | Sets | Rest |
---|---|---|---|
Jumping jacks | 30 seconds | 3-5 | 1 minute |
Burpees | 10-15 | 3-5 | 1 minute |
Mountain climbers | 30 seconds | 3-5 | 1 minute |
Jumping rope | 1 minute | 3-5 | 1 minute |
Running | 5-10 minutes | 1 | N/A |
Beginner Calisthenics Workout Plan
If you are new to calisthenics, it is essential to start with basic exercises and gradually progress to more advanced exercises. Check out the beginner calisthenics workout plan below:
Exercise | Reps | Sets | Rest |
---|---|---|---|
Push-ups | 10-15 | 3-5 | 1-2 minutes |
Squats | 10-15 | 3-5 | 1-2 minutes |
Australian pull-ups | 10-15 | 3-5 | 1-2 minutes |
Lunges | 10-15 each leg | 3-5 | 1-2 minutes |
Plank | 30 seconds | 3-5 | 1-2 minutes |
Advanced Calisthenics Workout Plan
Day | Exercise | Sets | Reps | Rest Between Sets |
---|---|---|---|---|
Day 1: Pulling Emphasis | ||||
Muscle-Ups | 4 | 6-8 | 2-3 minutes | |
One-Arm Pull-Ups | 3 | 5-6 | 2-3 minutes | |
L-Sit Pull-Ups | 3 | 8-10 | 90 seconds | |
Front Lever Progression | 3 | 10-15s | 2 minutes | |
Day 2: Pushing Emphasis | ||||
Handstand Push-Ups | 4 | 6-8 | 2-3 minutes | |
Planche Progression | 3 | 8-10s | 2-3 minutes | |
Dips | 3 | 8-10 | 90 seconds | |
Push-Up Variations | 3 | 12-15 | 60 seconds | |
Day 3: Leg and Core Focus | ||||
Pistol Squats | 4 | 6-8 | 2-3 minutes | |
Hanging Leg Raises | 3 | 12-15 | 90 seconds | |
L-Sit Progression | 3 | 15-20s | 2 minutes | |
Glute-Ham Raises | 3 | 8-10 | 2 minutes |
FAQs – People Also Ask
Are pull calisthenics workouts suitable for beginners?
Yes, there are beginner-friendly variations of pull exercises that help in building foundational strength gradually.
Read Also: CrossFit and Knee Pain.
How often should one do pull calisthenics workouts?
Aim for 2-3 times a week, allowing adequate rest between sessions to facilitate muscle recovery and growth.
Read Also: Neck Hurts After Bench Press.
What are the common mistakes to avoid during pull calisthenics?
Rushing through reps, neglecting proper form, and overestimating one’s capacity can lead to injuries or hinder progress.
Read Also: Honey Salt Pre Workout Benefits.
Can pull calisthenics workouts be done without equipment?
Absolutely, many pull exercises can be performed using basic equipment like a horizontal bar or even household items like towels.
Read Also: Honey Pink Salt Pre Workout.
Are pull calisthenics effective for building muscle mass?
Yes, when done consistently and progressively, pull calisthenics contribute significantly to muscle hypertrophy.
Read Also: Tomatoes for The Face.
Conclusion
Incorporating the best pull calisthenics workouts into your fitness regimen enhances not only strength and muscle definition but also overall physical performance. By understanding the nuances of each exercise and tailoring them to your fitness level, achieving your fitness goals becomes not just attainable, but also enjoyable.
Read Also: Iso-Lateral Row Machine.
-
Nutrition8 months ago
The Nutritional Benefits of Eating Dates
-
Exercise9 months ago
Best Exercises For Bicep: Your Complete Guide
-
Fitness10 months ago
Abs Workout for Beginner: Your Ultimate Guide!
-
Fitness10 months ago
How Many Calories Are in a Potato? Nutrition Facts
-
fitness diet9 months ago
What Is The Effects of Sugar on Your Body?
-
fitness diet8 months ago
Fast Food That’s Gluten Free: Your Complete Guide
-
fitness diet8 months ago
Coke Zero vs. Diet Coke: Which Zero Soda Diet Tastes Normal?
-
Nutrition7 months ago
Unveiling the Nutritional Wonders of Strawberries: A Comprehensive Guide